Steve: Notes
- This was part of Brisketathon 2014 Missy Brisket
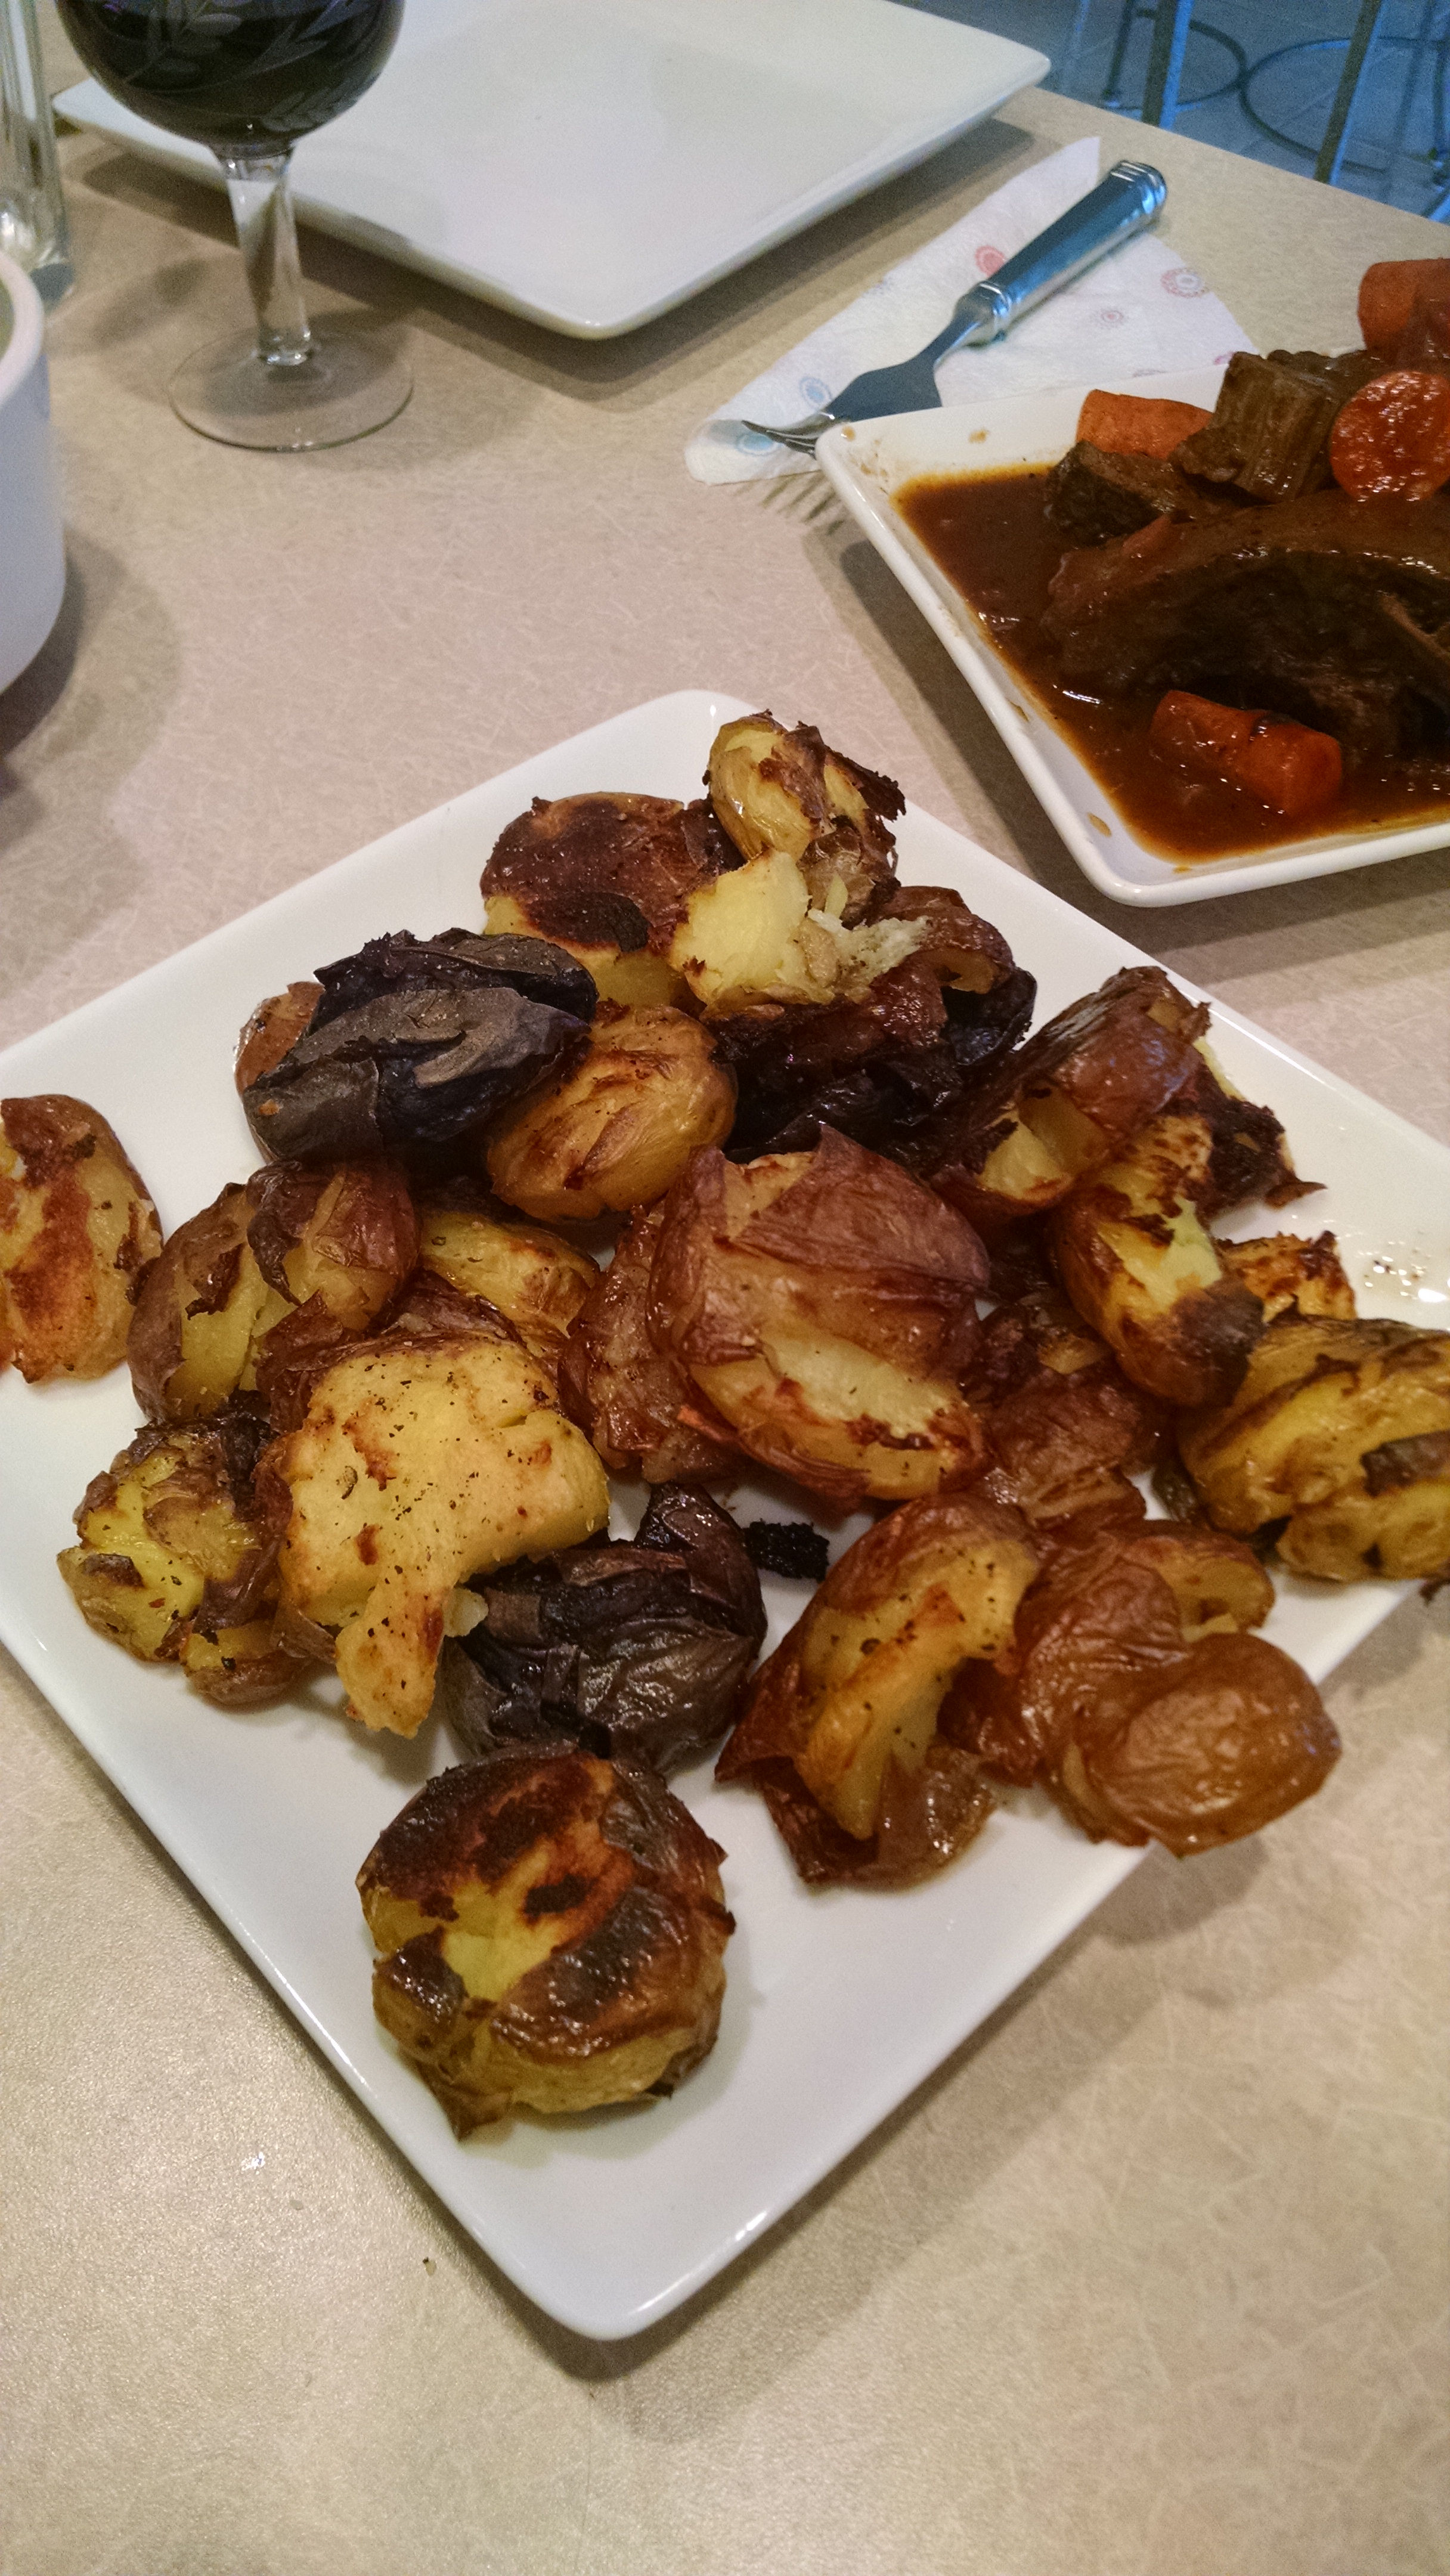
- I made crispy smashed new potatoes instead to the traditional cook in the gravy ones.
- The below words are not mine they are Elana whose picture shocked me I was expecting a bubbe.
- The other recipe is here
I don’t compliment myself too easily. In fact I have a complex about not being good enough. I am terrified that everything I do will suck and bring embarrassment to my family and the entire Jewish people at large. A neurotic Jew- that is so cliche, which only makes me feel more pathetic. I have been to therapy, I have seen healers, done yoga, tried alcoholism and acupuncture. If it wasn’t for a small dose of zoloft I wouldn’t even have the guts be writing this. But let me be clear: I don’t need the zoloft to tell you that I know how to make a friggin’ brisket.
My brisket is made with Jewish heart and Italian flavors. I cook it much in the same way a Northern Italian might braise a different cut of beef (in wine, tomatoes, and aromatics: meaning rosemary, thyme, bay leaf, etc.) to create a dish that tastes like Tuscany but feels like Shabbat.
While I am aware that there is such a thing as BBQ Texan Brisket, I do not acknowledge that as brisket. Until the state of Texas chooses to recognize reproductive rights, gay marriage and the replacement of oil with renewable energy, I will not recognize their brisket. Until then, no stars for the lone star.
Please let it be known that even though I keep throwing out the Jewish card on this one, my brisket is not only meant for the chosen people. Anyone who eats it feels chosen. You can line a hundred Jews up to tell me that my brisket is amazing but it won’t carry the weight of one Italian who gives me the same compliment. Of course, they call it spezzatino…my Italian friends still remember and still talk about my spezzatino. (FYI, spezzatino is usually made with cubed beef from a different cut.)
One day a few years ago, I made a brisket to combat a wave of depression that was trying to creep its way in, quite a lot of food and time when no one but misery is coming over to eat. If you bake it, they will come. Just as I was taking it out of the oven, in walked a group of my Italian friends (they called about 2 minutes beforehand to notify- very typical) in order to pick up something they needed. When they smelled and saw an 8 pound spezzatino in my kitchen they almost went through the roof. They called other friends, had them bring wine and before I knew it a dinner party was well on its way with a meal that no one has ever forgotten. And as for that wave of depression, postponed.
Brisket is actually incredibly easy to make and pretty hard to mess up. You can add a little too much of this or a little too little of that but as long as you have a few basics (which I will of course share with you) all the flavors will meld perfectly with time in the oven to bring you a delicious, juicy brisket. The problem with many briskets, however, is that they are either too sweet, too dry and/or too fatty. Sweet briskets can be tasty but I don’t want dessert for dinner and I don’t want my main course to further contribute to my hangover. (Note: It’s the sugars that makes you feel icky in the morning and quite frankly I would rather have wine and dessert than beef that topples over the glycemic index.) Furthermore, briskets don’t need to be dry in order not to be fatty. The trick to making a juicy, tender brisket is four-fold:
- Make sure you have enough liquid in the pot. (wine, broth, etc)
- Make sure you have a good pot. An important factor in making an amazing, fool-proof brisket is to cook it in the right pot. I use a Le Creuset enameled cast-iron dutch oven (buy here). Everything I make in that thing turns out delicious. When my sister got married, she asked me what to register for and I told her to get as many Le Creusets as she could. She’s a novice but an enthusiastic cook. Her husband called me to thank me for turning Danielle into a chef. It wasn’t me. It’s the pot. There are other top brands and none are inexpensive, but they will last you a lifetime and really make all the difference in your cooking.
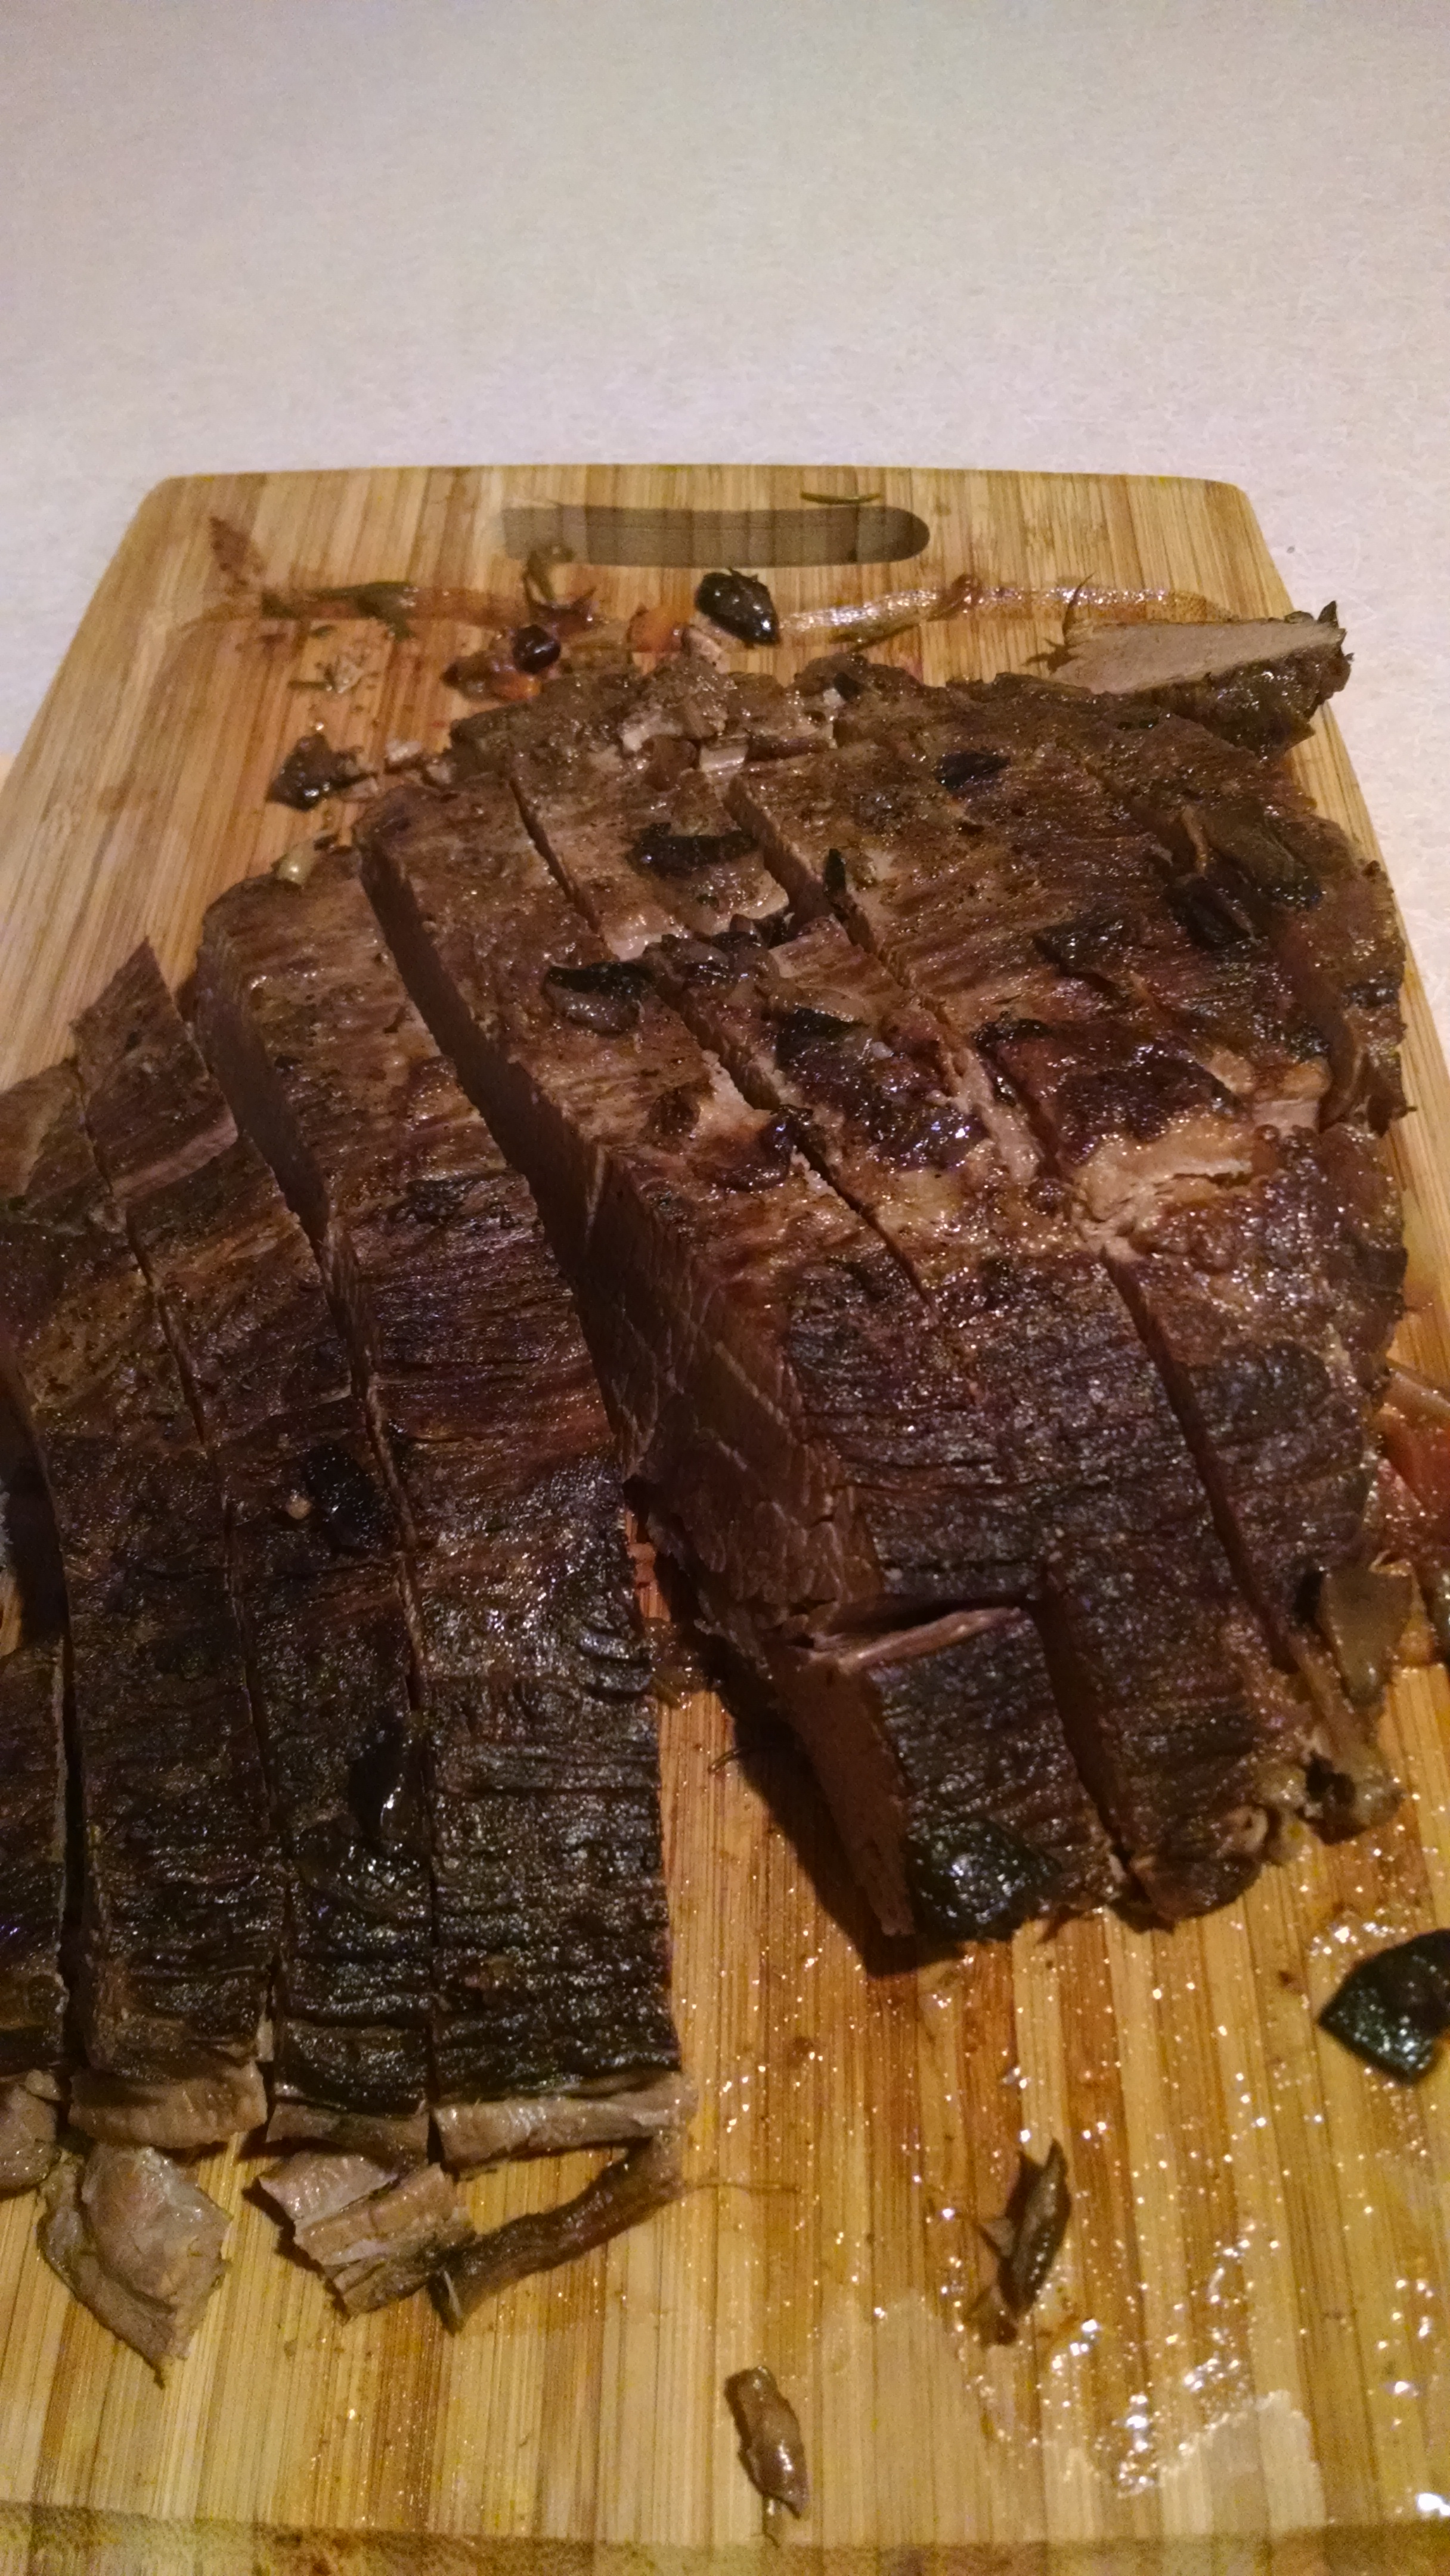
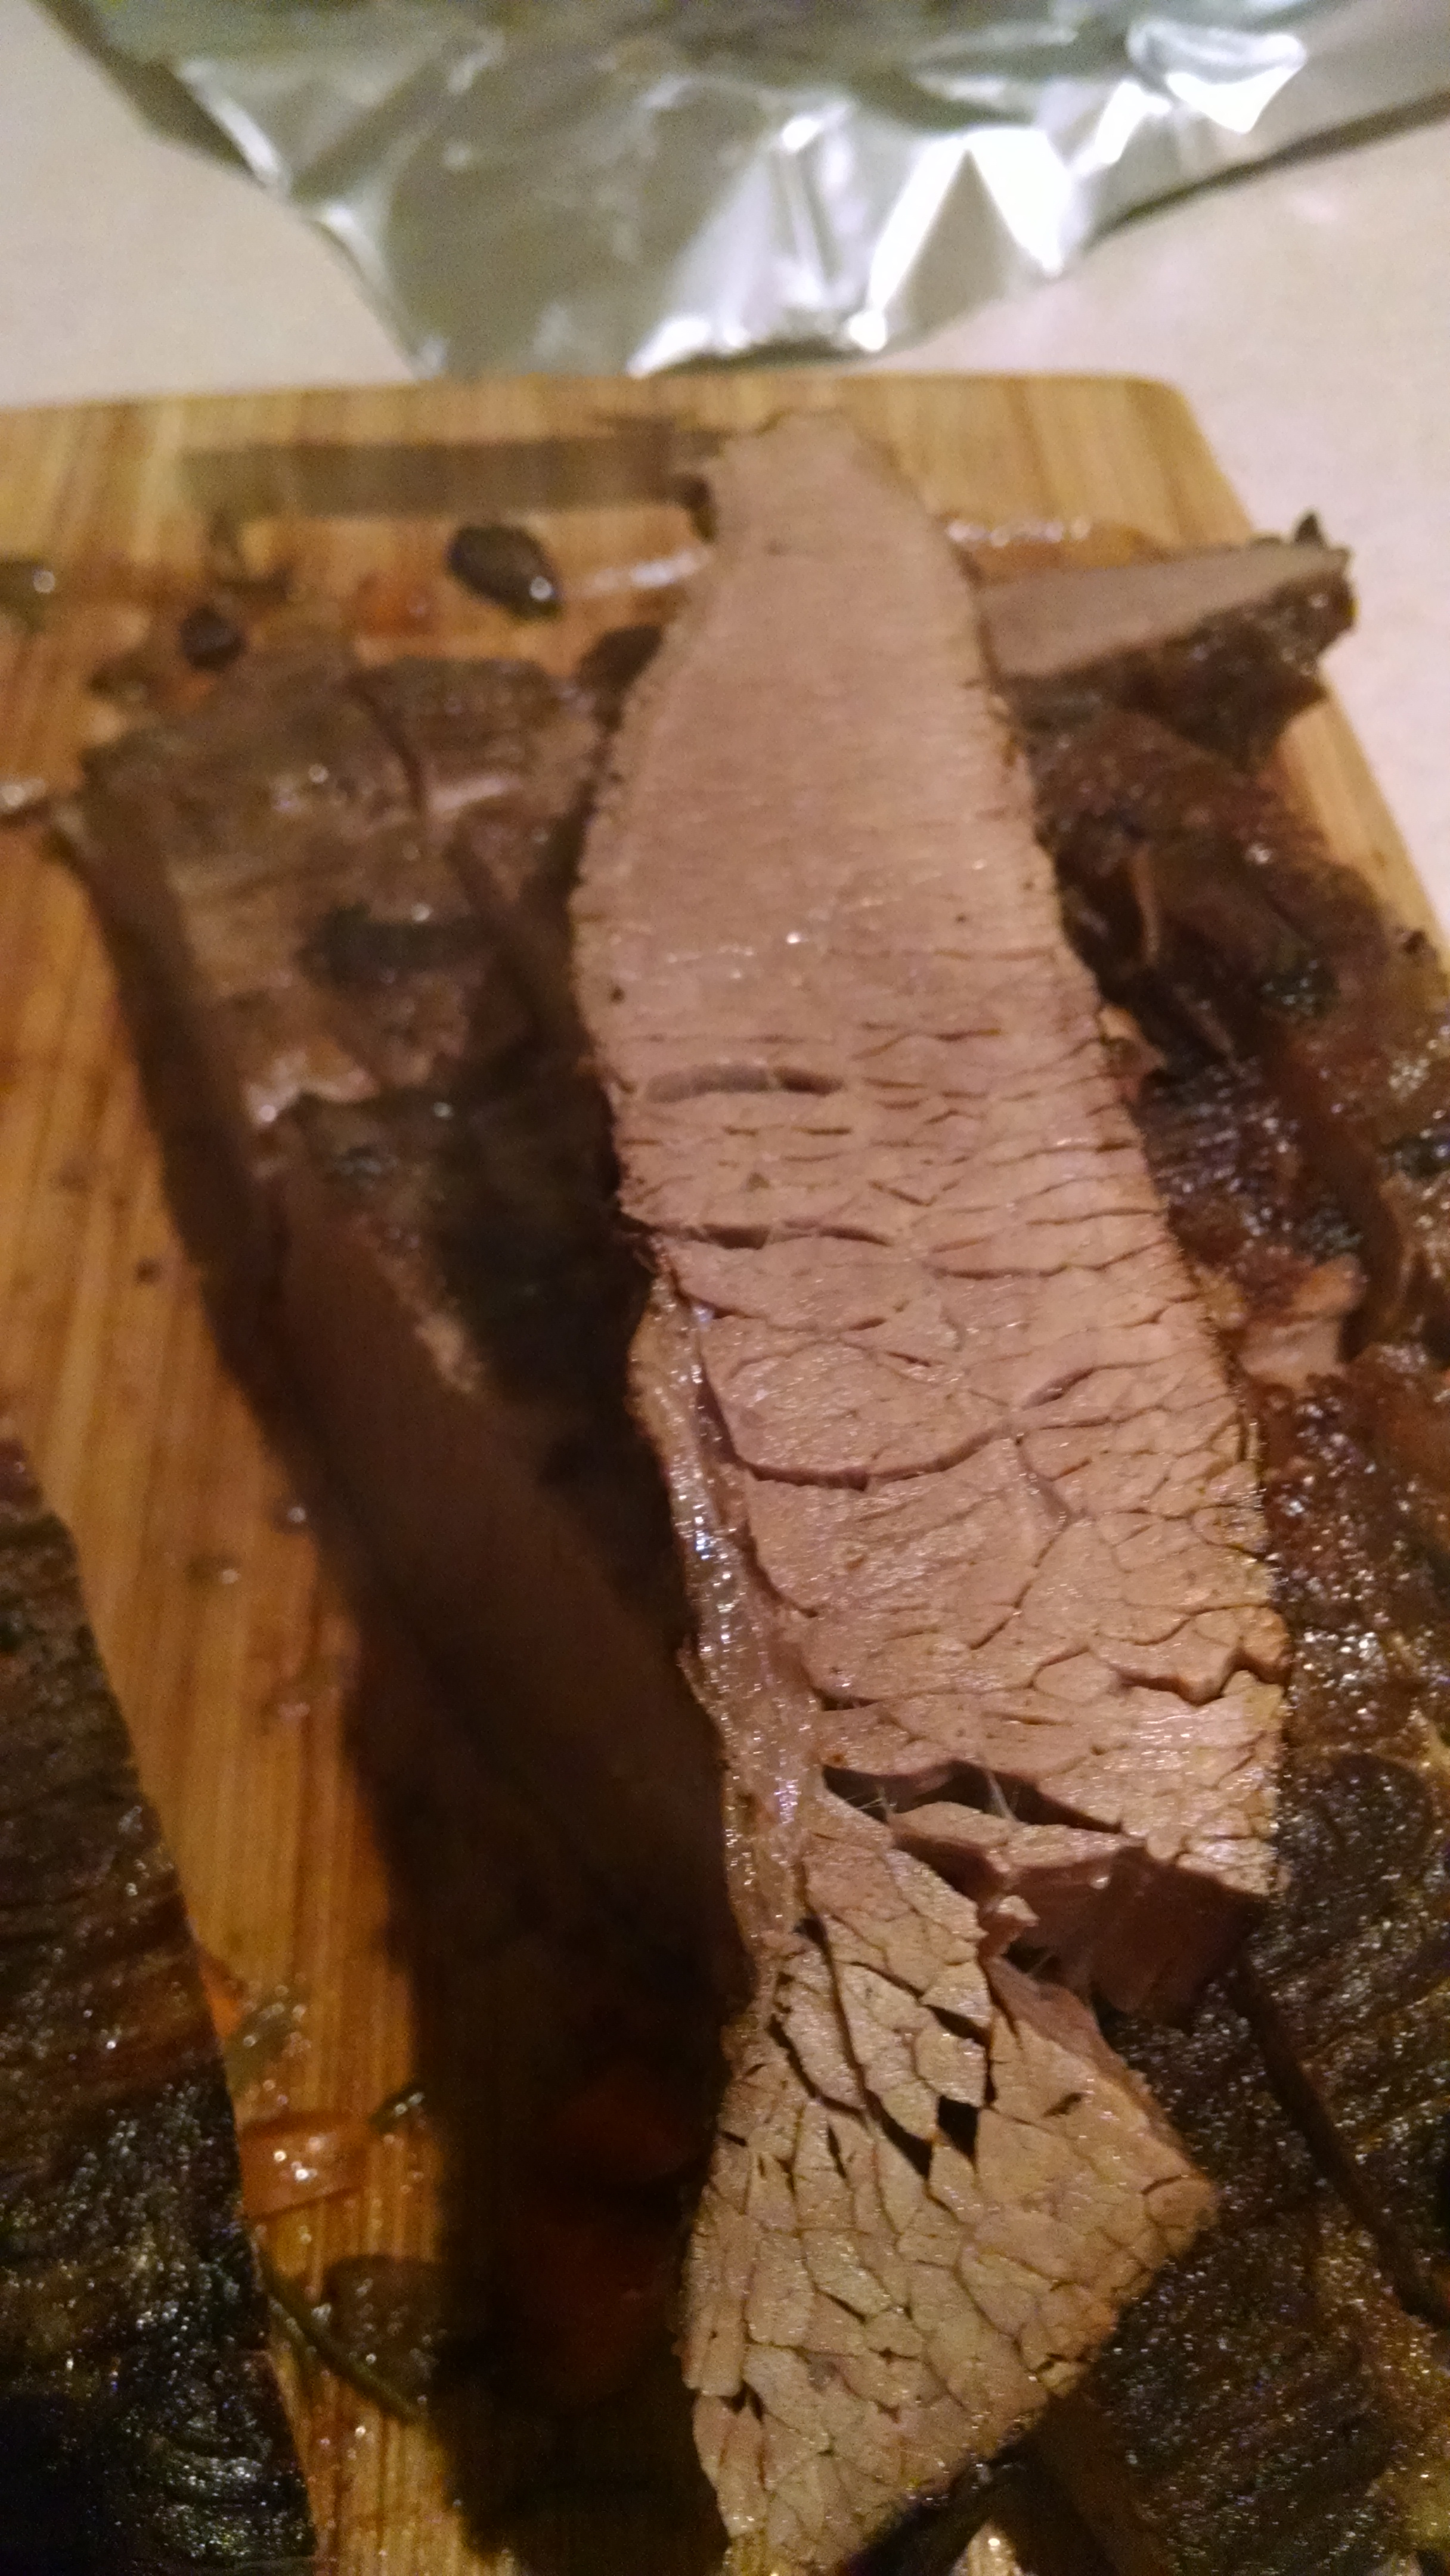
- Cook the meat with the fat still on it and with the fat side up so that the fat will insulate the beef and keep in the juices. Once the brisket is done, take it out of its juices, let it cool, and scrape off the fat before slicing it and returning it to its sauce.
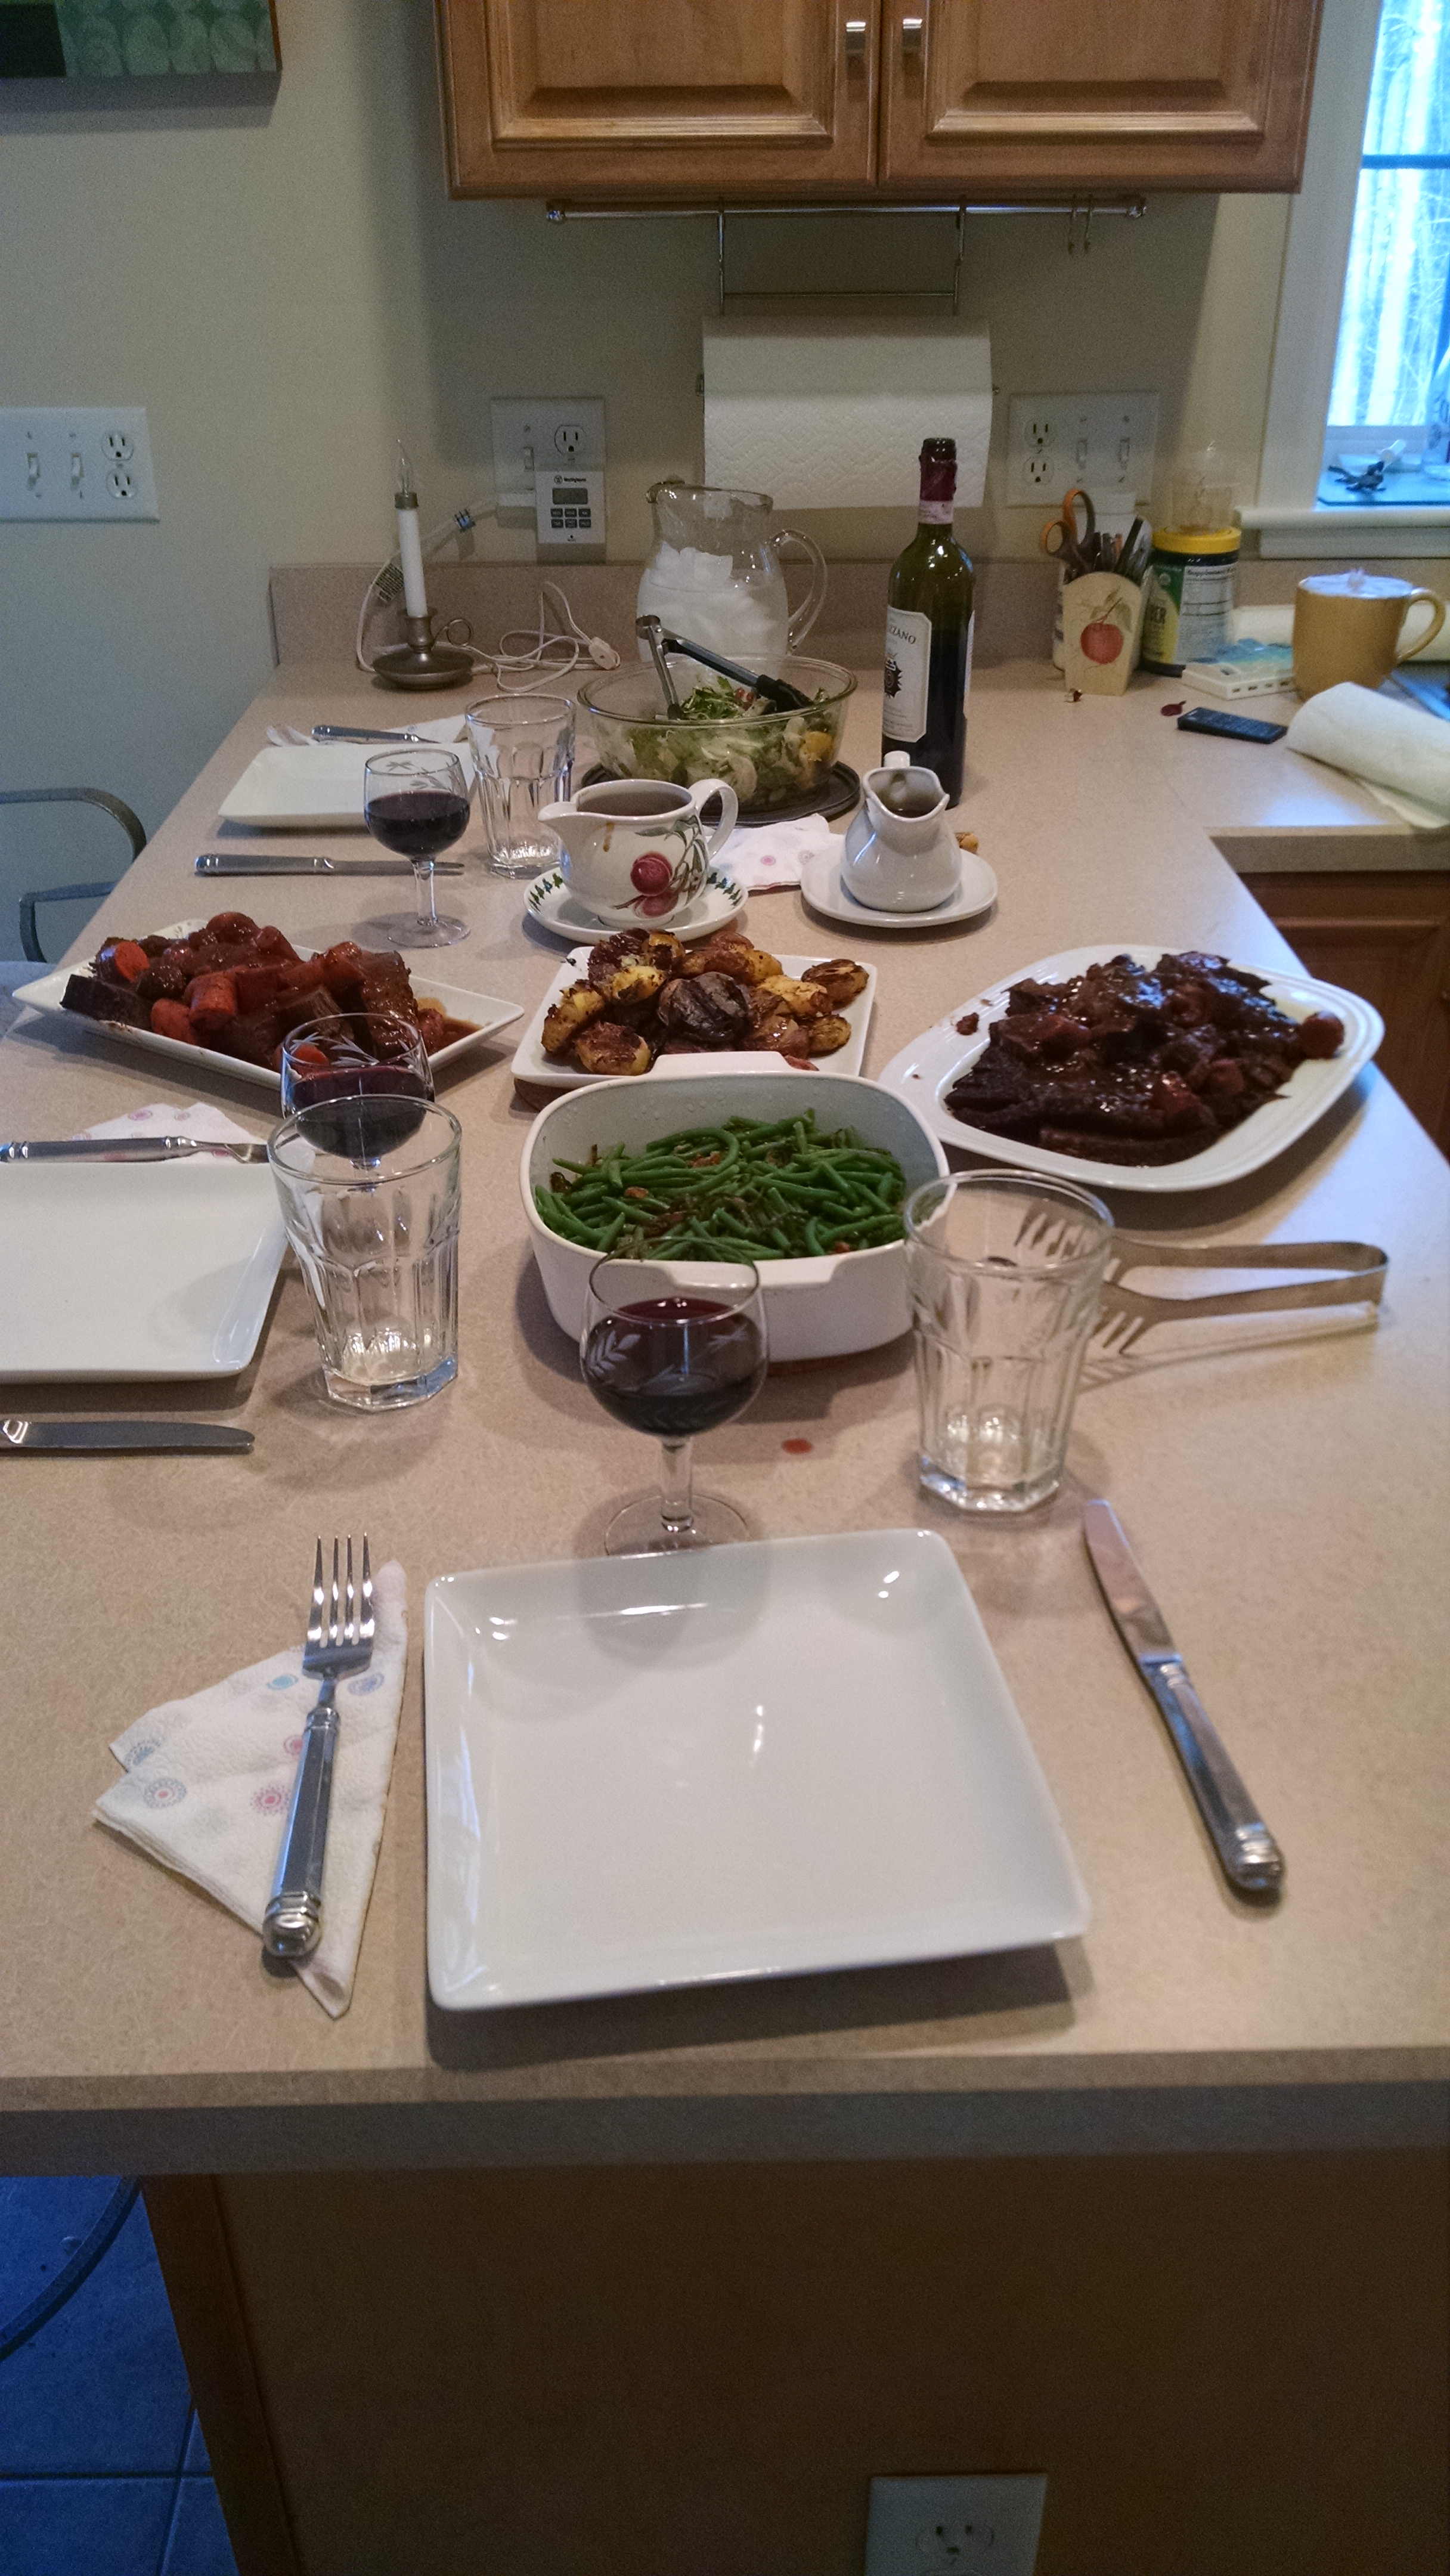
- Time. Brisket is a slow-cooked, braised meat. As long as the liquid is plentiful, the longer it cooks the better. (Note: The brisket cut of meat is historically poor man’s food; it cost less than tender cuts of meat like filet mignon, however if cooked long enough will be just as tender.) It needs lots and lots of time at a low temperature to break down the tension in the meat so that it will fall apart with no knife needed. I have even set my oven to 200°F, stuck the thing in at night and woke up in the morning to brisket breakfast. Time is so of essence that you will find your brisket to be even better the next day. (Always make it ahead of time for company and reheat.)Ingredients: for 8-10 hungry people plus leftovers
Ingredients
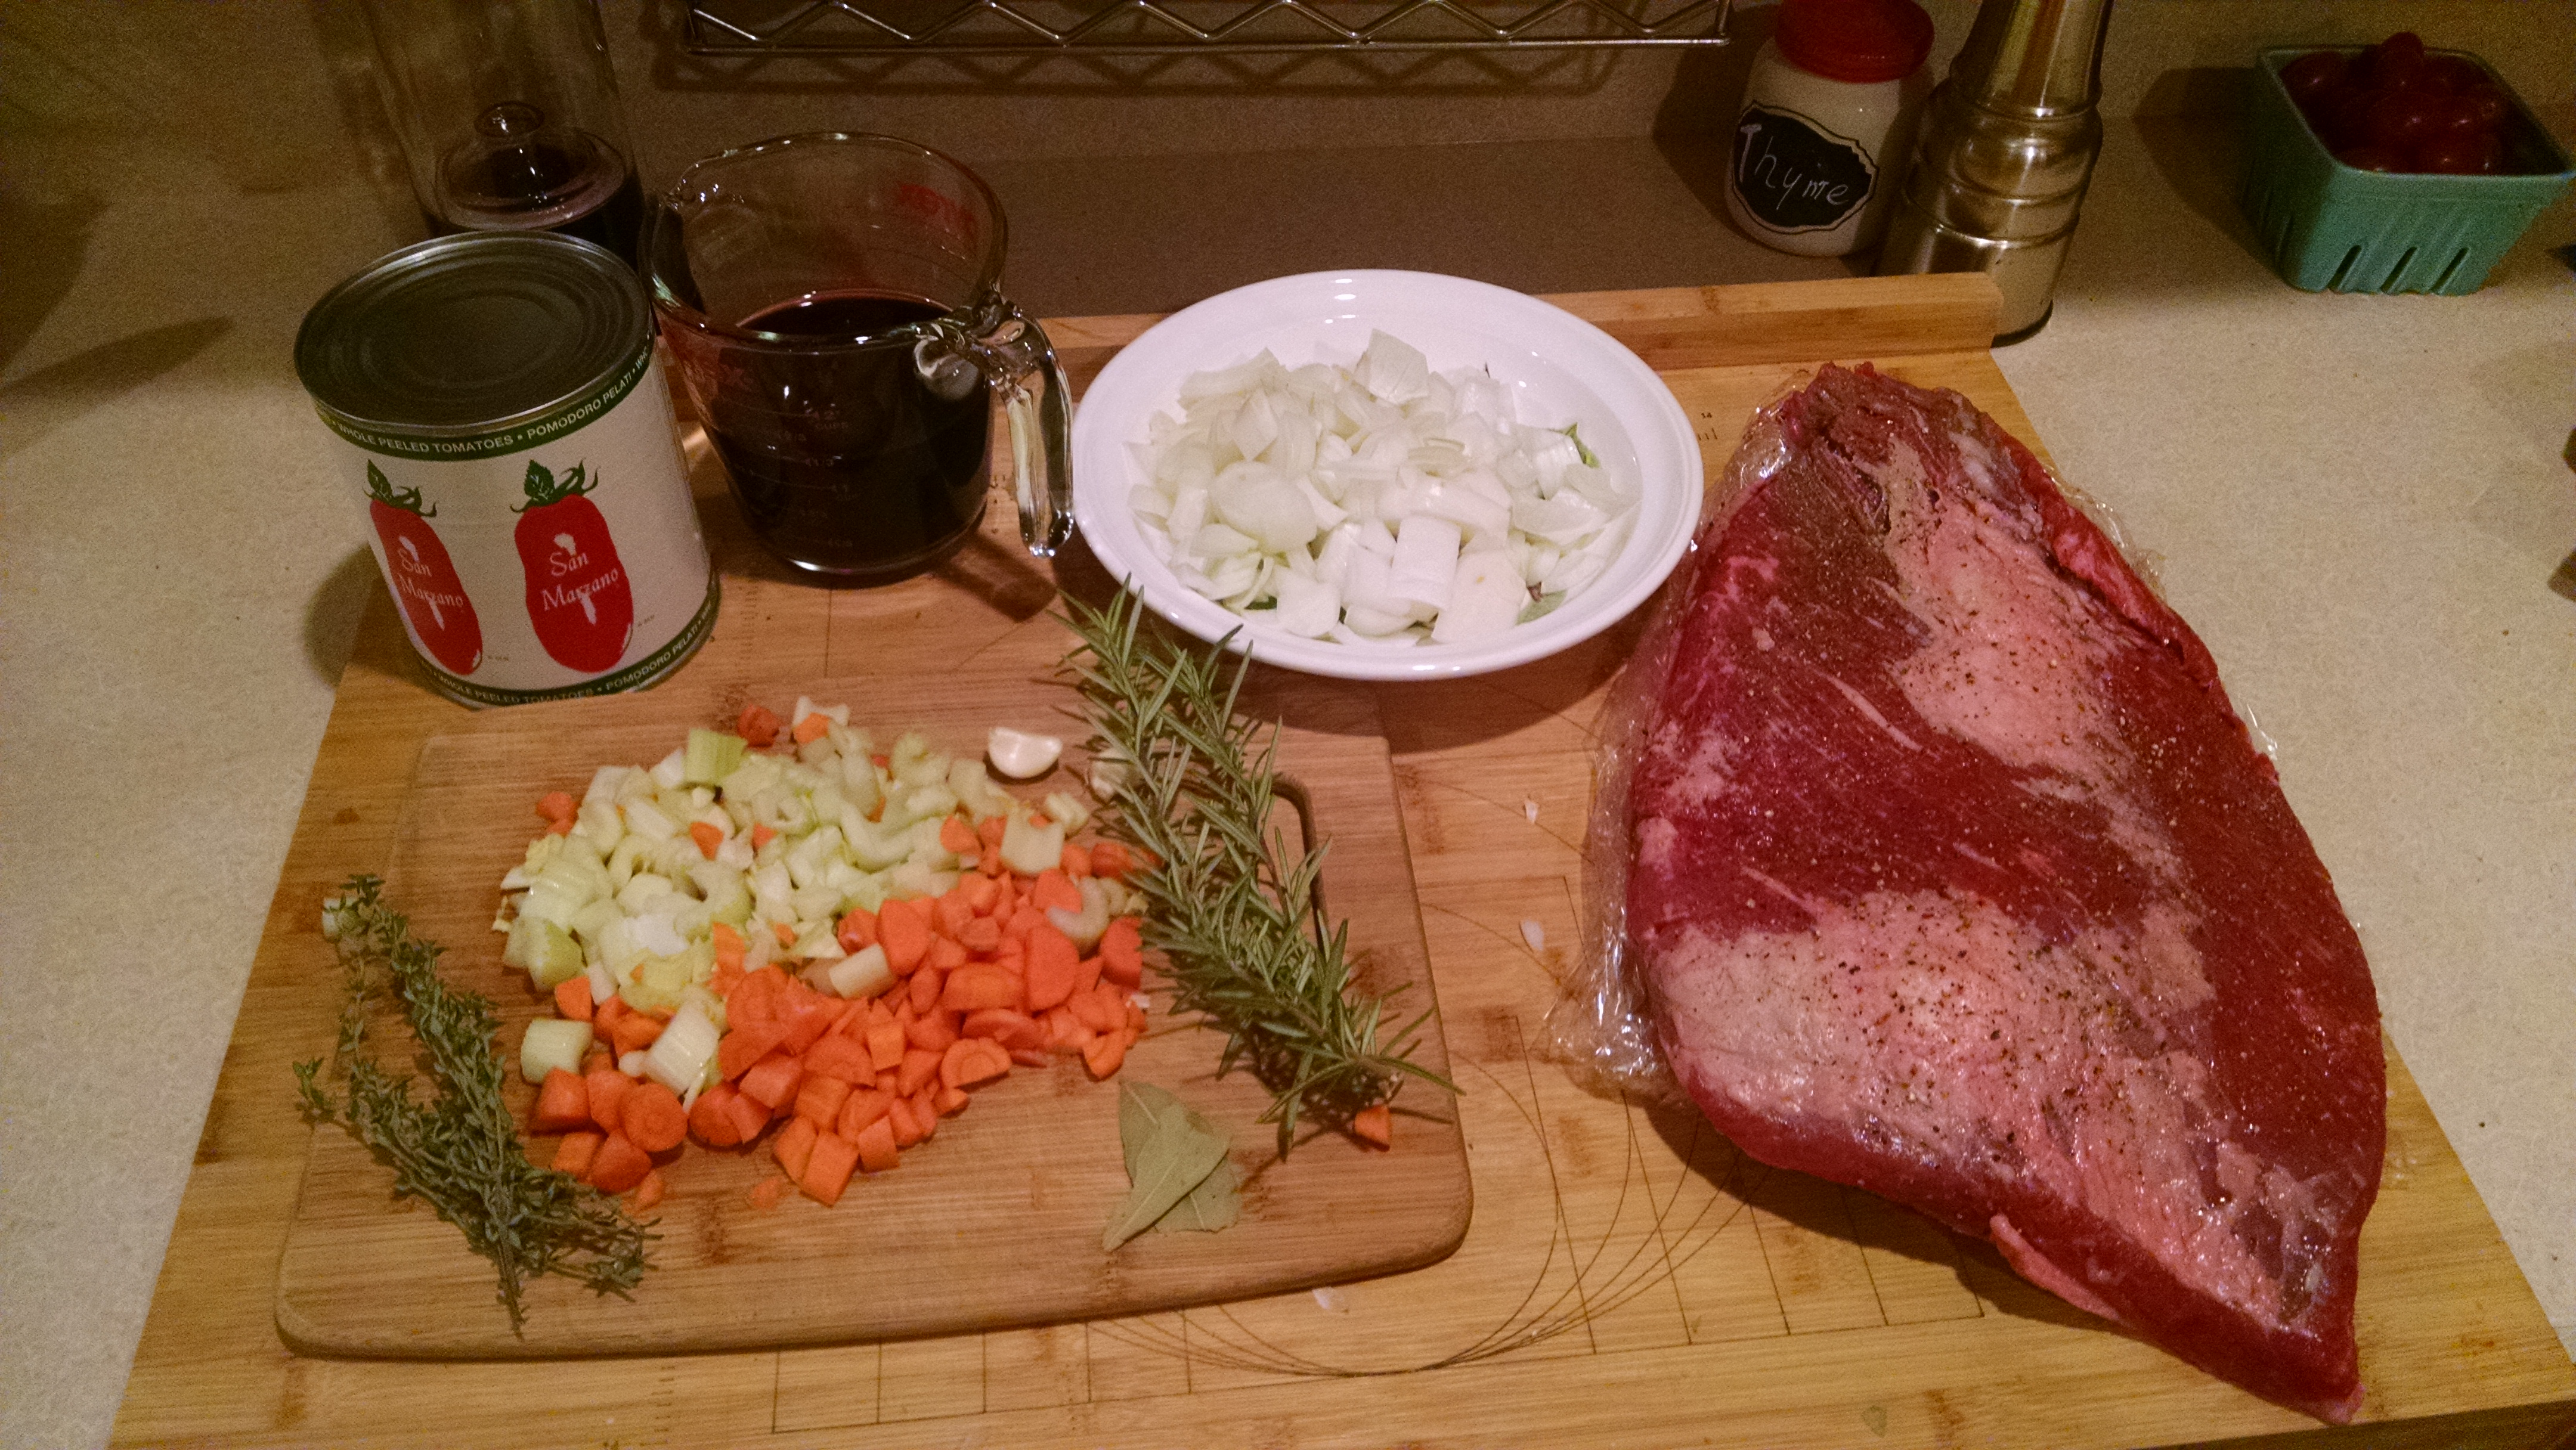
- 1 6-8 pound brisket, kosher and/or antibiotic, hormone free
- 2 onions, coarsely chopped
- 2-3 stalks celery with leaves, coarsely chopped
- 2-3 carrots, coarsely chopped
- 2-3 cloves peeled garlic, whole
- 2 bay leaves
- 2-3 branches of rosemary
- 2-3 stems of fresh thyme (if you have)
- 5-6 fresh basil leaves (if you have)
- 1/2 bottle wine (an oaked chardonnay or medium bodied red like chianti or whatever leftover wine you have in the kitchen)
- 1 28 oz. can San Marzano whole peeled tomatoes
- Homemade or store bought chicken broth (if needed for more liquid, or just more wine- you want brisket to be just about covered with liquid)
- salt- about 2 very generous teaspoons
- extra virgin olive oil
- 5 or 6 russet potatoes, quarteredThe day or two before: Steve Note: I made crispy smashed new potatoes
- Preheat oven to 325°F.
- Heat a dutch oven over a medium flame. When hot add olive oil.
- Put the brisket in on one side to brown a few minutes and then turn to brown on the other side. (One side will have a lot of fat and you are trying to brown the fat-less parts if any.)
- Remove brisket and set aside.
- If there is too much melted fat for your taste, remove a little before continuing.
- Put in onions and cook until translucent.
- Put the brisket back in fat side up.
- Top with the carrots, celery, garlic, rosemary, bay leaves, thyme, and basil.
- The next step can get messy but its fun. If you prefer, use a knife or a neater system. Take out the tomatoes, one by one, and crush using your hand. Watch out for spurting juice. Pour in all juices from can.
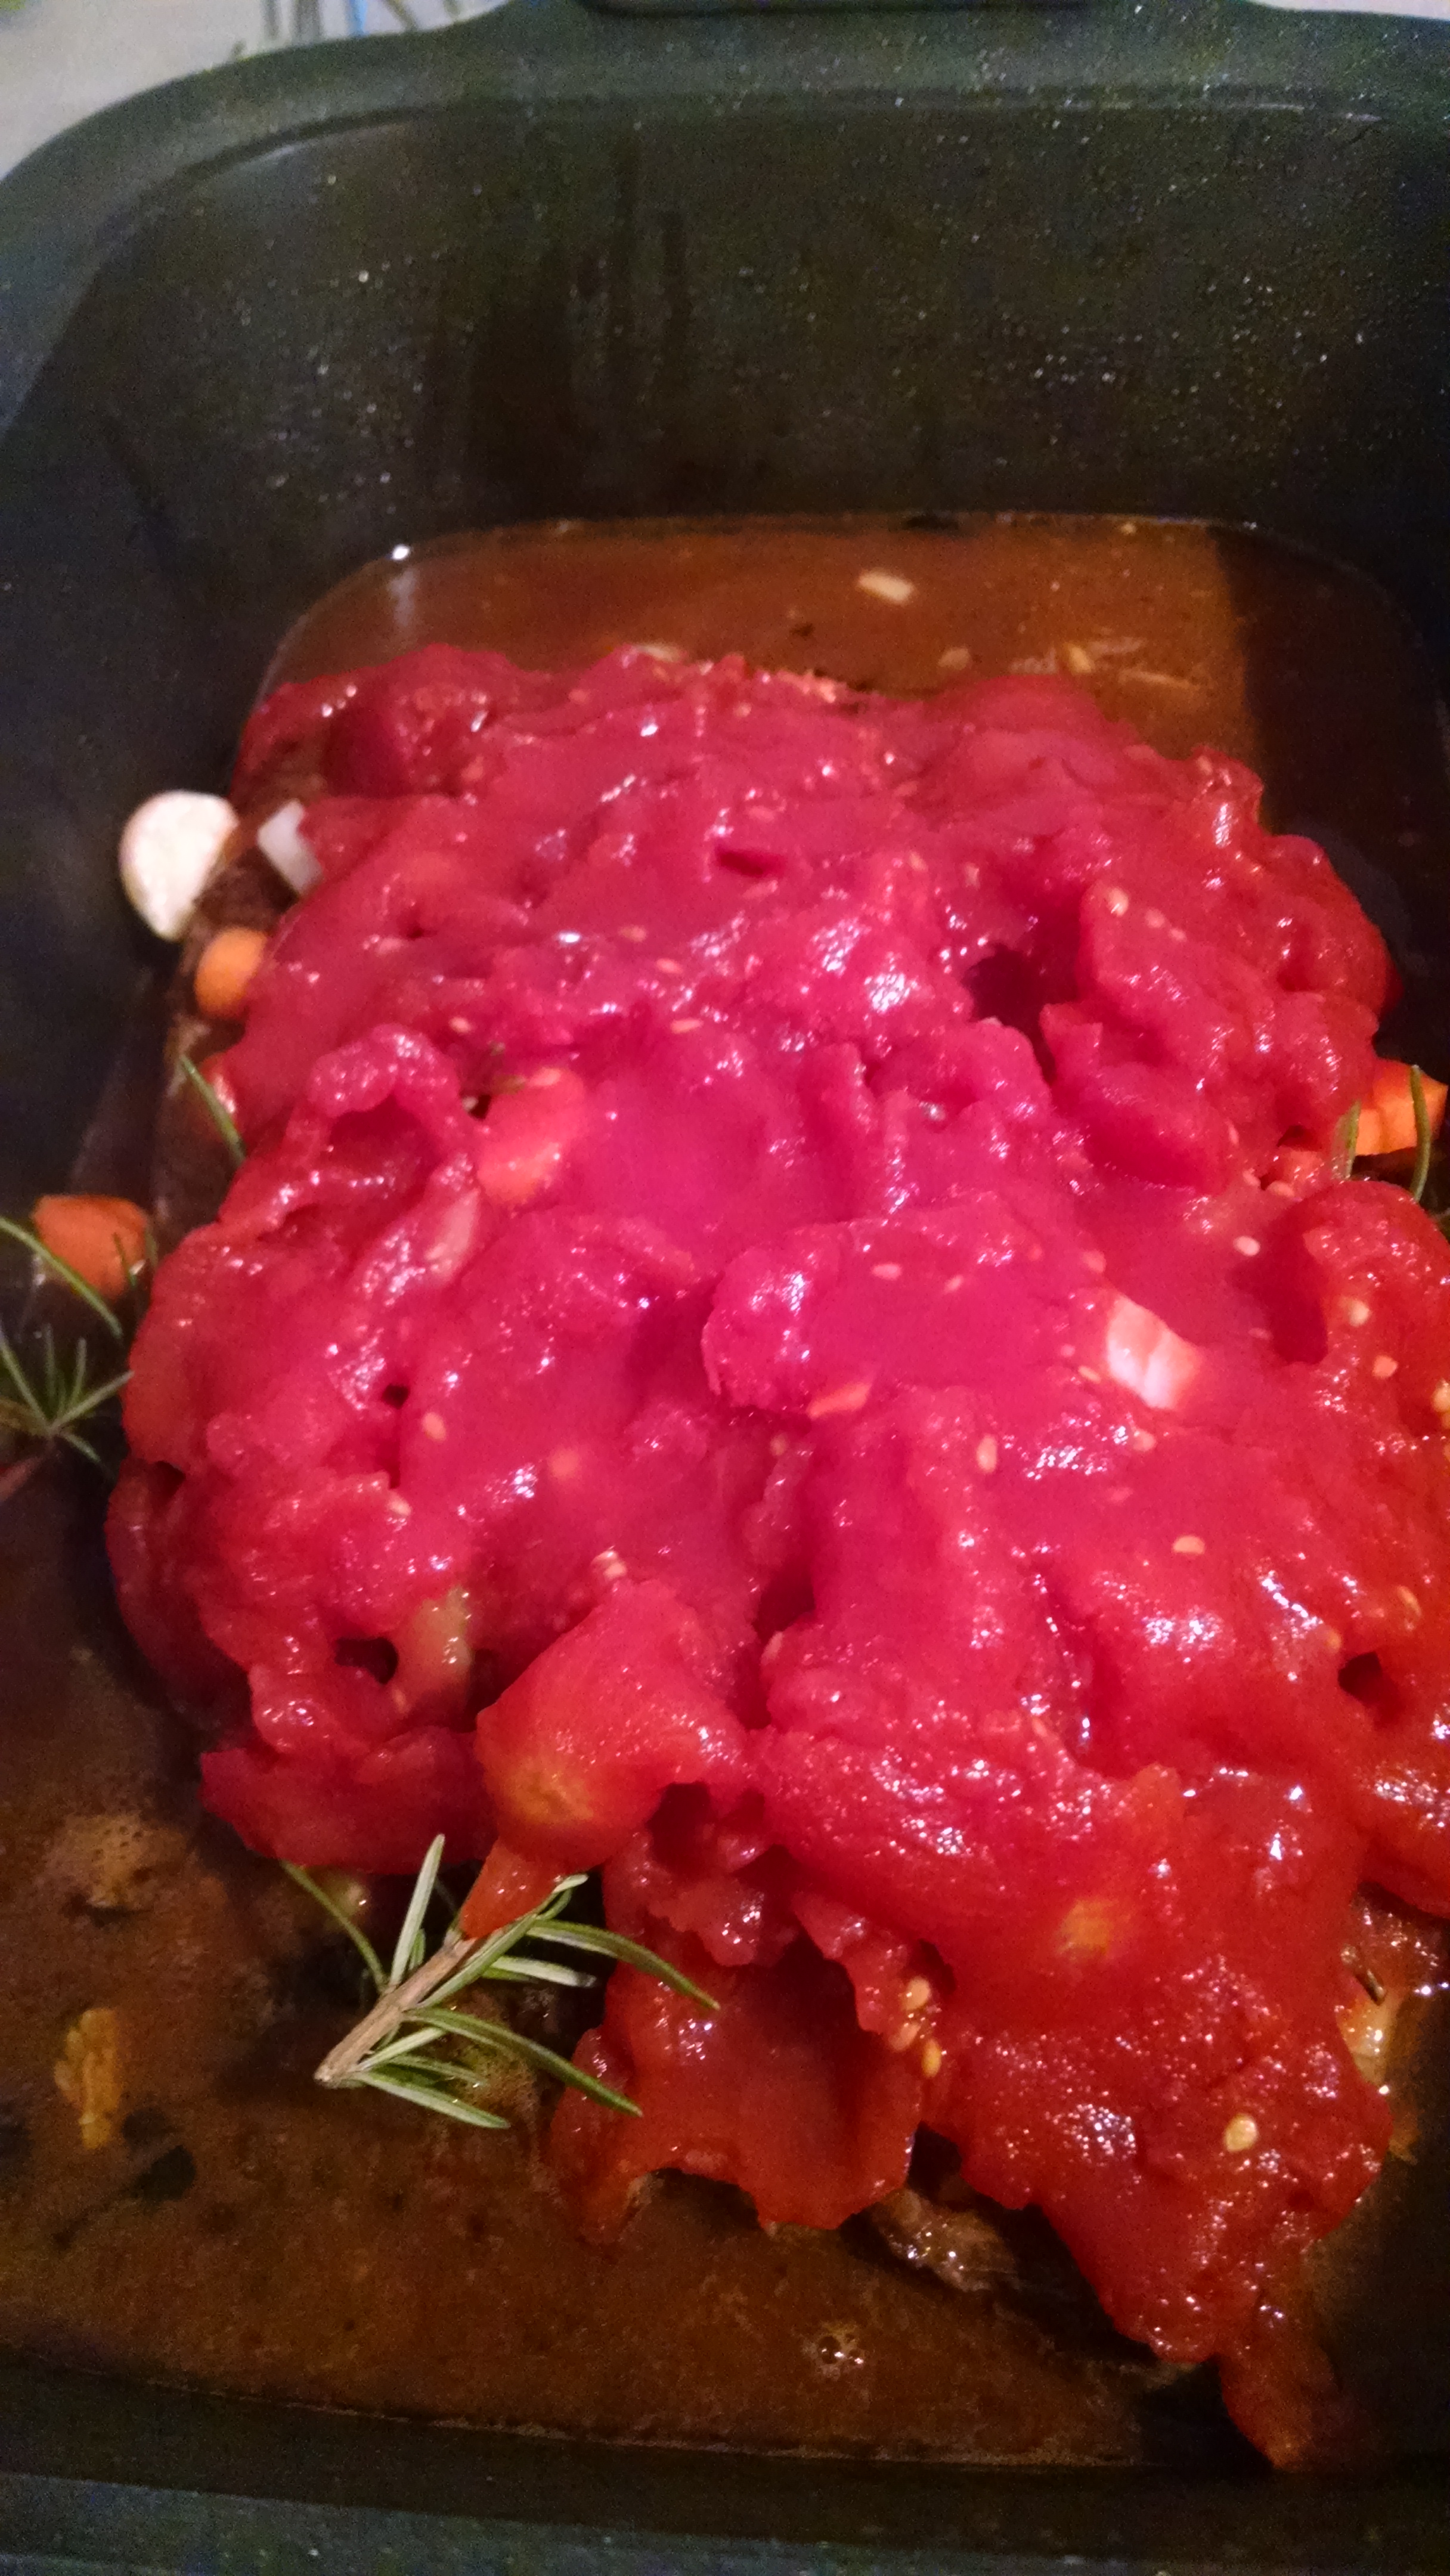
- Add wine (and broth if you feel necessary to mostly cover meat.)
- Sprinkle generously with salt.
- Cover well and stick in oven for 4-5 hours or longer at an even lower temperature.
- Go take a walk and a nap.
- When your brisket cuts itself with a fork, it is done.
- Take out of oven and let sit to cool a bit.
- Take brisket out of juices and let cool completely. When cool, refrigerate it covered.
- In the meantime put the potatoes in the juice of the brisket in dutch oven and put on stove, covered, over medium flame, until potatoes are soft and cooked.
- Refrigerate until ready to use.
- Save all brisket juices.Next Day:
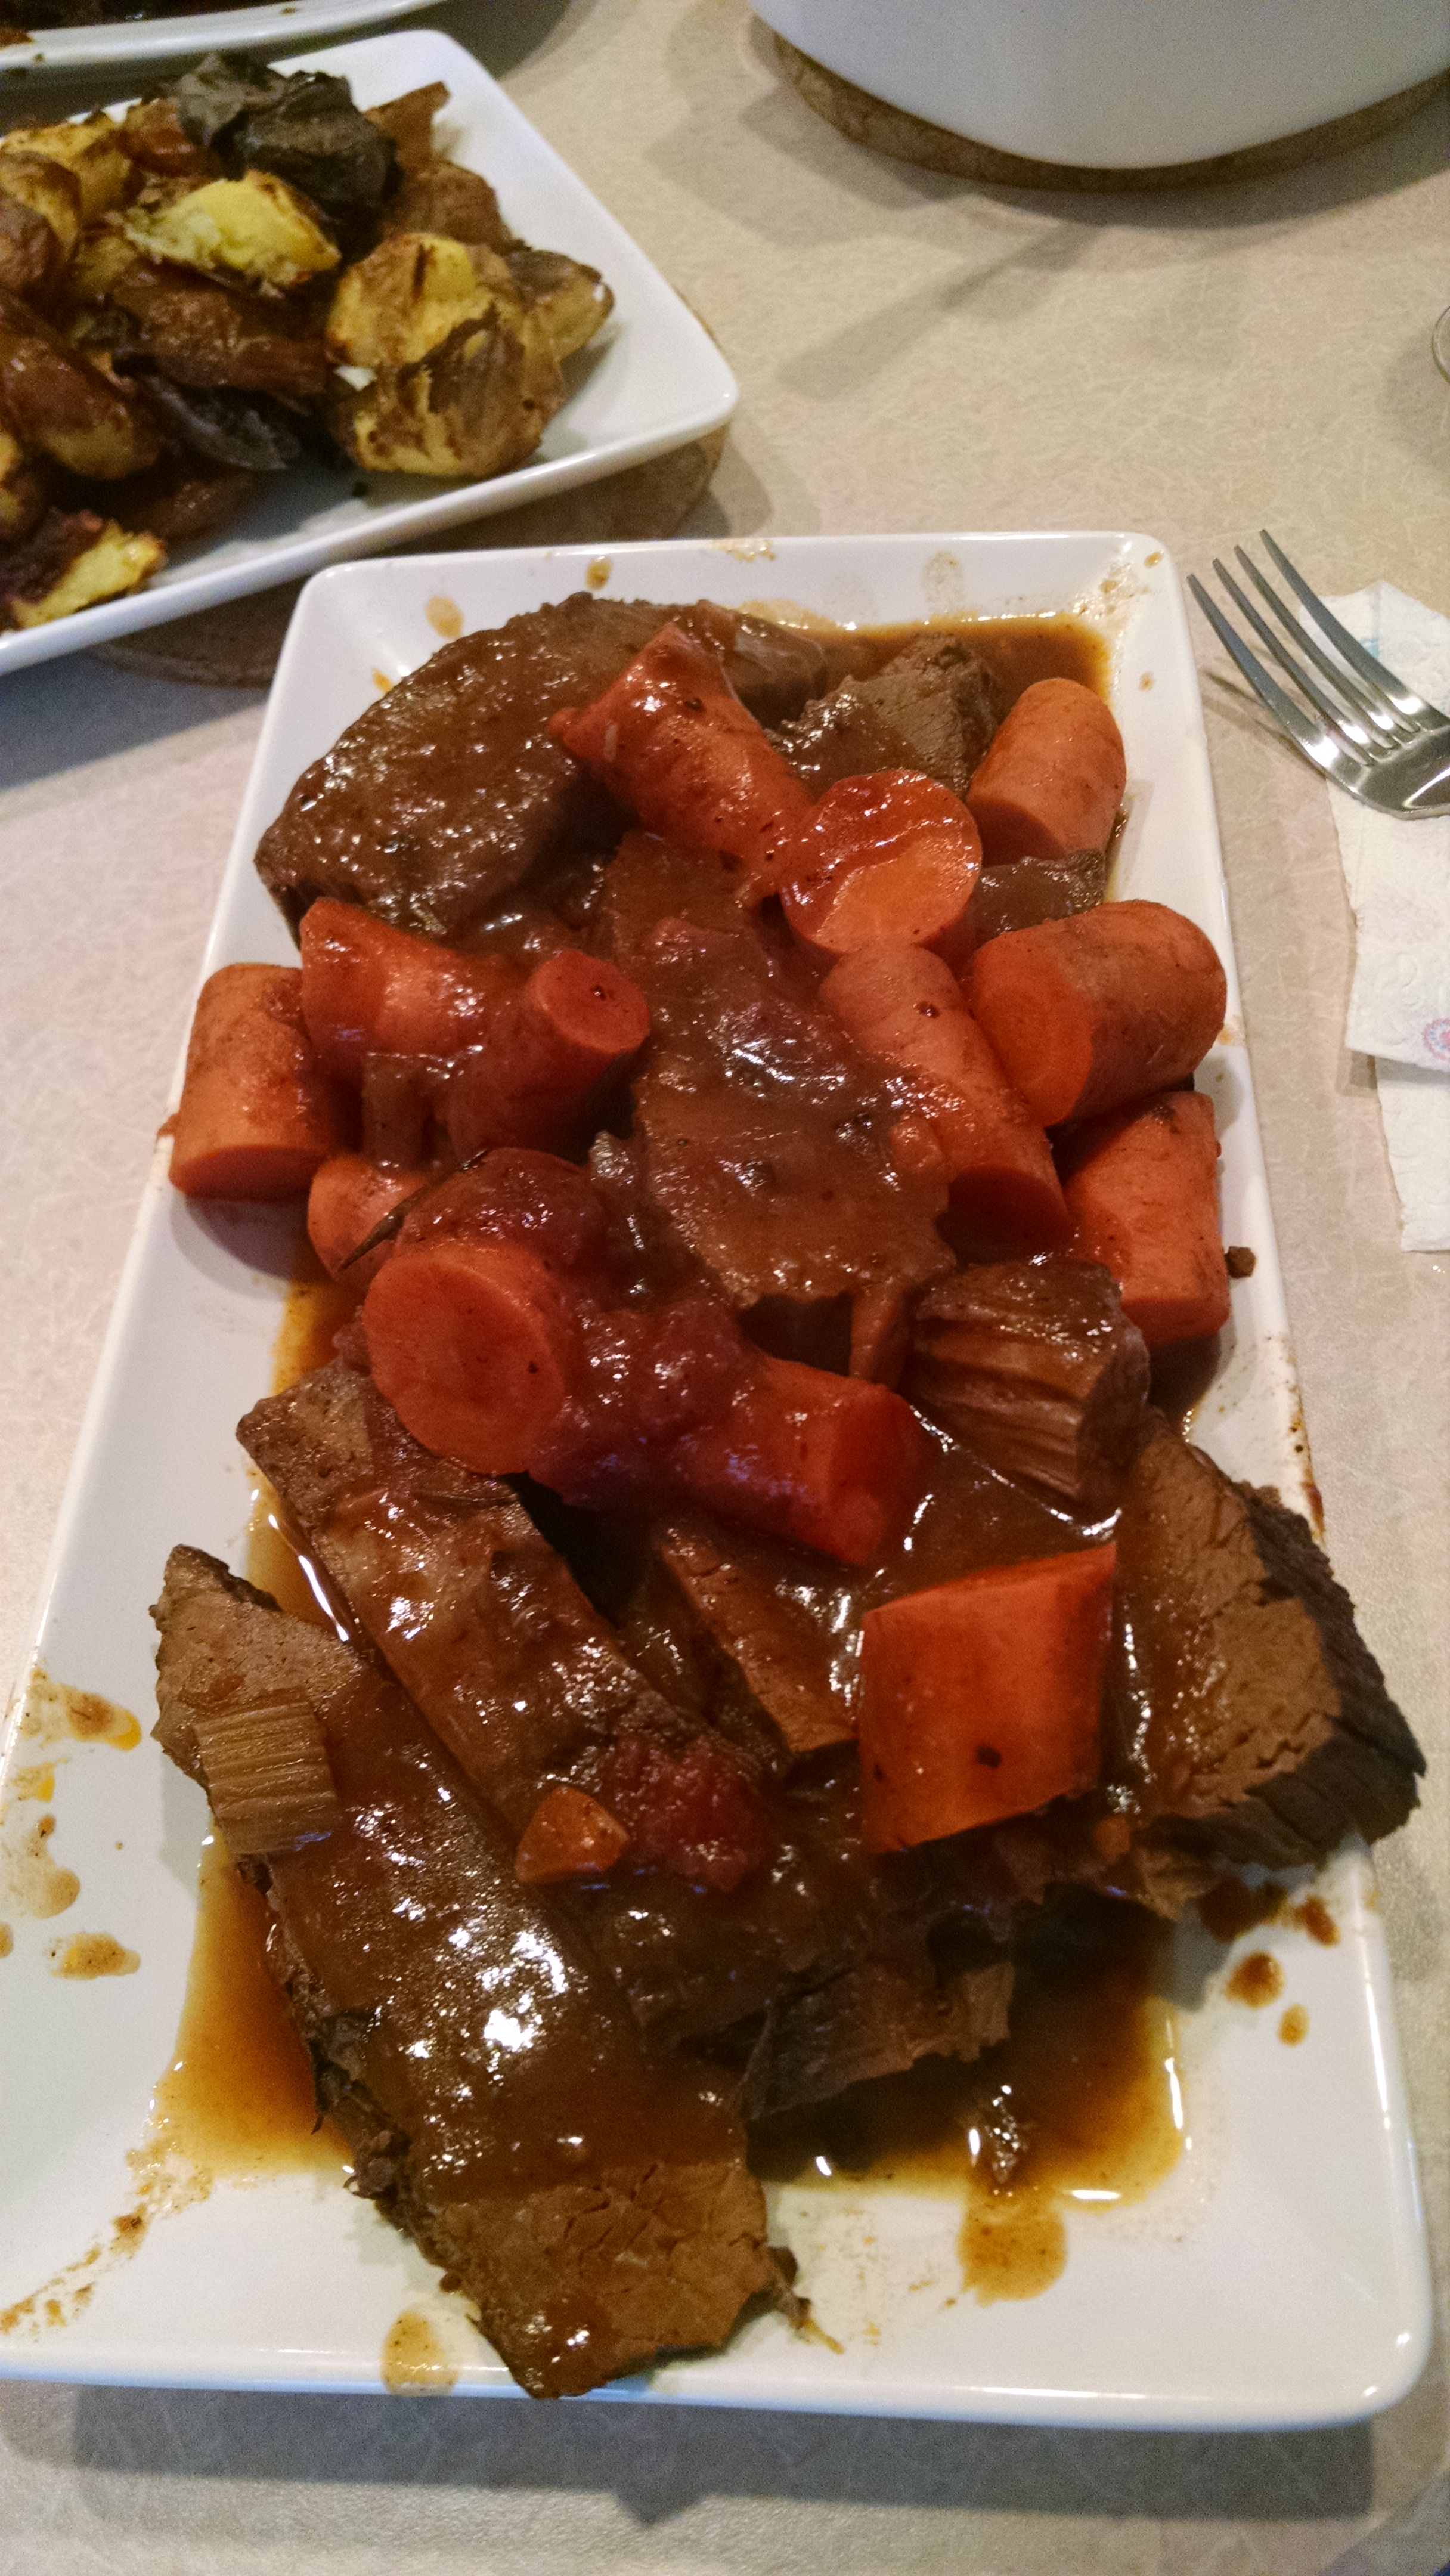
- Once cold, use a knife to slice off all the fat from the brisket. Then slice the brisket against the grain into ¼ inch slices. Place “in order” in a casserole dish fit for the oven. Add potatoes if there is room or put potatoes in separate casserole dish.
- If you think the brisket juices should be thicker, boil them down a bit on the stove. Then when cool, you can cover the meat and potatoes with the sauce.
- Refrigerate until ready to use.Day of:
- When you are ready to serve, you can heat up the brisket in one of two ways.
- Place potatoes and meat in casserole dishes and cover VERY well in heavy duty aluminum foil or double wrapped in regular foil, and bake on 350 for almost an hour until brisket and potatoes are well heated through. Place on serving platter, top with remaining juice and serve.
- Keep everything in the dutch oven you baked it in and heat on stove on medium low or in the oven at 350 for one hour.