Joe’s Blueberry Pie

Joe’s Blueberry Pie

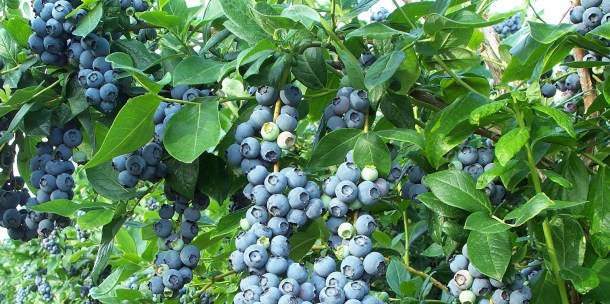
I remember as a kid we used to go to Auntie D’s house to make pies. The adults, under her direction, would all be busy making pie after pie Apple, Blueberry, mixed berry…….. she was and still is in everyone’s mind the measuring stick when it came to pies. Across the street there was a path in the woods, long since taken over by development, to the cranberry bogs and along the way was a gold mine of blueberry bushes. Big fat blueberries all there for the picking. Now this was the important job of the kids fill the buckets and eating our fill. The thought of one of her pies after dinner kept us under control and the buckets returned full. A few years back my wife and I went blueberry picking in Beebe Woods and quickly retreated because of the immediate and massive horse fly attack we fell to. That sure took the romanticism out of picking, there they were bushes, branches plump with hundreds of blueberries under the guard of a flying army. We did find the nearest convenient store and sprayed ourselves but it was just not the same. Anyway I babble…..Joe and I were talking about me buying 4 cases of blueberries from Wholefoods when they had them organic $1.99 a pint. I froze some, made some blueberry syrup, jam, Lyn made muffins and probably bread but mostly I would throw a handful in my morning oatmeal taking advantage of the memory boosting powers of blueberries. They are gone except for a bottle or two of the syrup and I am staring to have trouble remembering why I started writing this  only kidding….so hear ya go  Joe’s Blueberry pie.

Cooks Illustrated Published July 1, 1995.  

Makes one 9-inch pie, serving 6 to 8.

Why this recipe works:

For many years we have tried using flour and cornstarch to thicken fresh fruit pies, but the results have been uniformly poor. After testing cornstarch, flour, tapioca, and arrowroot, we found that the samples of fruit thickened with the root starches, arrowroot and tapioca, were clear and bright in appearance and had the clearest fruit flavor. Of the two, tapioca showed a bit more thickening power and was therefore our favorite. So we developed a fruit pie recipe employing this favorite.

The amount of sugar and tapioca you use is relative, depending on the fruit’s quality and your taste. If you prefer a less sweet pie or if the fruit is especially sweet, use the lower sugar amount. If you like your pie juices fairly thick, or if the fruit is really juicy, then opt for the higher amount of tapioca. If you are using frozen fruit, measure it frozen, but let it thaw before filling the pie. If not, you run the risk of partially cooked fruit and undissolved tapioca.
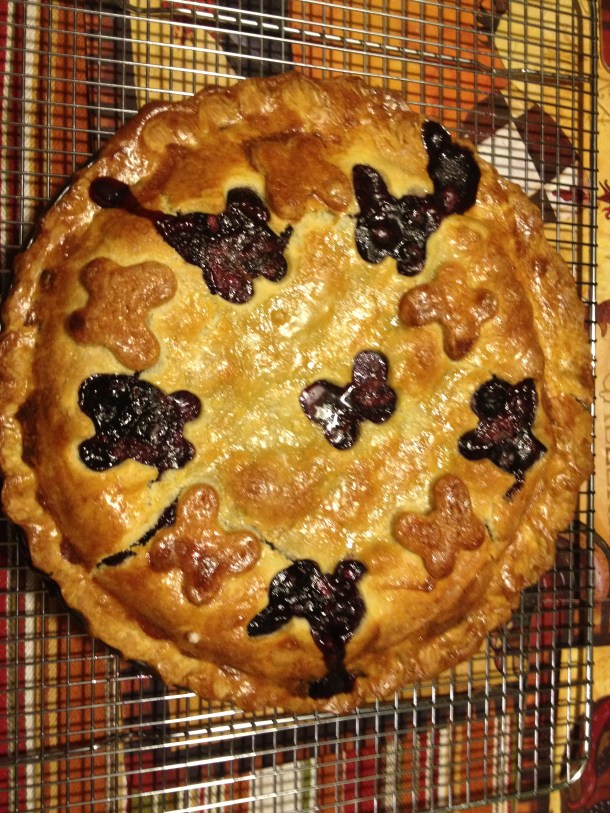
Joe's Blueberry Pie

Joe’s Blueberry Pie

Ingredients

  • Pie Dough
  • 2 1/4cups unbleached all-purpose flour , plus extra for dusting
  • 1teaspoon table salt
  • 2tablespoons granulated sugar
  • 11tablespoons unsalted butter , cut into 1/4-inch cubes
  • 7tablespoons vegetable shortening , chilled
  • 1/3cup water , chilled with ice, increasing up to 3/8 cup, if needed
  • Blueberry Filling
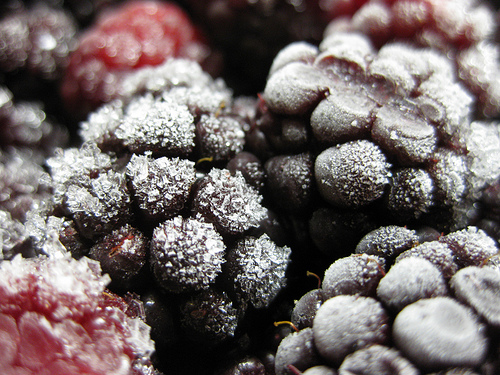
  • 3pints fresh blueberries (6 cups), rinsed and picked over
  • 3/4cup granulated sugar
  • 1 small lemon , zested to yield 1 teaspoon zest and juiced to yield 2 teaspoons juice
  • 1/4teaspoon ground allspice
  • pinch ground nutmeg
  • 3–4tablespoons quick-cooking tapioca
  • 2tablespoons unsalted butter , cut into small pieces

Instructions

1. Mix flour, salt, and sugar in food processor fitted with steel blade. Scatter butter pieces over flour mixture, tossing to coat butter with a little flour. Cut butter into flour with five 1-second pulses. Add shortening and continue to cut it in until flour is pale yellow and resembles coarse cornmeal with butter bits no larger than small peas, about four more 1-second pulses. Turn mixture into medium bowl.

2. Sprinkle all but 1 tablespoon of the ice water over mixture. With blade of rubber spatula, use folding motion to mix. Press down on dough with broad side of spatula until dough sticks together, adding up to 1 tablespoon of remaining ice water if dough does not come together. Divide dough into two balls, one slightly larger than the other. Flatten each into 4-inch-wide disk. Dust lightly with flour, wrap separately in plastic, and refrigerate at least 30 minutes.

3. Remove dough from refrigerator; let stand at room temperature to soften slightly, about 10 minutes. Heat oven to 400 degrees. Toss fruit with sugar, lemon juice and zest, spices, and tapioca; let stand for 15 minutes.

4. Roll larger dough disk on lightly floured surface into 12-inch circle, about 1/8-inch thick. Transfer and fit dough into 9-inch Pyrex pie pan, leaving dough that overhangs the lip in place. Turn fruit mixture, including juices, into pie shell. Scatter butter pieces over fruit. Refrigerate until ready to top with remaining dough.

5. Roll smaller disk on lightly floured surface into 10-inch circle. Lay over fruit. Trim top and bottom dough edges to 1/2-inch beyond pan lip. Tuck this rim of dough underneath itself so that folded edge is flush with pan lip. Flute dough in your own fashion, or press with fork tines to seal. Cut four slits at right angles on dough top to allow steam to escape. If pie dough is very soft, place in freezer for 10 minutes before baking.

6. Place pie on baking sheet; bake until top crust is golden, 20 to 25 minutes. Reduce oven temperature to 350 degrees and continue to bake until juices bubble and crust is golden brown, 30 to 40 minutes longer.

7. Transfer pie to wire rack; let cool to almost room temperature so juices have time to thicken, from 1 to 2 hours.

100_1879

The Apple of My Pie

When making our blueberry pie filling, we found that if we used more than 2 tablespoons of tapioca, the texture of the filling took on a gummy consistency we didn’t like. But 2 tablespoons or less resulted in a filling that was too loose. Could we solve this problem with pectin, a gentle thickener that occurs naturally in fruit?

EXPERIMENT

As a control, we thickened one pie with 2 tablespoons tapioca. We then compared it with a second pie thickened with 2 tablespoons tapioca and a grated apple, which is high in pectin and has a mild flavor. (We hoped that grating the apple would make it less noticeable in the baked pie.)

RESULTS

As expected, the pie thickened with tapioca alone was loose and soupy. But the pie thickened with tapioca plus an apple had a naturally gelled texture that was just right. The apple bits seemed to melt into the berry filling during baking, boosting fruity flavor but leaving no textural sign of their presence.

EXPLANATION

Pectin is a natural substance, found in fruits and vegetables, that creates structure in a plant by helping to bind its cell walls together. This same substance is used to thicken jams and jellies into a set, but soft, mass. Pectin content varies from fruit to fruit and also within a plant (more pectin is found in the skin of a fruit than in its flesh, for example). Apples are a great source of pectin because they contain high levels of high-methoxy pectin, the best natural pectin for making gels. By mashing some of the blueberries and grating the apple, we helped to release the pectin from the fruits’ cell walls so that it could thicken the pie filling.

loose

ON THE LOOSE
Pie filling thickened without enough tapioca won’t firm up. But too much tapioca leads to gumminess.

firm

ALL FIRMED UP
A little tapioca plus a grated apple created a juicy but sliceable filling.

I have some bushes in back yard and only wish that they looked like this, I share with the birds, although got a fake owl this year and actually got a few pints

I

Other related posts from stevesacooking

Glazed Blueberry Chicken

Blueberry oatmeal bread

Jordan Marsh Blueberry Muffins and Pepper Biscuits

Lyn’s Blueberry Oatmeal pancakes

Saving leftovers


I go through spurts with cooking and have always tried to overcook, the amount not the food. I use leftovers as additions to my daily lunch salad, others freeze for another day in perfect one meal portions, while some I use for leftover meals,  look at what I have and experiments on how to use.

leftovers

We have a FoodSaver an ancient model and works fine for us.

Some of my best minced chicken lettuce wraps came about in this manner. This has come in handy recently especially with Lyn on her special diet.  This is not to say I won’t cook during the week but I do tend to cook more on weekends. I think any Chicken or meat dishes freeze and reheats well especially the meatballs in or out of sauce.

After a while the freezer gets pretty full so I pull out my frozen menu for the week and place them on the frig shelf. It’s kind of fun when one can plan a week worth of meals just sitting there waiting to be reheated. Some things freeze and reheat well other do not American Chop Suey did not reheat well after freezing – the pasta got a little mushy but that Spaghetti Squash Pad Thai I made the other day did, I reheated in a fry pan added fresh peanuts and bean sprouts and a little more sauce mmmmm. Lyn freezes plain spaghetti squash but told me it is a little watery when reheated so I got my pan very hot and stir-fried until reheated this got rid of the excess moisture.

Freezer Burn

Freezer burn on a piece of beef 4003882014_6aba7bdc0eshutterstock_70258339Freezer Burn (film)


Freezer burn is not a food safety risk. It appears as grayish-brown leathery spots on frozen food, and occurs when air reaches the food’s surface and dries out the product. This can happen any time food is not securely wrapped in air-tight packaging. Color changes result from chemical changes in the food’s pigment. Although undesirable, freezer burn does not make the food unsafe. It merely causes dry spots in foods. Kind of looks like when you defrost in Microwave and some of the edges or thinner parts start to cook, I know you’ve been there.

Save It for Later

http://allrecipes.com

Making meals in advance can be as simple as doubling a casserole recipe or tossing an extra meatloaf into the oven.

Before You Freeze

Before freezing hot food, it’s important to let it cool down. Heat will raise the temperature of the freezer; and the food will not freeze uniformly, the outer edges of the hot dish will freeze hard quickly while the inside might not cool in time to prevent spoilage.

There are just a few things to keep in mind:

  • Cool precooked dishes as quickly as possible before they are placed in the freezer.
  • For fastest cooling, place the pan of hot food in a sink filled with ice water (or in a larger pan of ice water). If you’re cooling a soup, stew, or sauce, stir occasionally to help it cool evenly.
  • Once the dish is cooled, portion it into meal-sized containers or packages. Label and date the containers. Place them in a single layer in the coldest area of your freezer until completely frozen. Rearrange as necessary.

Tips for Freezing Foods

Poorly wrapped foods run the risk of developing freezer burn and unpleasant odors from other foods in the freezer. Follow these simple wrapping and container tips to ensure the quality and safety of your food:

  • Use only specialty freezer wrappings: they should be both moisture-proof and vapor-proof.
  • Leave as little air as possible in the packages and containers. When freezing liquids in containers, allow a small amount of head room for expansion. When using freezer bags, be sure to remove as much air as possible before closing.
  • Wrap solids foods like meats and baked goods tightly in foil before you bag them.
  • Use rigid containers with an air-tight lid and keep the sealing edge free from moisture or food to ensure proper closure.
  • Secure wrapped packages and containers with freezer tape, and write the dish and the date on the tape with a marker.
  • In many cases, meats and fish wrapped by the grocer or butcher need no extra attention before freezing. However, meat wrapped on Styrofoam trays with plastic wrap will not hold up well to freezing. If the food you want to freeze was not specially wrapped, then re-wrap them at home.
  • Freeze in small containers with no more than a 1-quart capacity to ensure that freezing takes place in a timely manner (i.e., within four hours). Food that is two inches thick will take about two hours to freeze completely.

food saver

Thawing Frozen Foods

With the exception of muffins, breads, and other baked goods, do not thaw foods at room temperature. Bacteria can grow in the thawed portion of prepared foods, releasing toxins that are unsafe to eat even after cooking.

To ensure that your food is safe to eat, follow one of these proper ways to thaw:

In the refrigerator: This is the slowest but safest thawing technique. Small frozen items might thaw in a few hours, while larger items will take significantly longer–overnight and then some.

In cold water: Place the frozen food in a leak-proof bag and place in a large container of cold water.

In a microwave on the defrost setting: Plan to cook the food immediately after it has thawed in a microwave, because some areas of the food might have begun cooking during the defrost cycle.

Best if Used By:

Although freezing keeps food safe for an indefinite amount of time, eventually the flavor will be affected. If the food is obviously damaged (shriveled, with white or frosty spots) it should be discarded.

This chart lists recommended storage times for popular precooked foods–casseroles, soups, lasagna–to ensure high-quality results:

Type of Food

Tomato/vegetable sauces – 6 months

Meatloaf (any type of meat)  – 6 months

Soups and stews –  2-3 months

Poultry and Meat Casseroles – 6 months

Poultry (cooked, no gravy)  – 3 months

Poultry (with gravy/sauce)  – 5-6 months

Meatballs in sauce  – 6 months

Pizza dough (raw, homemade) –  3-4 weeks

Muffins/quick breads (baked) 2-3 months

Don’t Crowd the Freezer

A temperature of 0 degrees F (-18 degrees C) is best for maintaining food quality. Proper air circulation is key to keeping your freezer operating at maximum efficiency.

Freezing does not kill bacteria, yeast and molds that might be in your foods–it merely holds them at bay by keeping them inactive. If the freezer’s temperature is disturbed often or altered for an extended period of time (such as a door left ajar or power outages) these microbes can compromise your food’s safety.

The Finger Test to Check the Doneness of Meat

The Finger Test to Check the Doneness of Meat

I know there are a ton of sites out there explaining this I just happen to like this one, if you haveothers let us know.

Method

Open the palm of your hand. Relax the hand. Take the index finger of your other hand and push on the fleshy area between the thumb and the base of the palm. Make sure your hand is relaxed. This is what raw meat feels like. (Check this out the next time you have a raw steak to cook.)

Now gently press the tip of your pinky and your thumb together. Again feel the fleshy area below the thumb. It should feel quite firm. This is what well done meat feels like when you press on it. (Check this out the next time you overcook a piece of meat.)

Press the tip of your ring finger and your thumb together. The flesh beneath the thumb should give a little more. This is what meat cooked to a medium doneness feels like.

Gently press the tip of your middle finger to the tip of your thumb. This is medium rare.

Press the tip of your index finger to the tip of your thumb. The fleshy area below the thumb should give quite a bit. This is what meat cooked to rare feels like. Open up your palm again and compare raw to rare.

Simply Recipes http://www.simplyrecipes.com

Of course everyone has thier own idea of what a handful of or a pinch of is.

1/3 cup. How do I measure up to you?

Patti sent me a chain letter the other day, normally I would have just hit the delete button but it was from Patti so I looked. The jest was to send a recipe to the next person on the list and then remove that person and add yourself to the bottom (only 2 people to start with). After doing that you were to send the starter email out to 20 of your friends. I bought into it (sorry guys) and gladly sent out a recipe. Well this started a conversation going between my brother, sister and myself about measurements. “I can’t send a recipe because I don’t measure anything”. I will admit I understand where they were coming from although I start with a recipe on new things I quickly move away with a handful of this, a pinch of that and a half palm full of ….eyeballing I guess is the best way to describe. My first try I measure as the cook says, I figure I should at least taste what they created.  I like to talk about what I made last night at to anyone that will listen and sometimes they ask for the recipe. It was not long that before I knew that this much in the palm of my hand was about a teaspoon and a handful was close to a cup of chopped herbs and ½ if crumbs or similar. A small grab and twist of fresh cilantro was about 2 Tablespoon minced…. I think you get the idea. So whether you measure or not and you like to share recipes it does not take long to figure out how your handful measures up. This is not me throwing a guilt trip on them they just got me thinking.