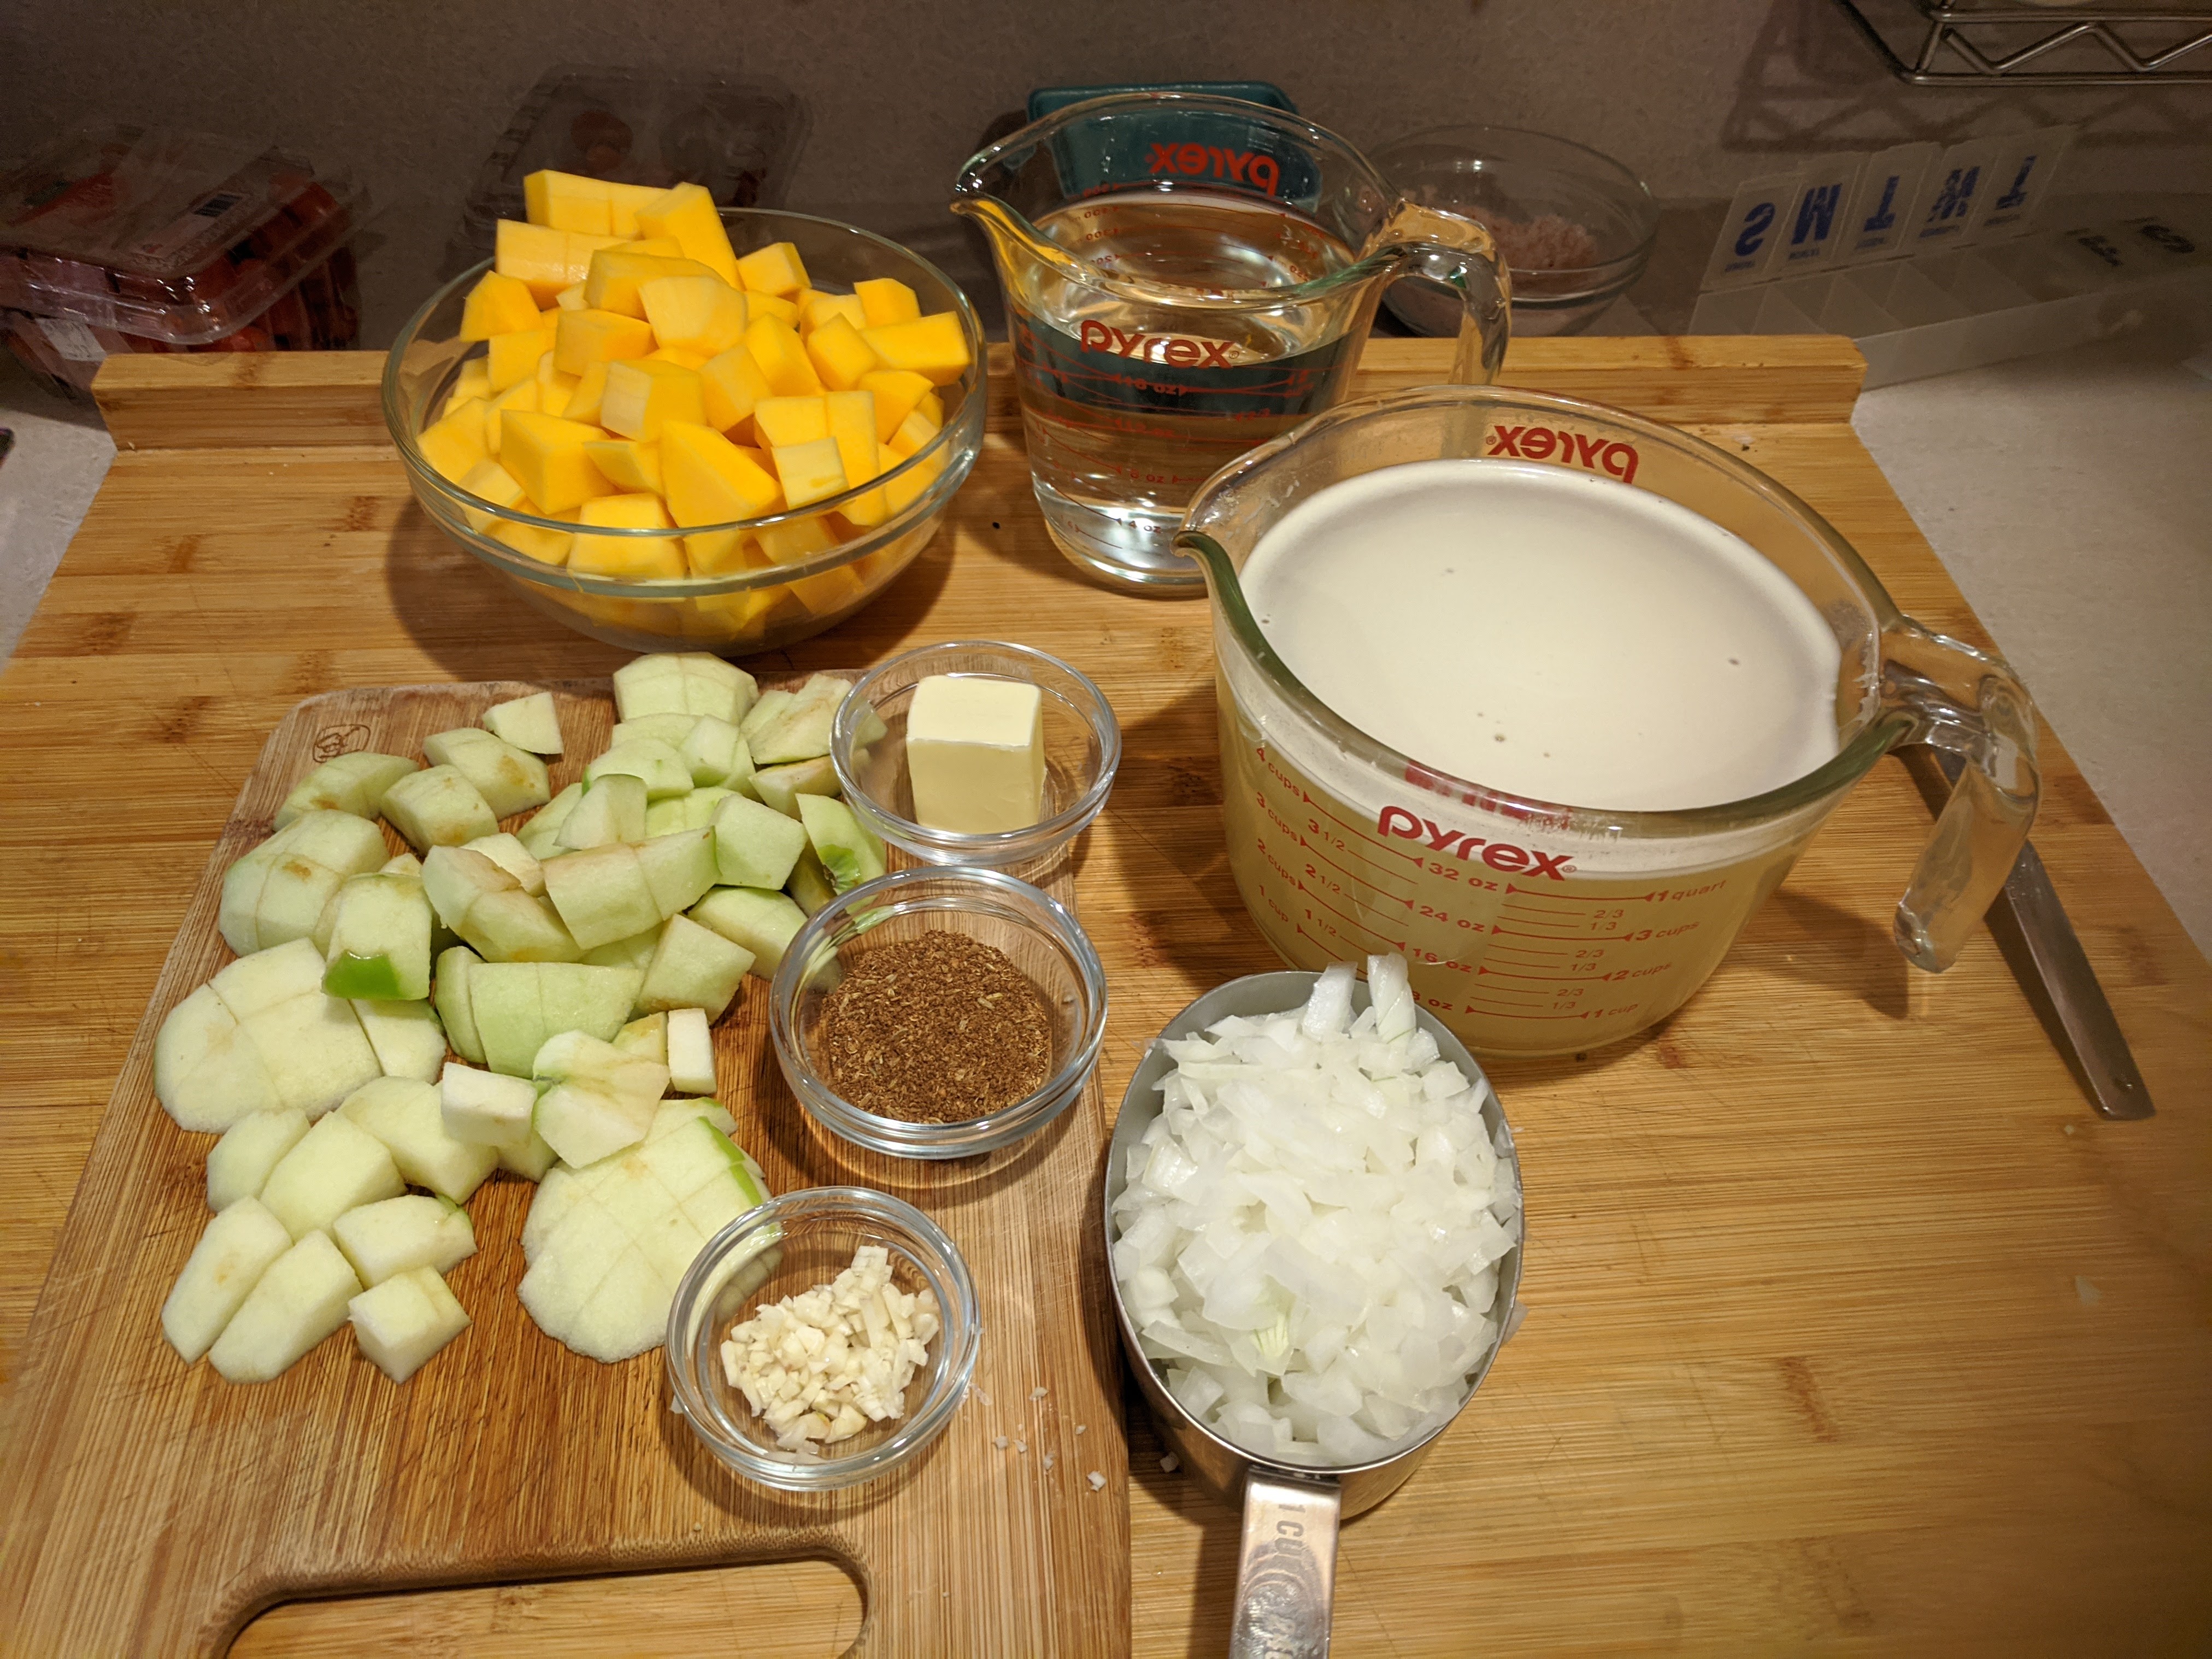
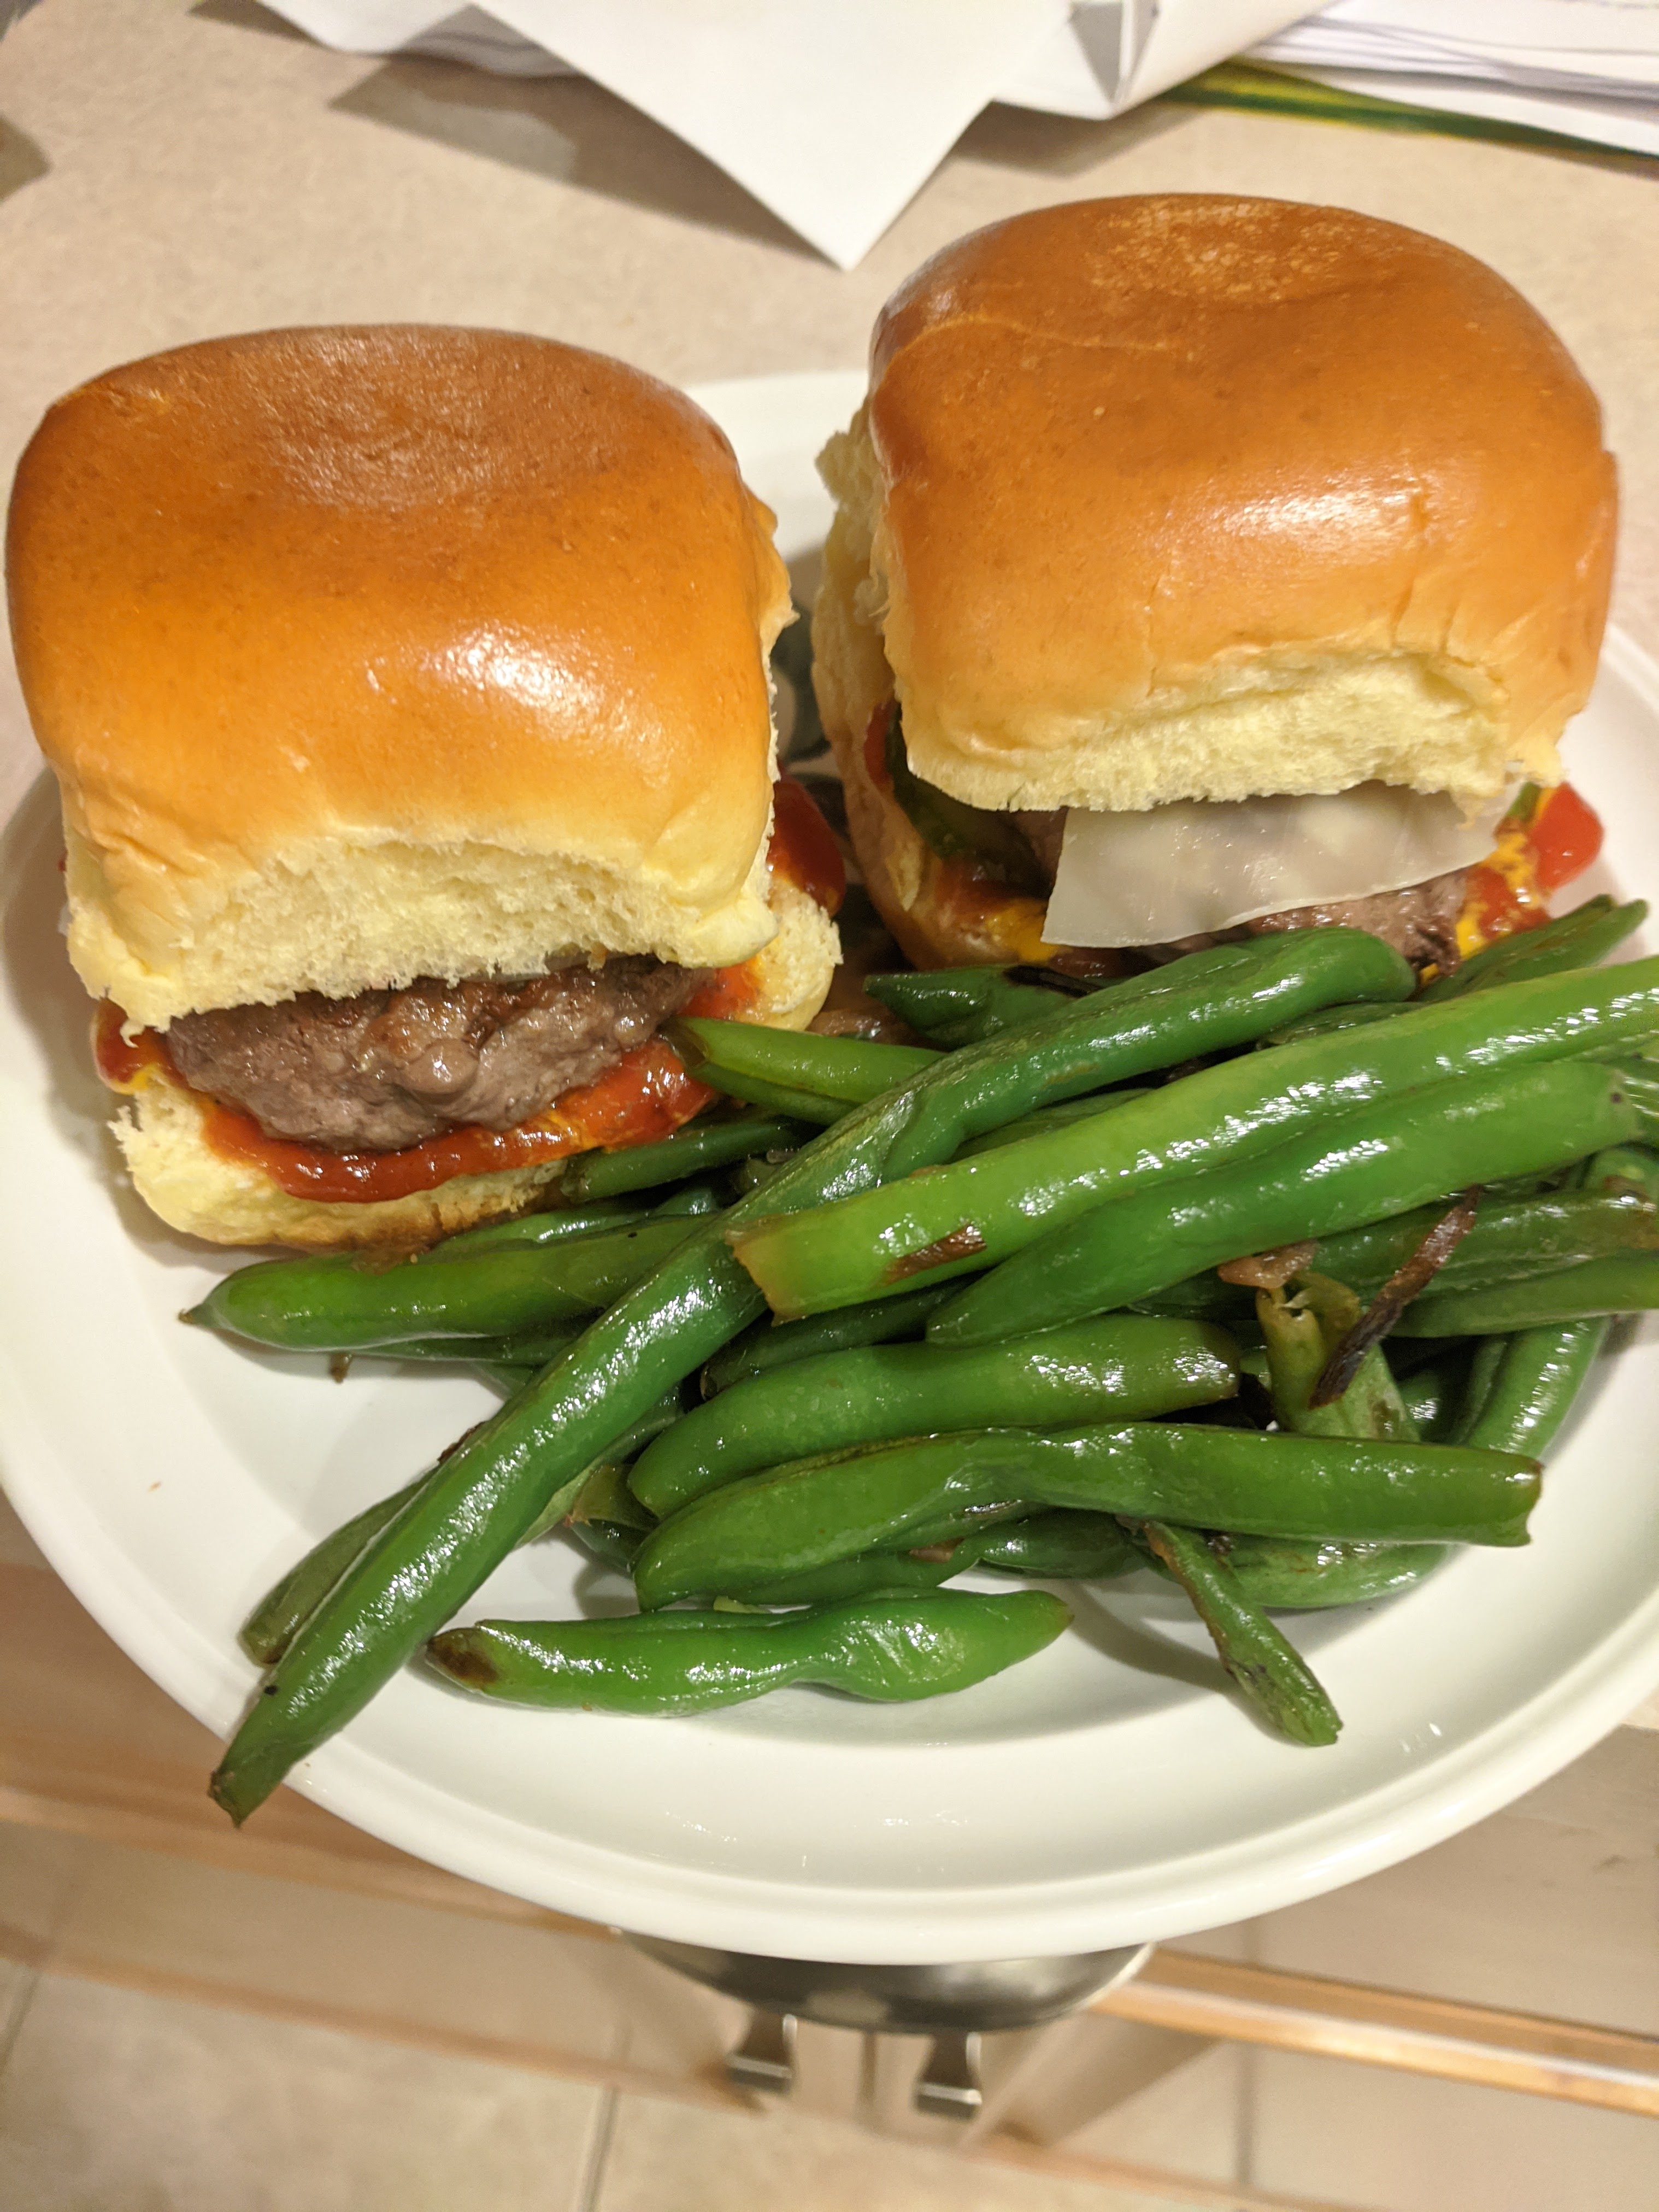
I think I enjoy the cooking more than eating, there is nothing better than to watch the smile grow after someone’s first bite. Note from Steve: I am a flow of thought writer and apologize up front if I lose you. My family is used to it.
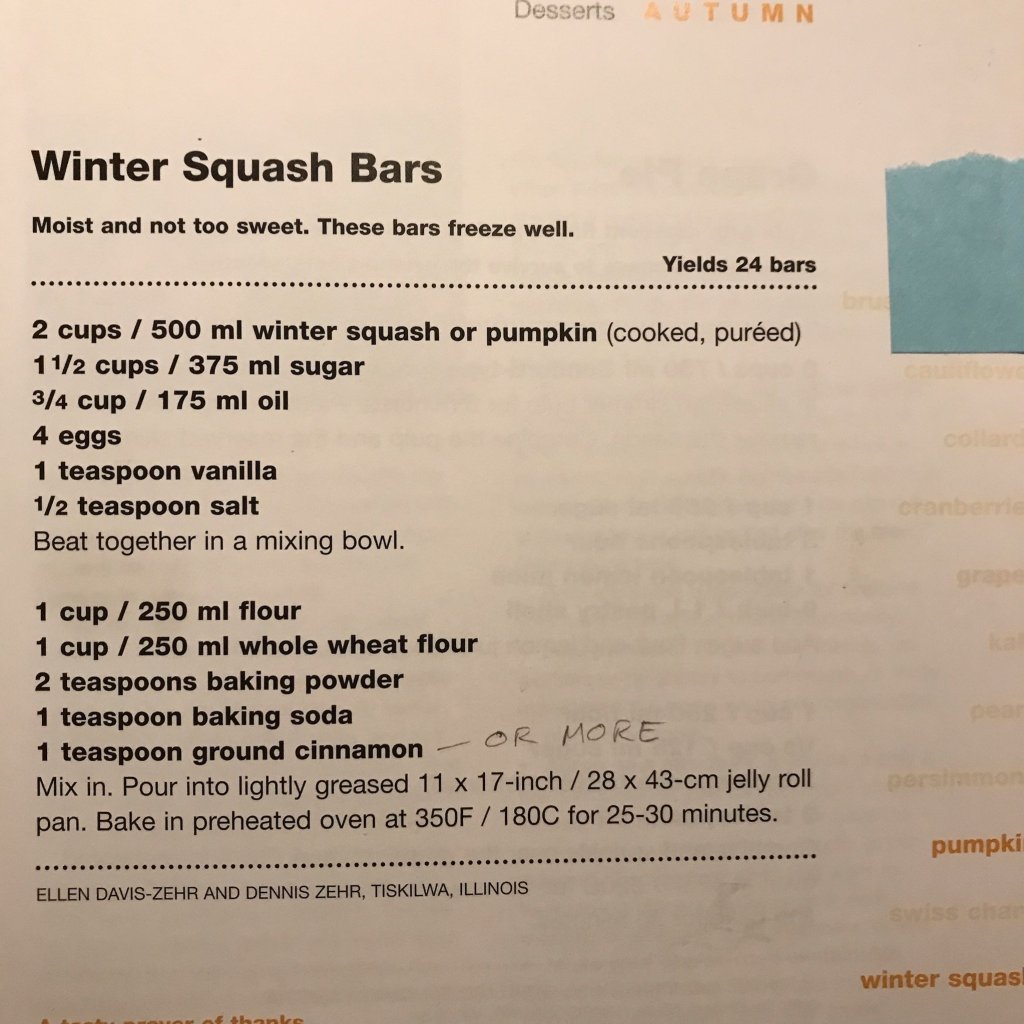
I’m taking a class at the senior center called Mindful Steps, we start of with some meditation and then walk when the winter weather is to cold or the path has not been plowed we do laps around the inside of the building and exercise in between each lap. Anyway my friend Todd brought in some of the squash bars he talked about last week and they were really good, no great! He used butternut squash on this batch.
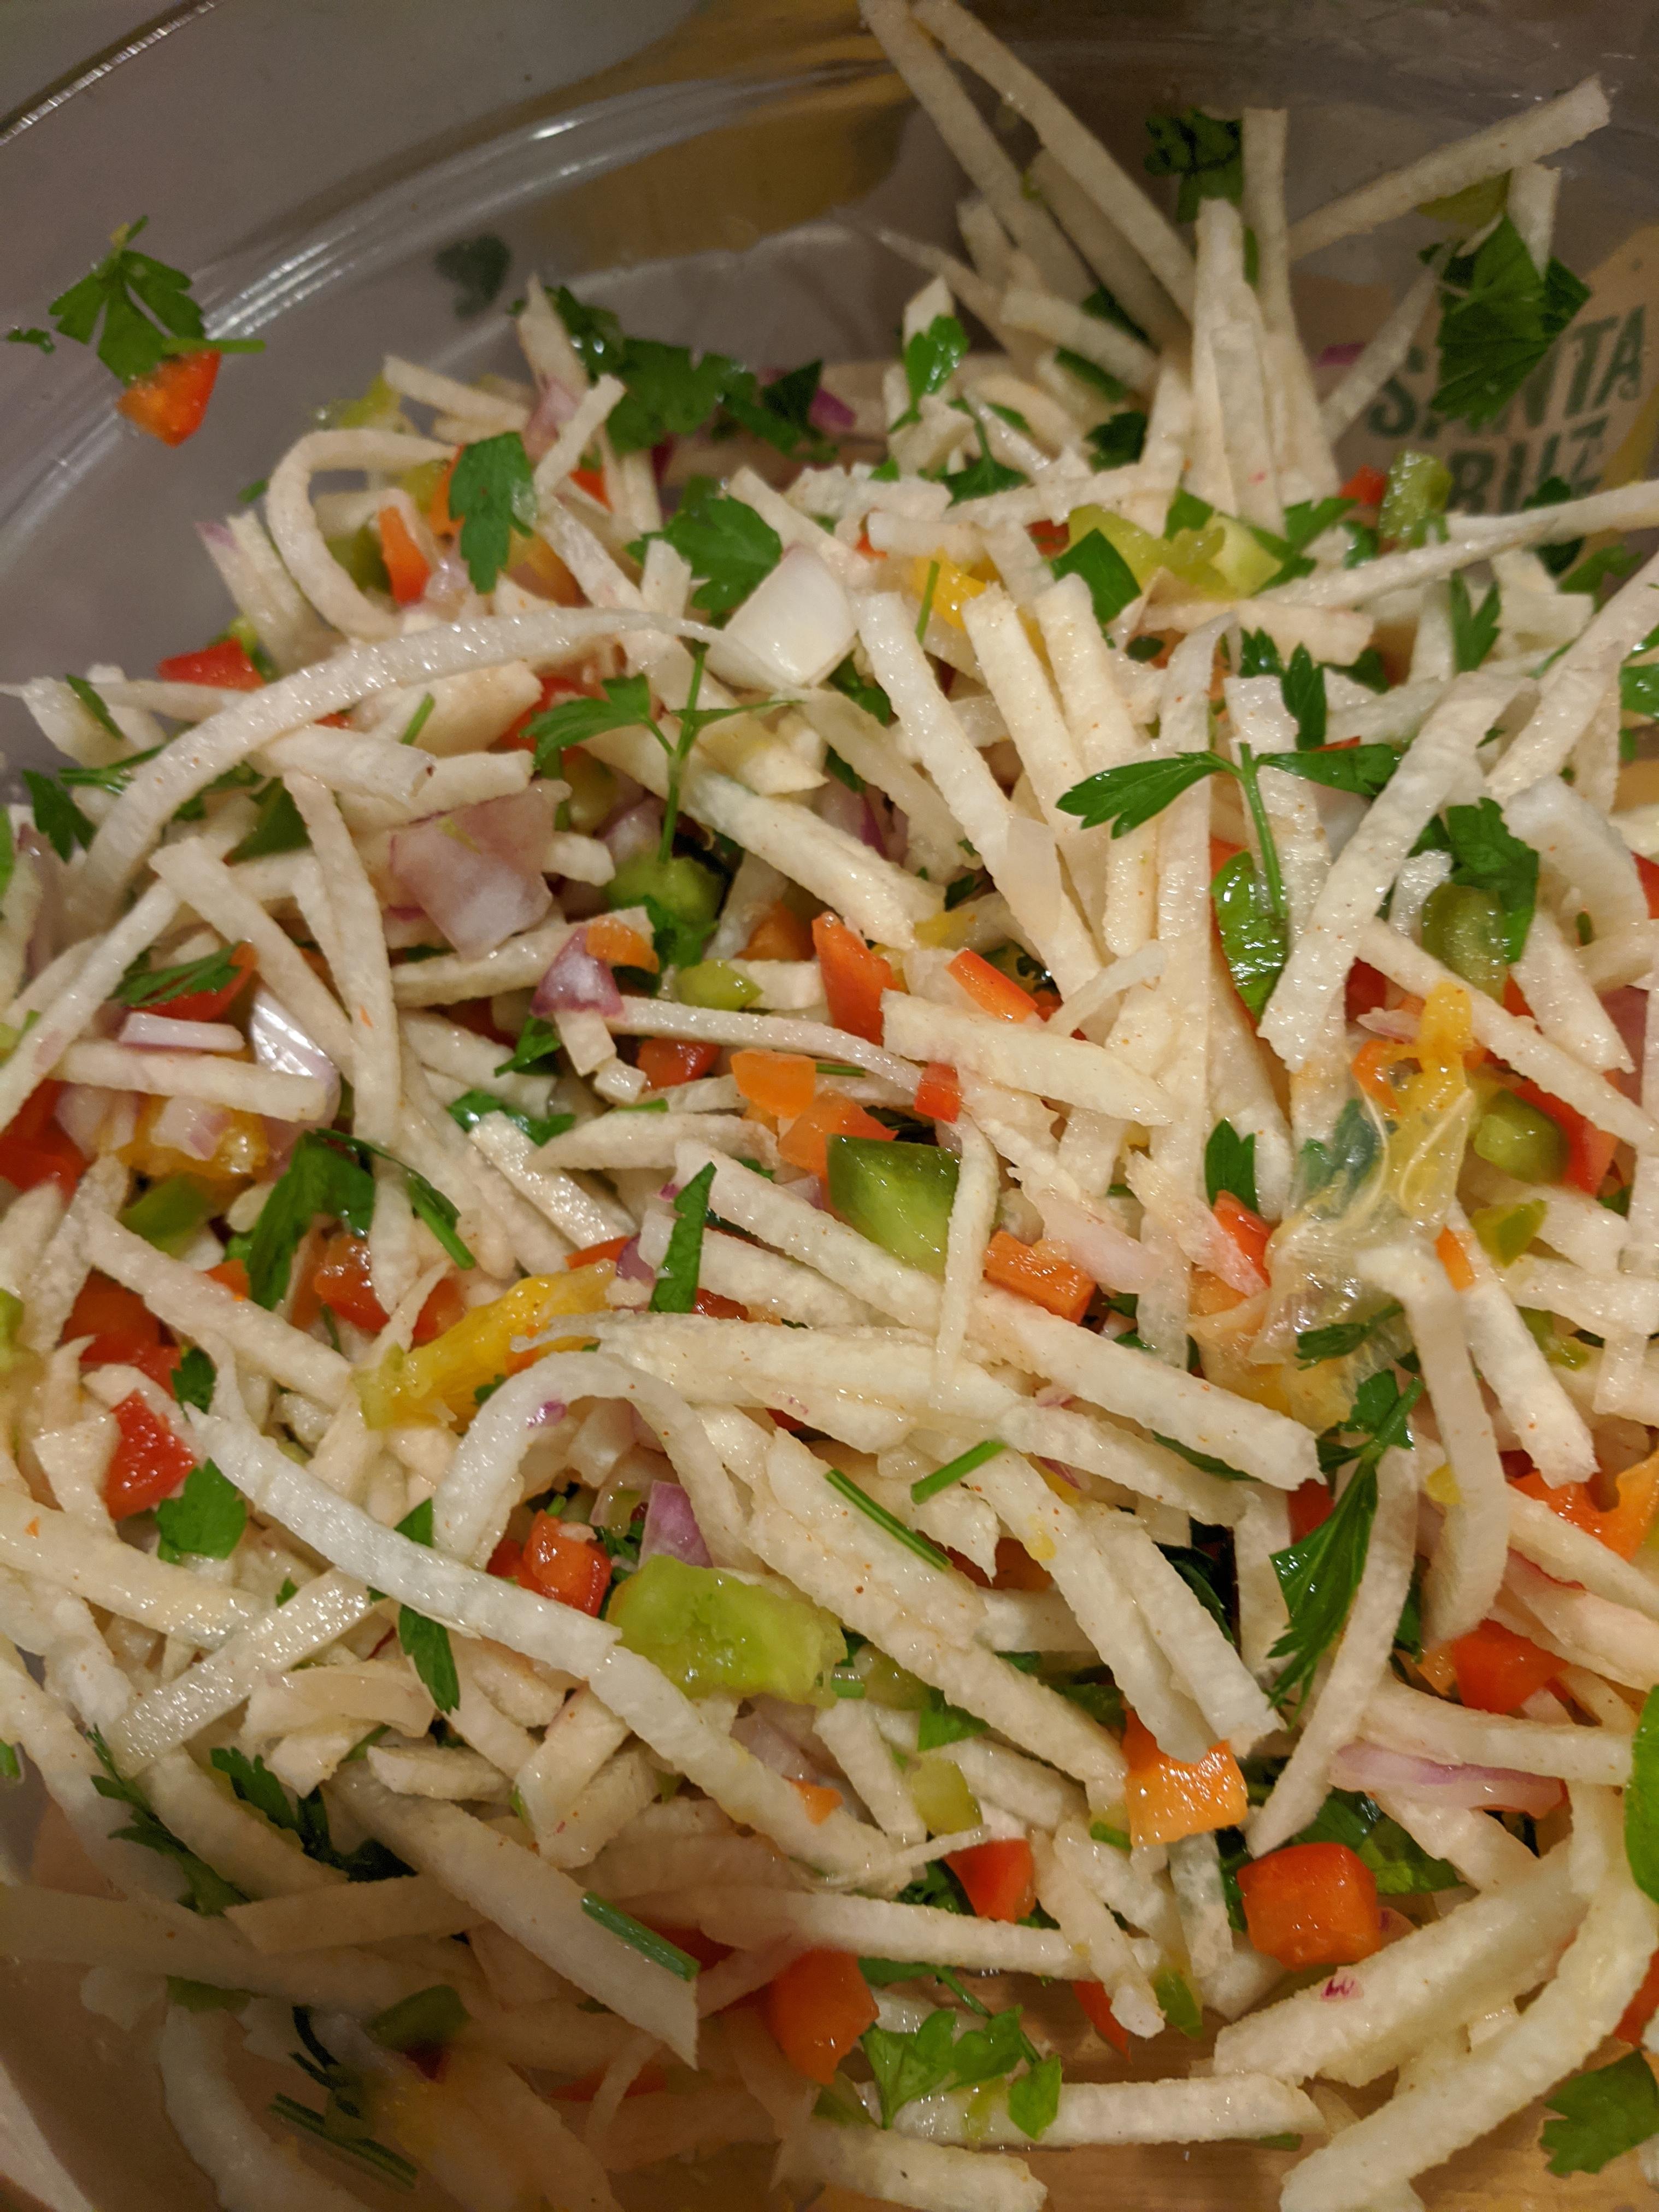
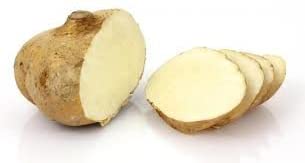
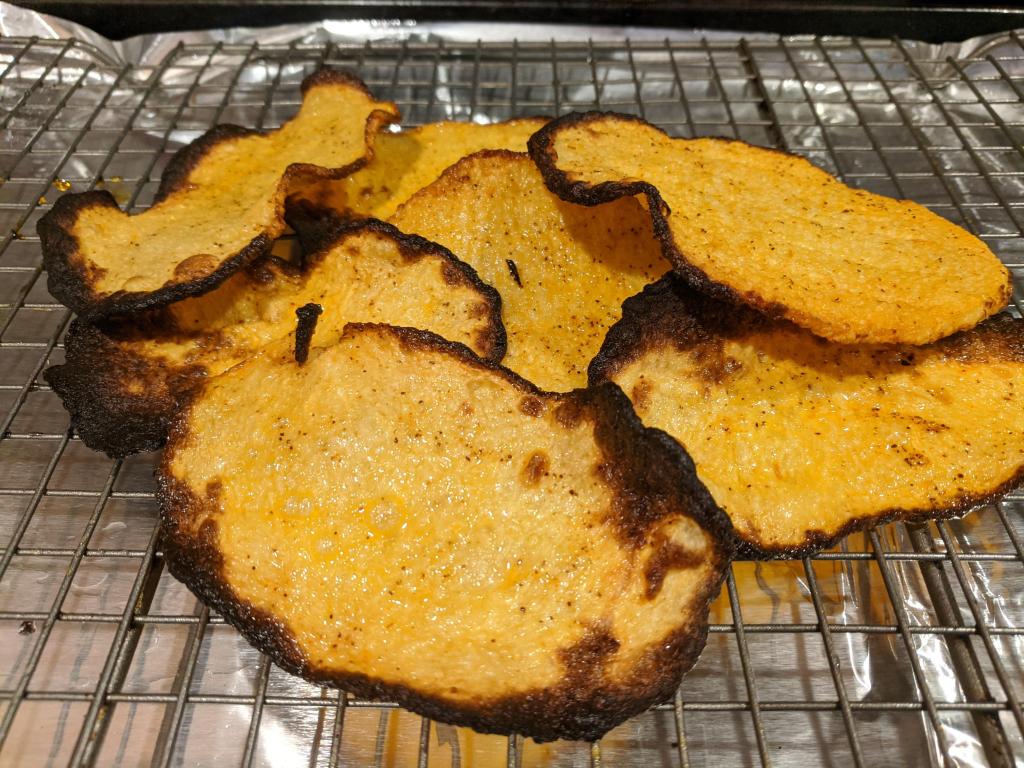
As you may know we belong to Misfits which has been great help during these times. * If you decide to try use this code we both get a discount. COOKWME-FG1DCQ and when I saw the Jicama as a choice this week In grabbed it. It had been awhile since we discovered so i tried the ole faithful slaw and then tried chips and fries. I recently had made sweet potato chips so figure what the heck.
Jicama (HEE-kah-ma), sometimes referred to as yam bean, Mexican turnip, or Mexican potato, is an edible root vegetable native to Mexico.
The vines of the jicama plant can grow up to 20 feet in length, but the leaves and seeds are actually toxic. The root is the only edible portion of the entire plant—the tough brown skin that gives way to juicy, white flesh on the inside. The flavor is sweet and starchy—think of a cross between a water chestnut and an apple.
Many call jicama a superfood, equating it with kale, acai berries, and quinoa. Jicama, along with sunchokes, packs a prebiotic called inulin, a big contributor to a healthier gut. In addition, jicama is rich in Vitamin C and Vitamin A. Lastly, jicama is naturally low in calories, making it a smart starchy substitute for those watching their weight.
Salad or slaw depending on what you want to call it
INGREDIENTS
1 large jicama (about 1 1/2 pounds), peeled, then julienned or cubed (easiest to work with if you cut the jicama in half first)
1/2 red bell pepper, finely diced
1/2 yellow bell pepper, finely diced
1/2 green bell pepper, finely diced
1/2 cup chopped red onion
1/2 a large cucumber, seeded, chopped (optional)
1 navel orange, peel cut away, sliced crosswise, then each round quartered
1/2 cup chopped fresh cilantro
1/3 cup lime juice
Pinch of cayenne
Pinch of paprika
Salt
How
Toss together the jicama, bell peppers, red onion, cucumber, orange, and cilantro in a large serving bowl.
Pour lime juice over all. Sprinkle with a pinch of cayenne and paprika. Season generously with salt.
2 Let sit a half an hour before serving.
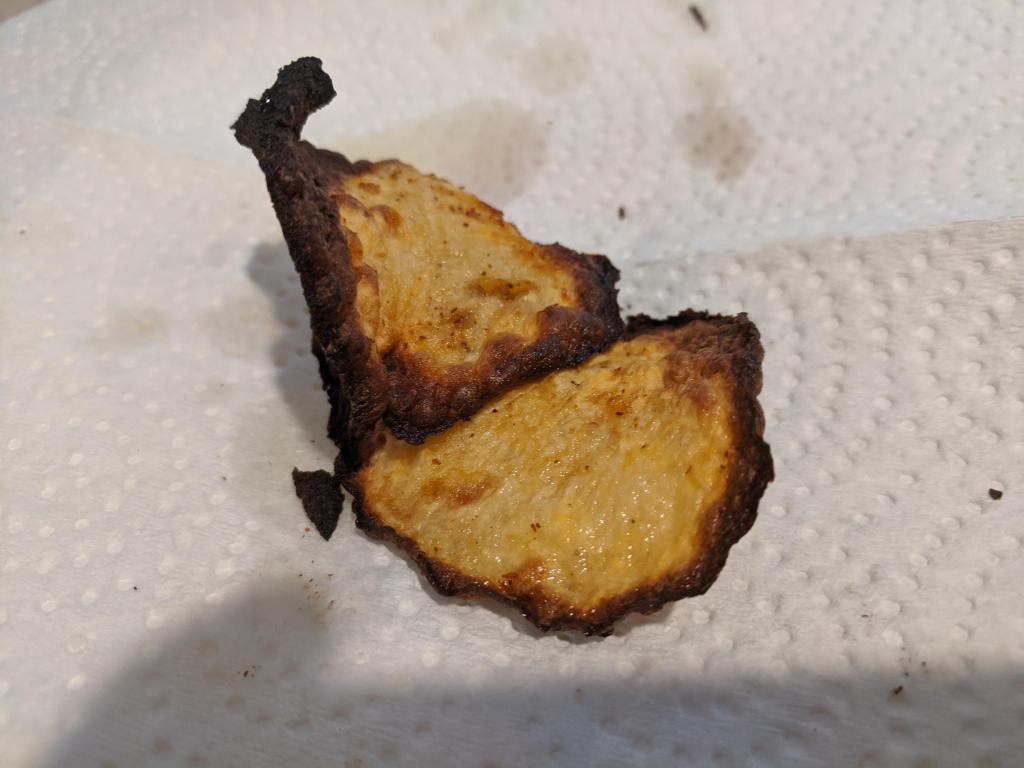
Fries and Chips
Tried these in oven and Air-Fryer watch closely they will burn quickly
Air-FryerOvenAir-Fryer
These are best served warm but did reheat nicely. You won’t get them super crispy but they good.
Ingredients
16 ounces Jicama, peeled and cut into medium sized fries (1 pound)
1 tablespoon Olive Oil
1 tablespoon Fresh Lime Juice
1/4 teaspoon Salt
1/8 teaspoon Chipotle Chili Powder
1/8 teaspoon Onion Powder
1/8 teaspoon Paprika
How
Preheat oven to 400°F.
In a small bowl, combine spices. Gently toss the jicama fries with the oil and lime juice, then sprinkle with the spice blend.
Spread fries evenly on a baking sheet and bake for 25 to 30 minutes, or until fries are golden.
Serve immediately – they taste best hot out of the oven.
Air-Fryer
same as above but watch closely and I turned half way through both methods. Oh the oven I made on a rack and used convection
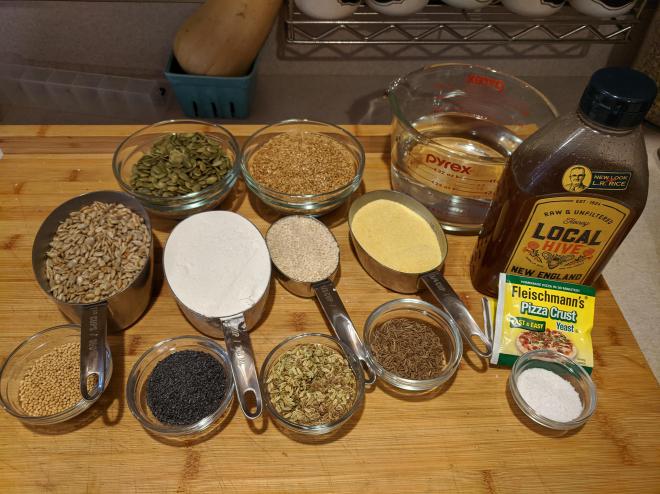
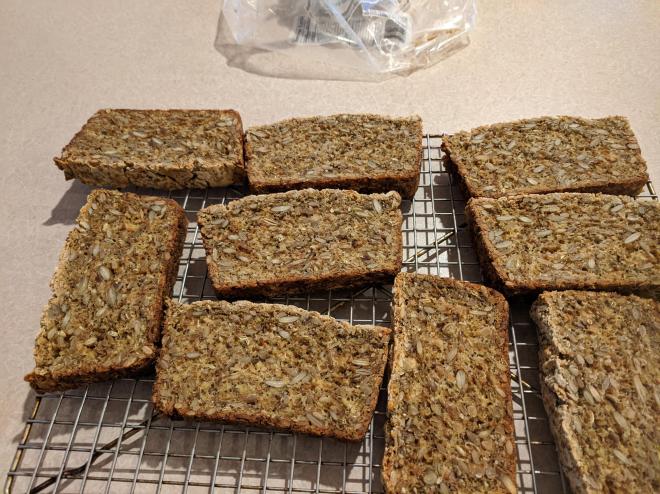
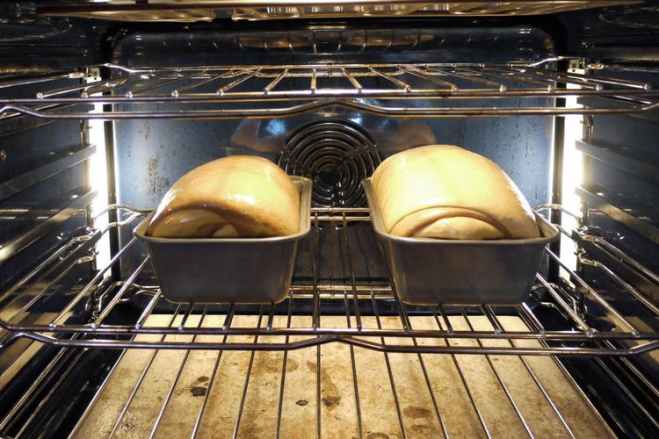
A few weeks ago Lyn innocently asked me, you used to make bread right, she knows I don’t like to bake (to exact) she also knows I have a hard time refusing her wants and needs. So she asked for some gluten free seed bread. This is a wicked heavy bread and I gave it a good try, after a few weeks she finished it and is hinting about another loaf. To keep impulse munching down we cut in slices and froze. You know what it is like with fresh bread.
Ingredients
To Make the Night Before:
1 cup Cup4Cup gluten-free flour
1 cup pumpkin seeds
¾ cup sunflower seeds
¾ cup flaxseeds
⅓ cup white sesame seeds
3 tablespoons fennel seeds
2 tablespoons poppy seeds
2 tablespoons dill seeds
2 tablespoons caraway seeds
5 teaspoons yellow mustard seeds
½ cup cornmeal
To Make the Day of:
1 package active dry yeast
2 tablespoons honey
1 cup Cup4Cup gluten-free flour
1 tablespoon kosher salt
Nonstick cooking spray
How
Step 1
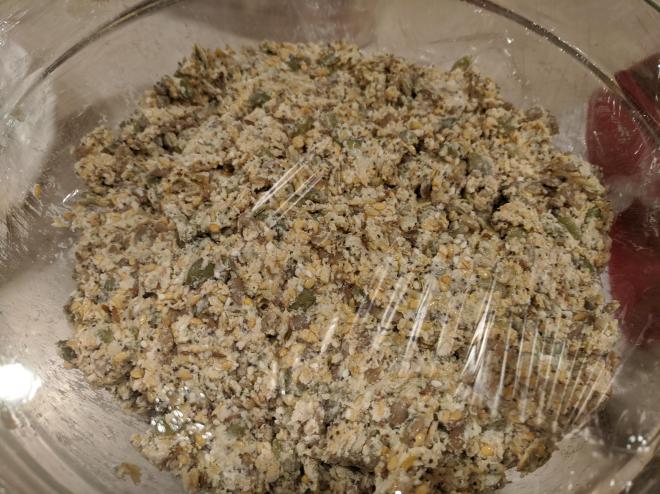
In a large glass bowl, combine the flour with all the seeds and the cornmeal. Stir in 2 1/4 cups water. Cover bowl tightly with plastic wrap, and let sit overnight, 8 to 12 hours.
Step 2
The next day, in another large glass bowl, whisk the yeast and the honey into 2 tablespoons warm water (100° to 110°). Let sit until foamy, about 5 minutes.
Step 3
Scrape the overnight mixture into the bowl with the yeast mixture, and add the flour and the salt. Using a wooden spoon, stir until well combined, about 1 minute. (The mixture will be thick.) Cover bowl tightly with plastic wrap, and let sit until mixture lightens in texture, about 1 hour.
Step 4
Spray a 9-by-5-inch nonstick loaf pan with cooking spray. Scrape dough into prepared pan. Cover with plastic wrap, and let rest in a warm area just until dough reaches the top of the pan, about 1 hour.
Step 5
Preheat the oven to 350°. Bake loaf until golden on top and a toothpick inserted into the center comes out clean, about 1 1/2 hours. Let cool before slicing. (Wrapped airtight, this bread will keep for over a week in the refrigerator or up to 6 months in the freezer.)
Tips
Use the Right Flour: “Cup4Cup is my favorite gluten-free blend,” Tompkins says. “For texture and flavor, mix in cornmeal or another gluten-free flour, like oat or teff.”Rise it Twice: “I go with the same process used in Danish rye breads,” Tompkins says. “I let the dough rise twice — in a bowl and again in the loaf pan — which really lightens up the loaves.”Add Lots of Seeds: Pumpkin, sunflower, fennel, mustard, sesame, and dillseeds add a nice complexity.”Soak the seeds overnight,” Tompkins says. “This keeps them from being too crunchy.”
Tips Recipe by Tamra Tompkins, pastry chef at Beckon in Denver.
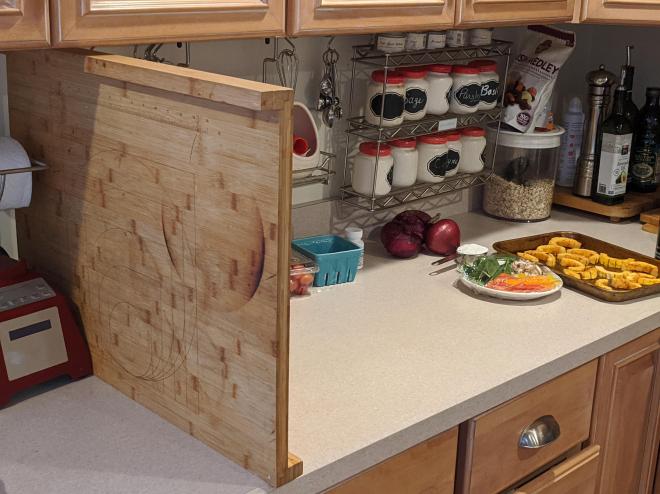
Mike was moving in with Gail and we volunteered to watch the cats to make the move easier. They quickly settled in but being cats, curiosity was top on their list. They knew where to hide when I went out for the mail so many escape attempts were just that attempts. Lyn did say that if they got out all we had to do was open a can of food and boy do they come running, begging and demanding. If you listen to them, we never fed them and there was never a bowl of dried food always at their ready night and day.
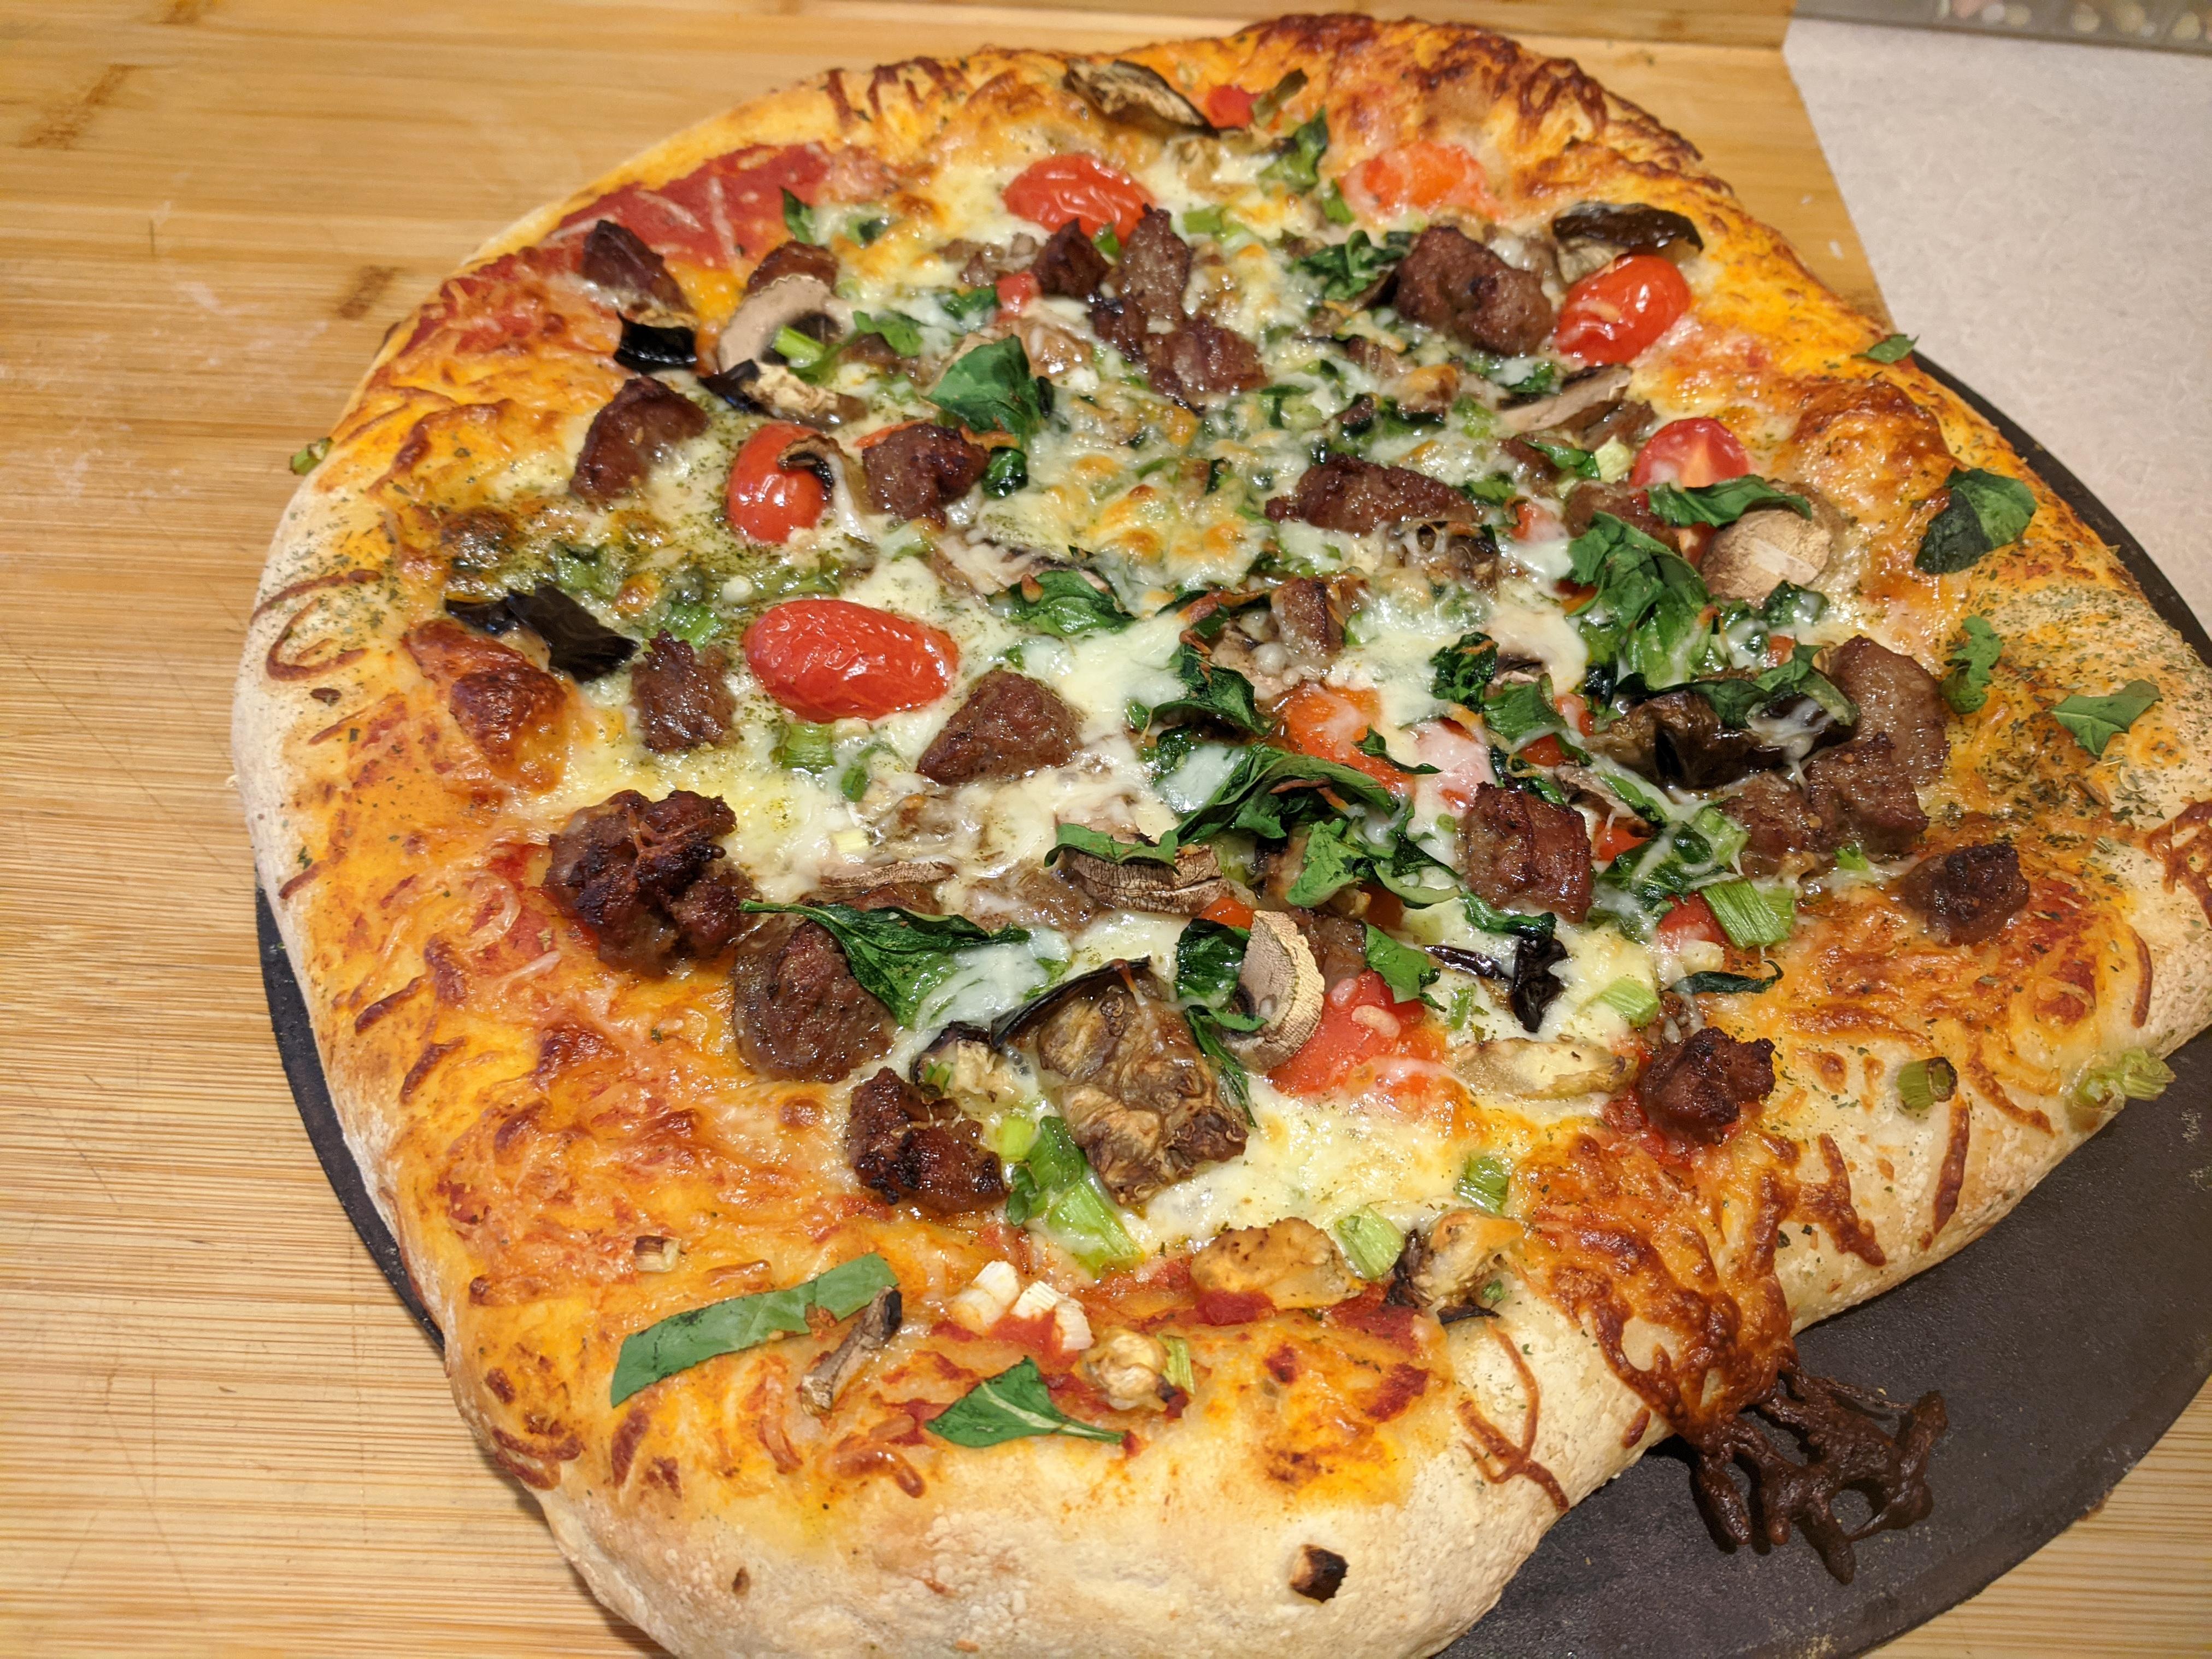
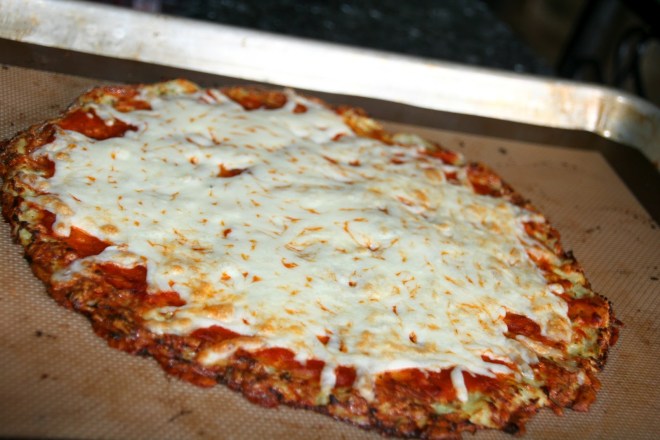
I took to preparing their wet food behind closed doors and Lyn said that they would try to push the door open. Anyway I was preparing a cauliflower crust pizza last Wednesday and had to take extreme measures. See picture below
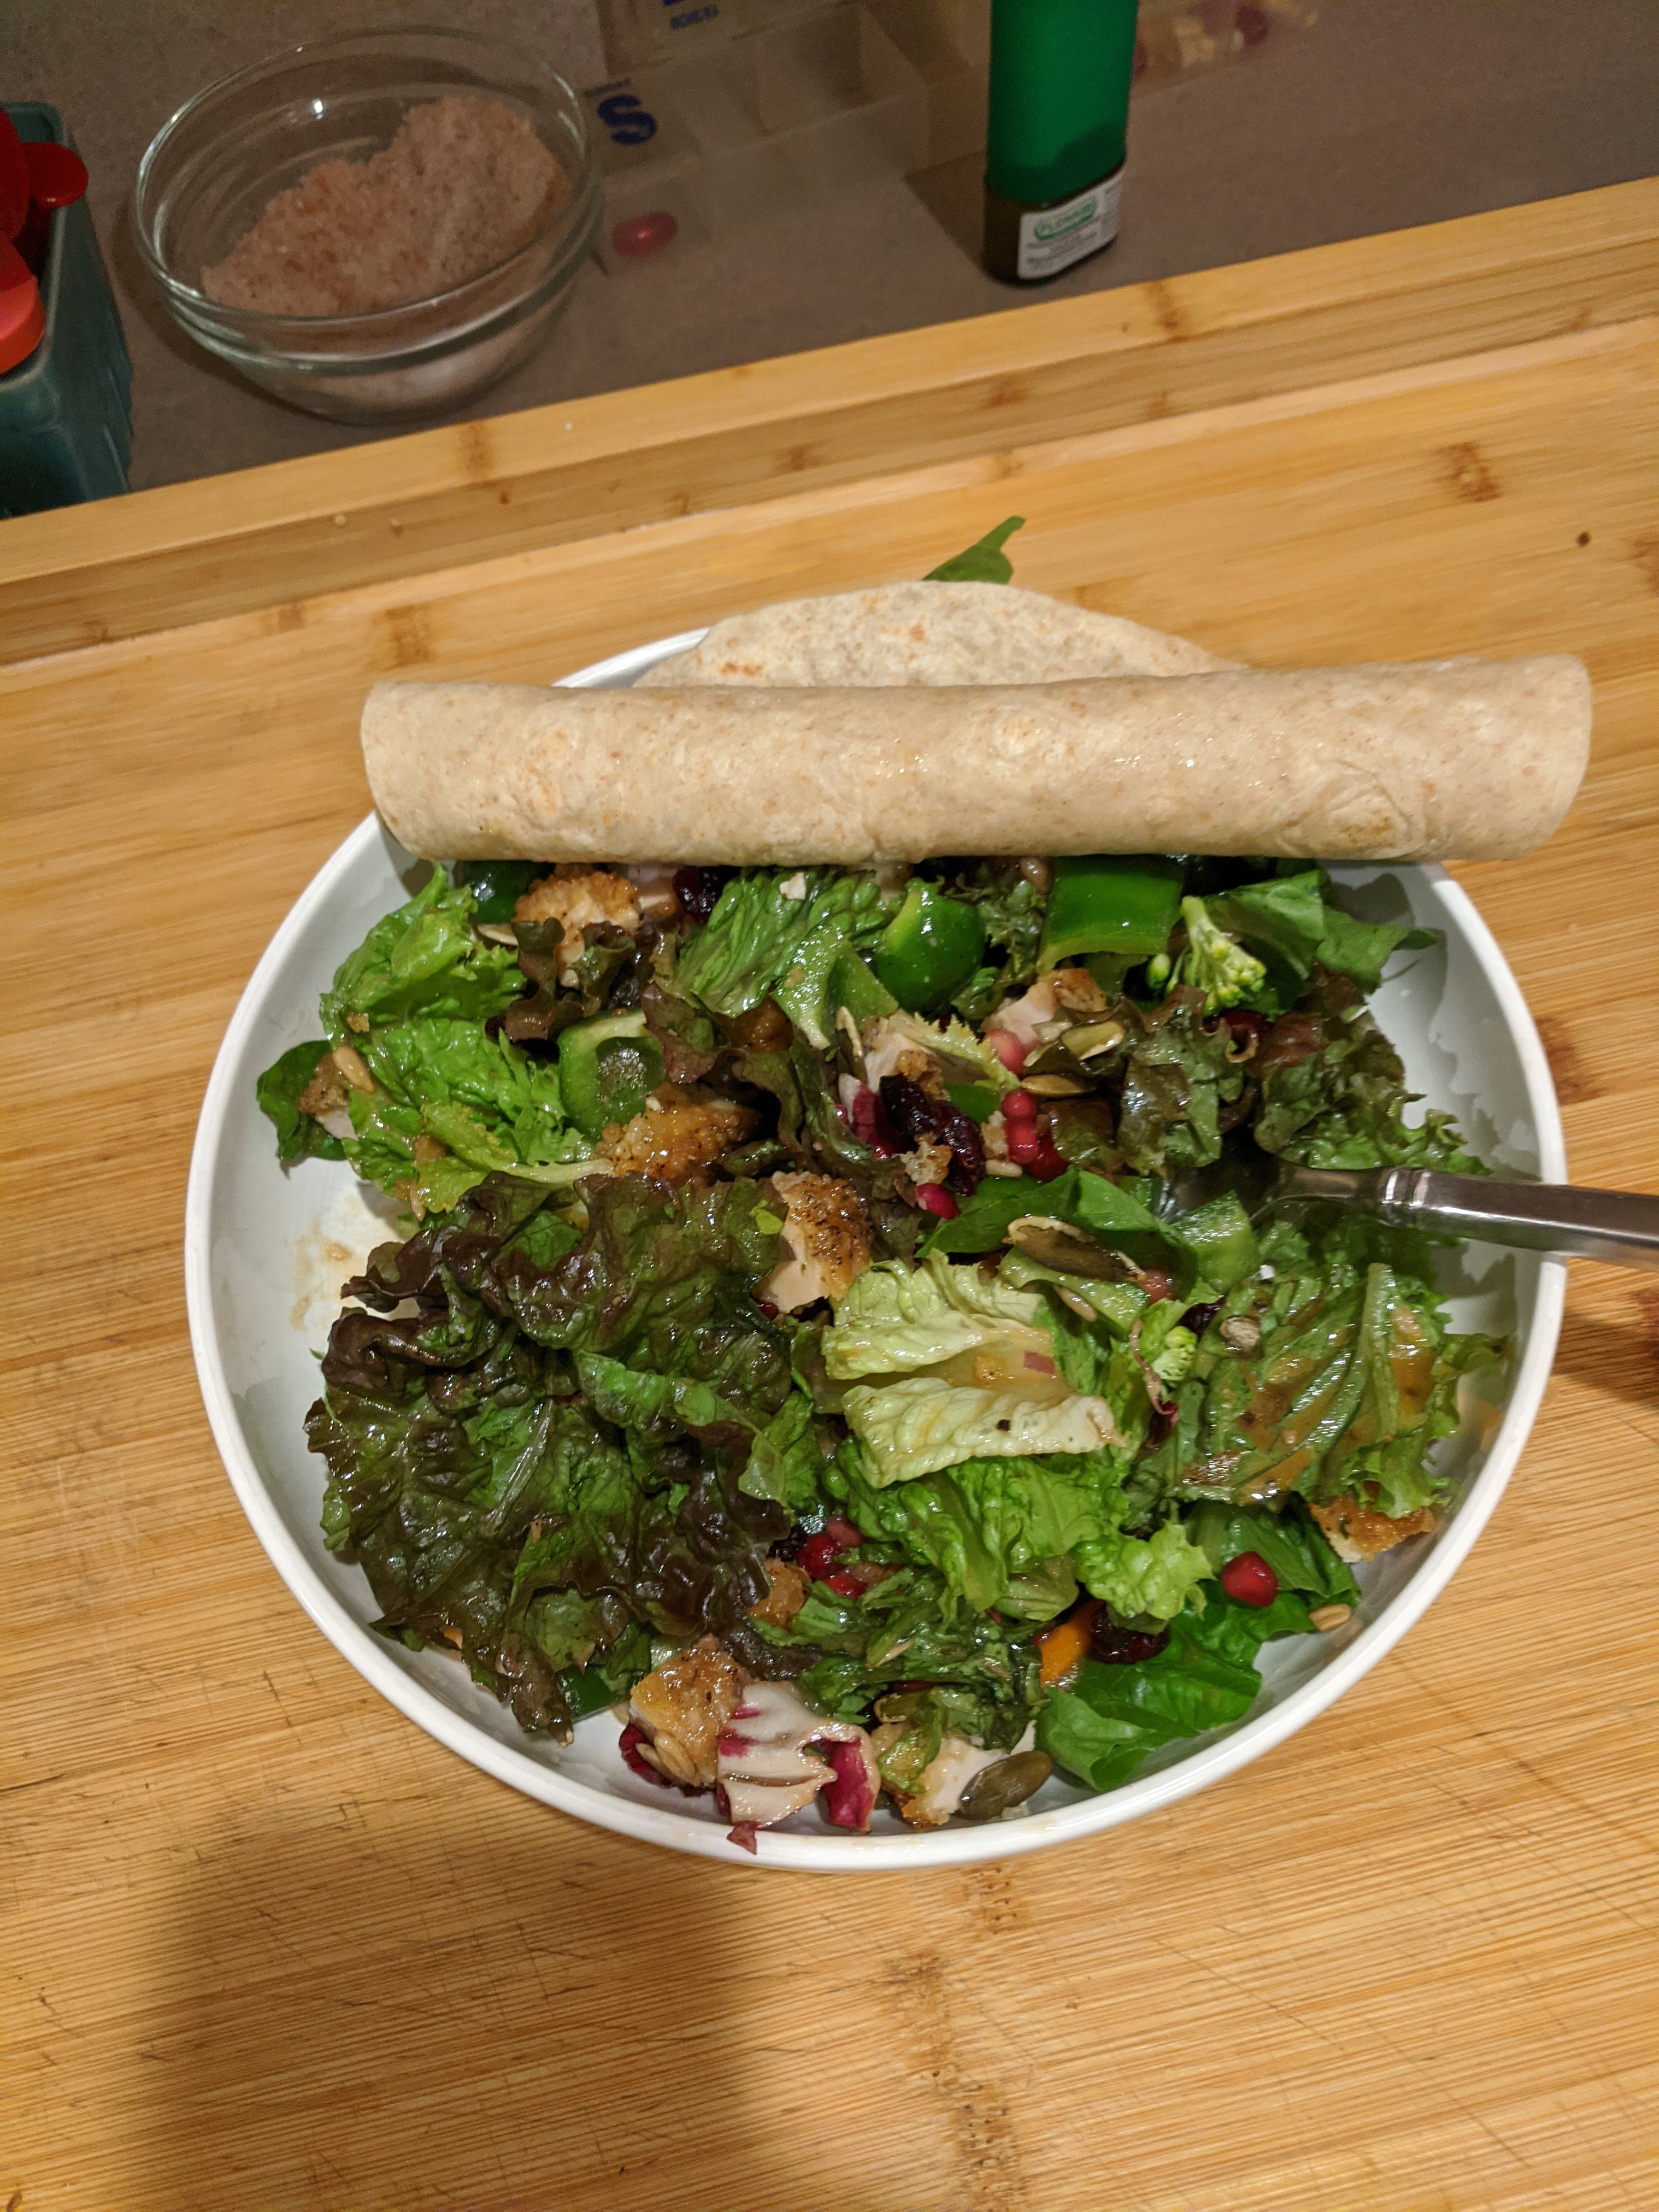
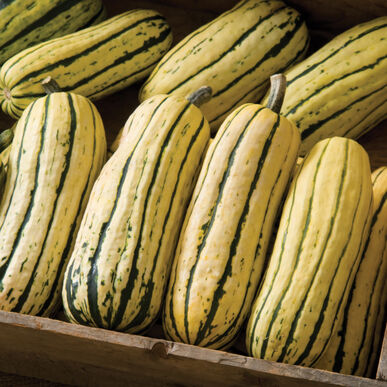
Another cook from the frig recipe. This time I had some delicata squash, red, green and yellow peppers, made some red onion relish, goat cheese, grape tomatoes earlier so I decided to roast the squash and add the rest sorry no pictures of the finished product.
I like this no peeling you can eat the skin like acorn squash.
Roasting the Squash
Preheat oven to 425° convection. Cut ends off of squash, then cut in half lengthwise. Scoop out seeds. Cut squash into ½” half-moons.
On a large baking sheet toss squash with oil. Season with salt and pepper. Spread single layer on pan and sprinkle with cinnamon (not the sugared kind but I suppose you could)
Roast until golden and soft on the inside, about 20 minutes, flipping halfway through.
Meanwhile I thinly slice the peppers, diced some fresh mushrooms, and prepared a small hand full of fresh baby spinach, grape tomatoes in half and goat cheese
For the cauliflower crust, Lyn’s been into the paleo version, I spread pizza sauce the topped with all the above. As Colbert likes to say meanwhile I spun out my dough which is Portland Pie Company Beer dough, my store bought favorite. And topped with everything except the goat cheese, instead I used three types of Italian cheeses. I then baked for about 10 minutes each. Will vary depending on oven.
Anyway, to make this long story short I was forced to use what I joking call the cat guard to protect my cooking area from the curious duo.
Oh they are in their new home now and enjoying it.
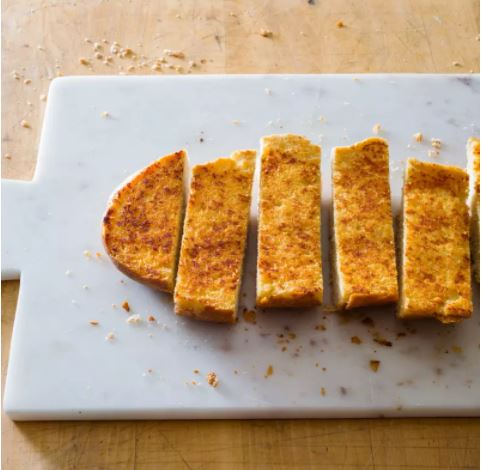
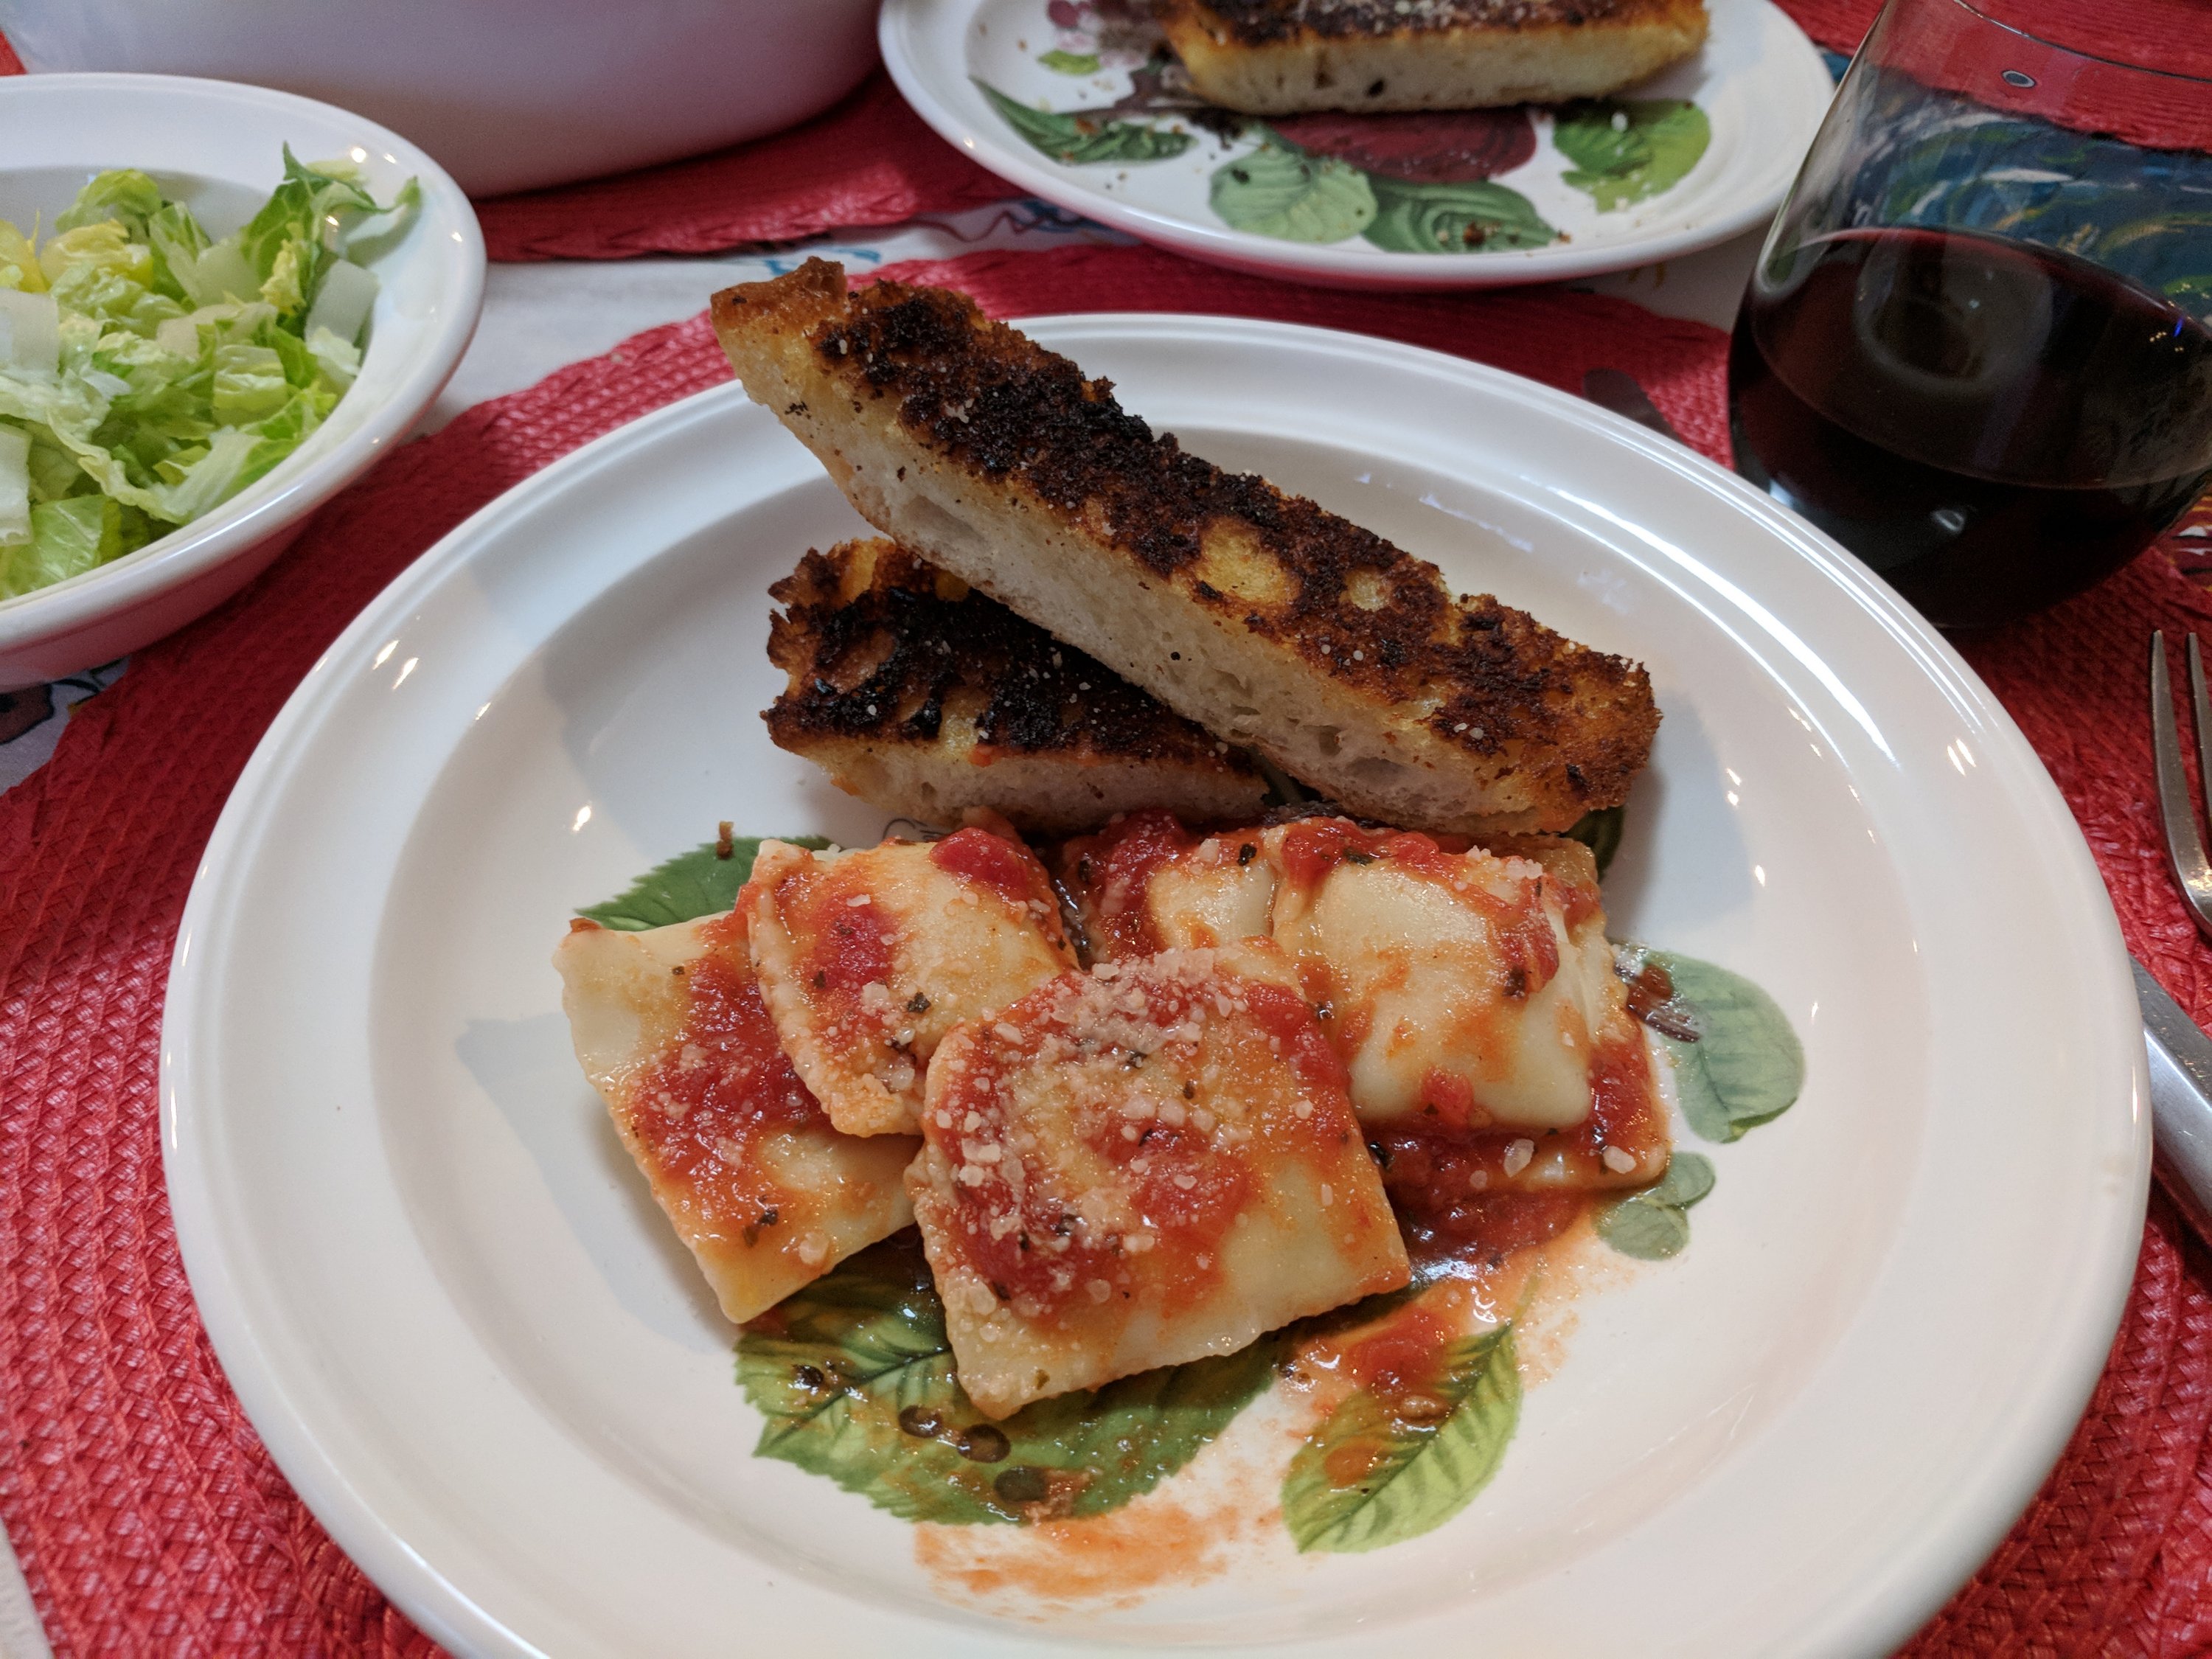
Saw this on America’s Test Kitchen and tried once before but had a crustier bread, it was good. Trying again tonight with a lighter airier bread.
INGREDIENTS
Print Shopping List
1 teaspoon garlic powder
1 teaspoon water
8 tablespoons unsalted butter
½ teaspoon salt
⅛ teaspoon cayenne pepper
4—5 garlic cloves, minced to paste (1 tablespoon)
1 (1-pound) loaf soft Italian bread, halved horizontally
INSTRUCTIONS
SERVES 8
A 12 by 5-inch loaf of supermarket Italian bread, which has a soft, thin crust and fine crumb, works best here. Do not use a rustic or crusty artisan-style loaf. A rasp-style grater makes quick work of turning the garlic into a paste. The amount of time needed to brown the bread after flipping it in step 3 depends on the color of your baking sheet. If using a dark-colored sheet, the browning time will be on the shorter end of the range.
Adjust oven rack to lower-middle position and heat oven to 450 degrees. Combine garlic powder and water in medium bowl. Add 4 tablespoons butter, salt, and cayenne to bowl; set aside.
Place remaining 4 tablespoons butter in small bowl and microwave, covered, until melted, about 30 seconds. Stir in garlic and continue to microwave, covered, until mixture is bubbling around edges, about 1 minute, stirring halfway through microwaving. Transfer melted butter mixture to bowl with garlic powder–butter mixture and whisk until homogeneous loose paste forms. (If mixture melts, set aside and let solidify before using.)
Spread cut sides of bread evenly with butter mixture. Transfer bread, cut sides up, to rimmed baking sheet. Bake until butter mixture has melted and seeped into bread, 3 to 4 minutes. Remove sheet from oven. Flip bread cut sides down, place second rimmed baking sheet on top, and gently press. Return sheet to oven, leaving second sheet on top of bread, and continue to bake until cut sides are golden brown and crisp, 4 to 12 minutes longer, rotating sheet halfway through baking. Transfer bread to cutting board. Using serrated knife, cut each half into 8 slices. Serve immediately.
The lighter bread toasted a little quicker than I thought but was still good. I guess I’ll just forget about my love handles and keep trying till I perfect this.
This has become one of our staples at least 2-4 times a month. We try it with different toppings etc. every time. Lyn tried spaghetti squash a few others and we found a sweet potatoes recipe we are going to try.
I can’t believe I have not posted I guess I just go to my Pinterest and grab from there.
Place the cooked Cauli-Rice into a tea towel and squeeze all the water out of the Cauli-Rice. It is important to get the rice as dry as possible so that there won’t be extra moisture in the crust which will prevent it from crisping up properly.
In a medium bowl combine the dry Cauli-Rice, egg, 1/3 cup shredded mozzarella, fennel seeds, Italian seasoning, salt & pepper and mix to combine well. Press the cauliflower mixture into an even thickness on the prepared pan, either into a round or rectangular shaped pizza. I kept the crust pretty thin, about 1/4-inch thick. Bake for 15-20 minutes until the crust is firm and golden brown. Remove the pan from the oven and turn off the oven and turn on the broiler and move the rack to up close to the broiler. Top the cooked crust with sauce, cheese and toppings of your choice. Place under the broiler until the cheese is bubbly and melted
Enjoy!
* Meats and veggies need to be cooked before placing them on the pizza as after the crust is baked, the pizza is only under the broiler to melt the cheese, not long enough to properly cook meats and veggies.
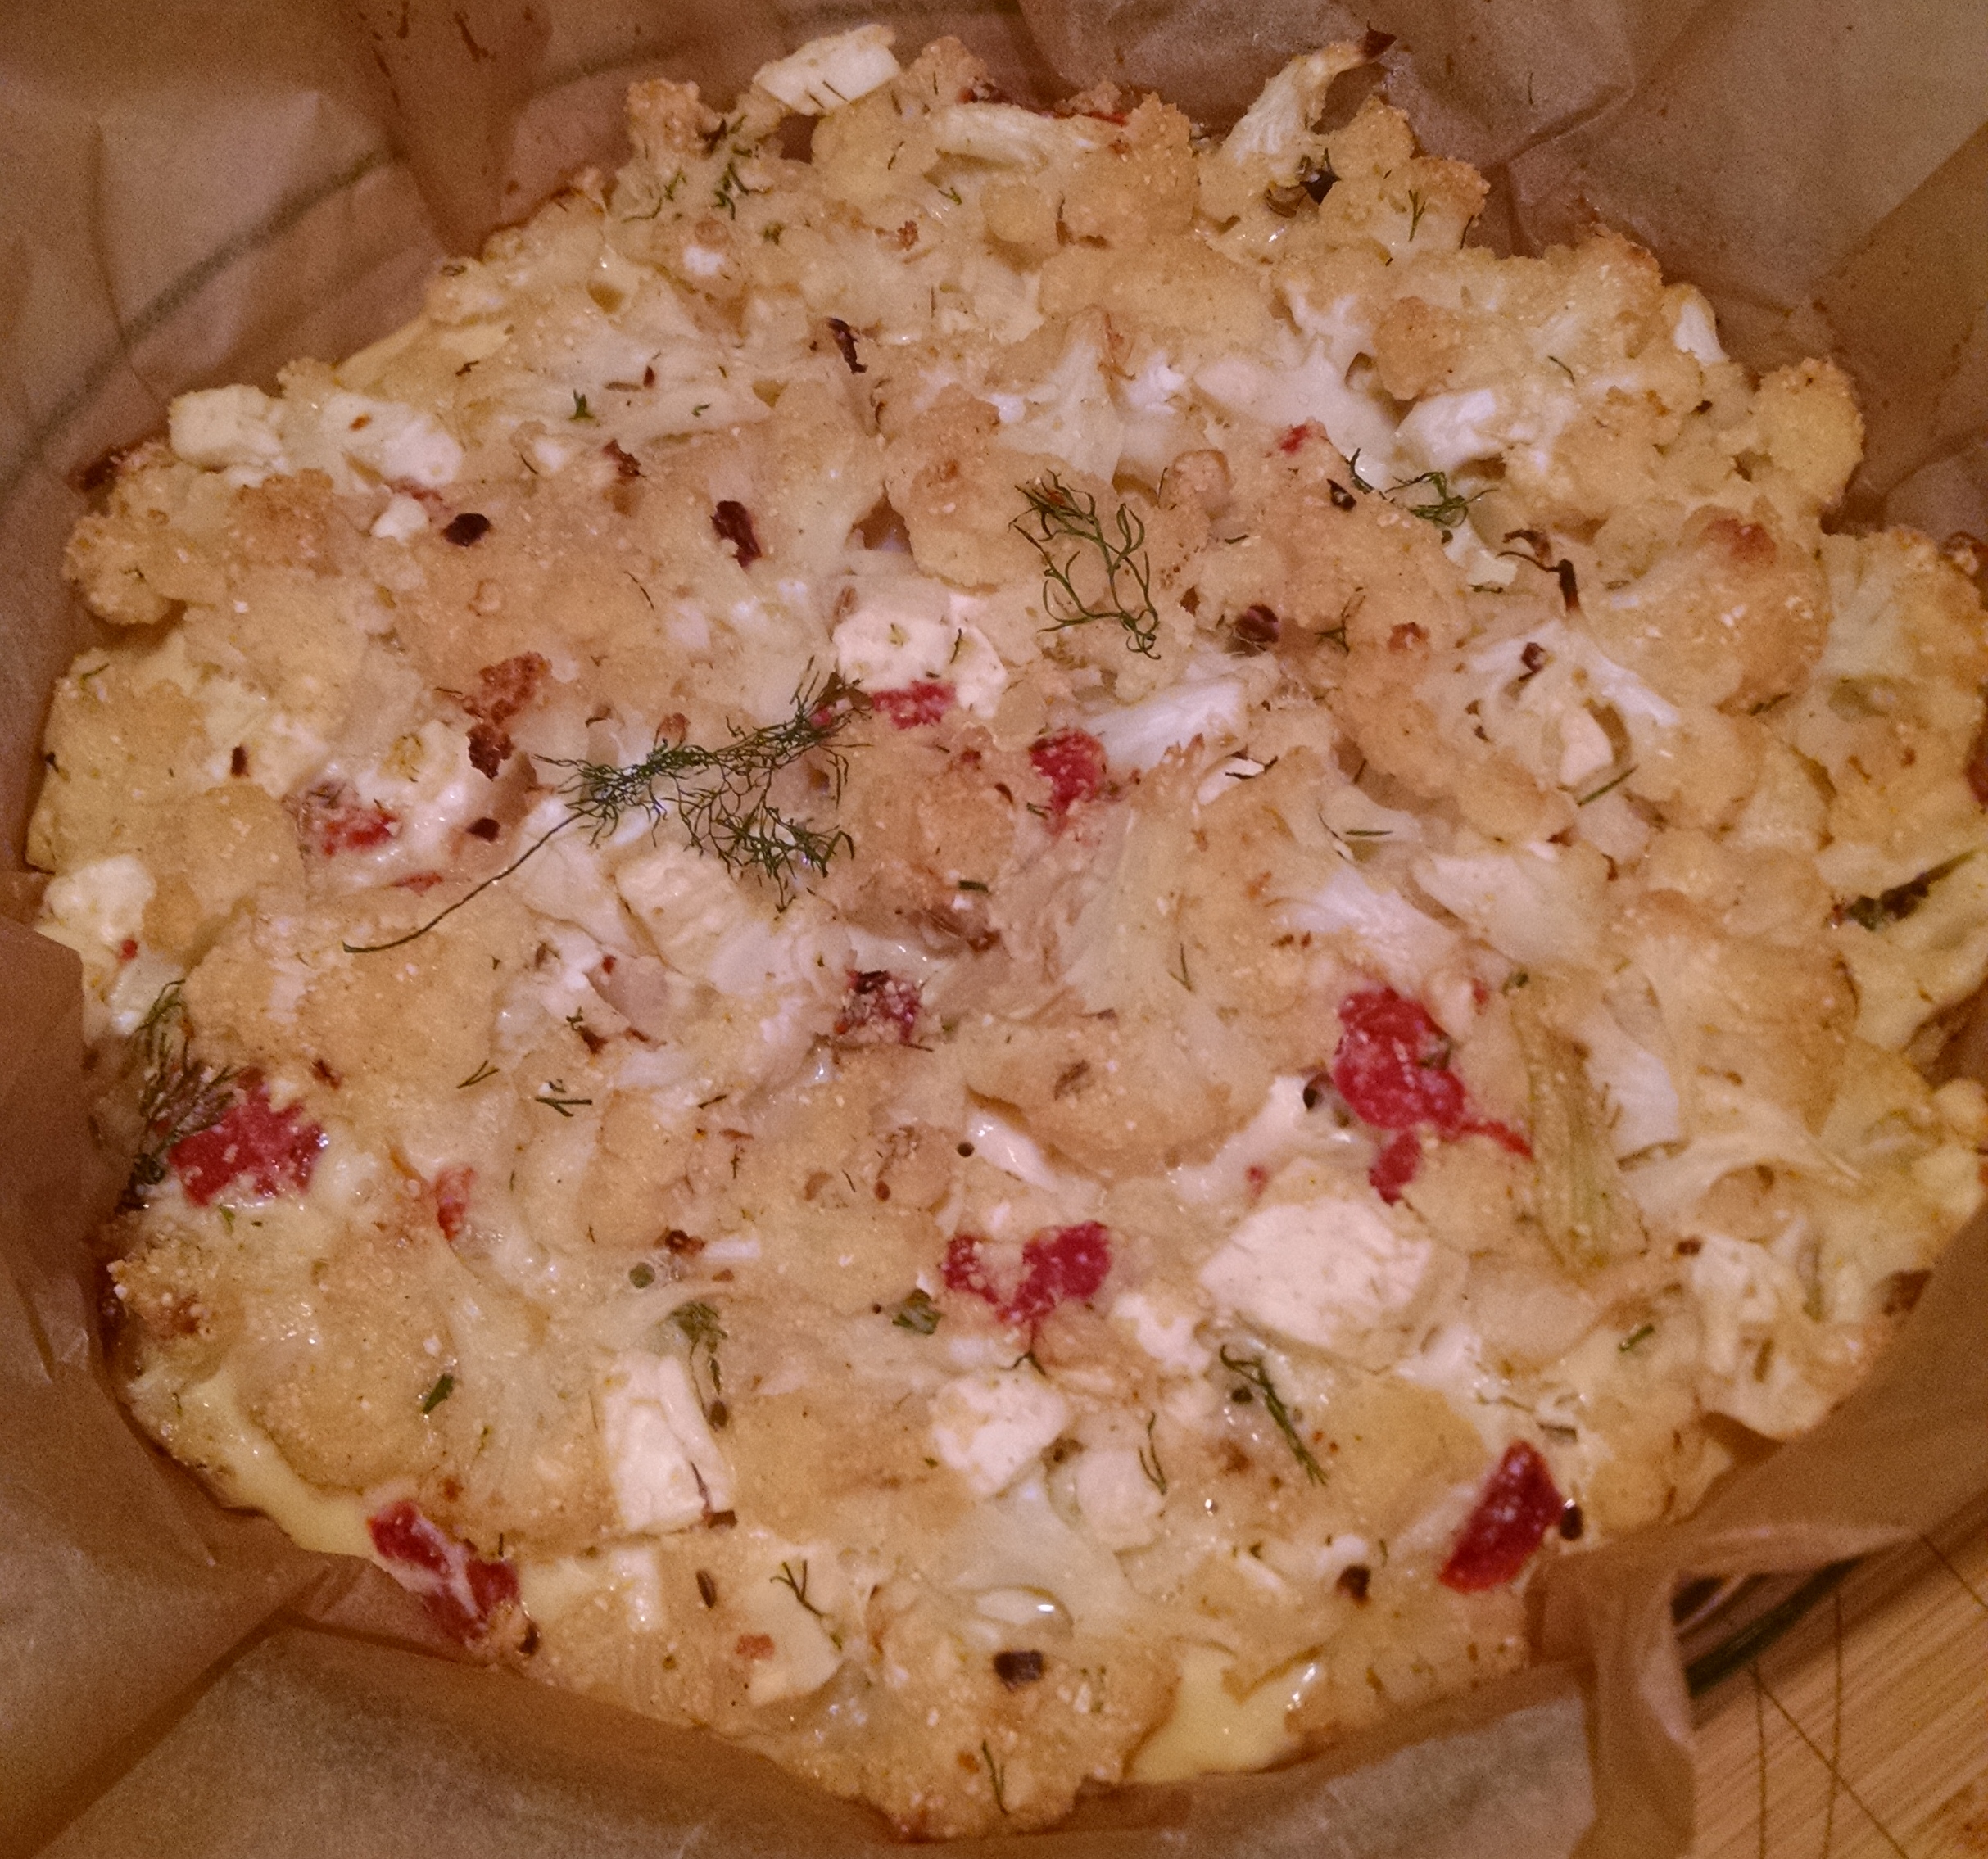
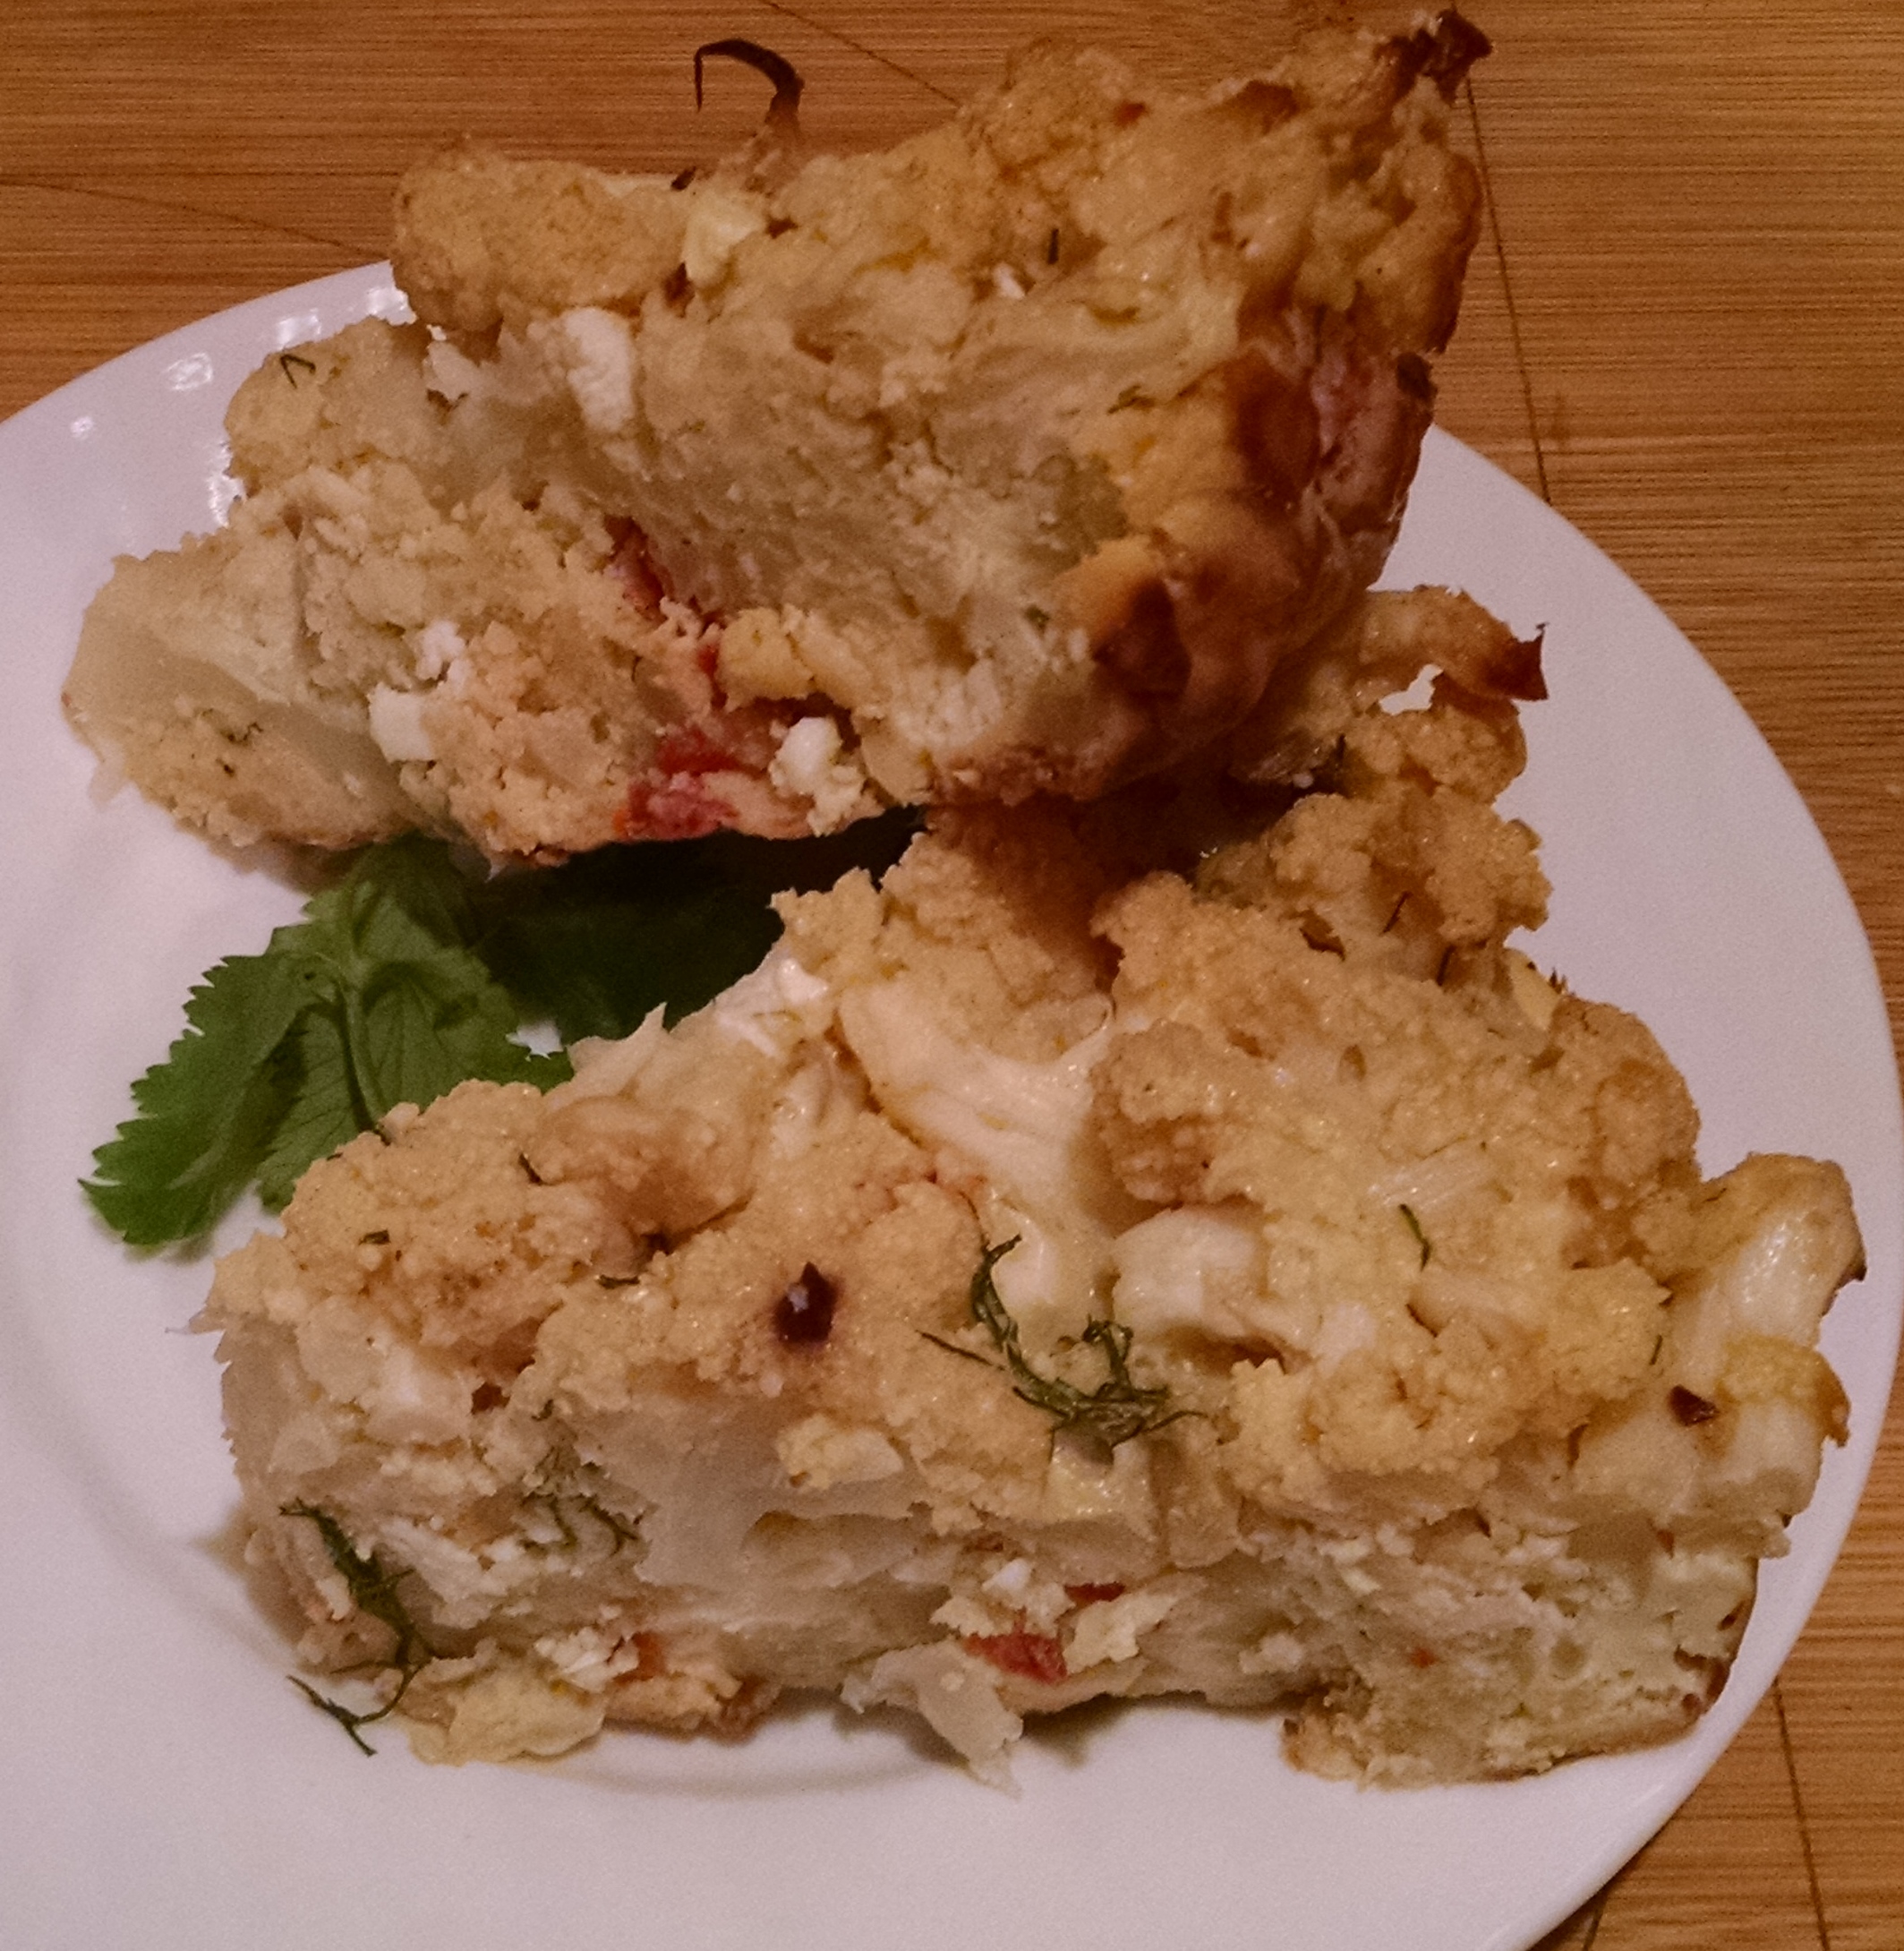
We tried a lot of different things with cauliflower, mashed potatoes, roasted, sautéed with garlic, in salads, I keep saying that I will try the cauliflower crust pizza one of these days pictures look good, but Lyn found this awhile back and we finally, well she finally made again the other day. This time instead of a bunt pan she used a parchment paper lined pie dish came out just as good and was easier to remove from pan and cut just didn’t settle as well.
This healthy, savory cauliflower cake recipe falls somewhere between a quiche and a meatless meatloaf. Garbanzo bean flour adds nutty flavor plus protein to make the cake a satisfying vegetarian main dish recipe. The flavor is best when the cake is warm or at room temperature, so it’s an ideal choice for a buffet.
8 servings | Active Time: 50 minutes | Total Time: 1 3/4 hours
Ingredients
1 medium head cauliflower (about 2 pounds), trimmed and broken into small florets
1 tablespoon extra-virgin olive oil
1 medium onion, thinly sliced
3/4 teaspoon caraway seed, ground or crushed
1/2 teaspoon ground coriander
1/2 teaspoon crushed red pepper, or to taste
3/4 teaspoon salt, divided
3/4 cup garbanzo bean flour (see Tip)
1/4 cup all-purpose flour or gluten-free flour blend
1/2 teaspoon baking powder
6 large eggs
1 jarred roasted red pepper, rinsed and chopped (about 1/2 cup)
3/4 cup crumbled feta cheese
3 tablespoons chopped fresh dill, divided
Preparation
Preheat oven to 350°F. Line the bottom and sides of a 9-inch springform pan with parchment paper.
Bring about 1 inch of water to a boil in a large pot fitted with a steamer basket. Add cauliflower and steam until tender, 8 to 10 minutes.
Heat oil in a large skillet over medium heat. Add onion and cook, stirring, until tender and golden, about 8 minutes. Add caraway seed, coriander, crushed red pepper and 1/2 teaspoon salt; cook, stirring, until fragrant, about 1 minute. Gently stir in the steamed cauliflower, doing your best not to break up the florets, and cook for 2 to 3 minutes to combine the flavors.
Whisk garbanzo bean flour, all-purpose flour (or gluten-free blend), baking powder and the remaining 1/4 teaspoon salt in a bowl. Whisk eggs in a large bowl until mixed. Sprinkle the dry ingredients over the eggs and whisk to combine and eliminate most of the lumps. Stir in roasted red pepper, feta and 2 tablespoons dill. Add the cauliflower mixture and gently stir to combine. Spread the mixture evenly into the prepared pan.
Bake until the top is golden and the cake is set, 35 to 45 minutes. Let cool to warm; remove the pan sides and the parchment. Serve warm or at room temperature, garnished with the remaining 1 tablespoon dill.
Nutrition
Per serving : 187 Calories; 9 g Fat; 4 g Sat; 4 g Mono; 152 mg Cholesterol; 15 g Carbohydrates; 11 g Protein; 2 g Fiber; 563 mg Sodium; 296 mg Potassium
Garbanzo bean flour, made from ground dried garbanzo beans (aka chickpeas), is a gluten-free flour used in many traditional Middle Eastern recipes. Look for it in natural-foods stores and/or in well-stocked supermarkets in the gluten-free section. Once opened, store airtight in the freezer.
WHFoods Recommendations
You’ll want to include cauliflower as one of the cruciferous vegetables you eat on a regular basis if you want to receive the fantastic health benefits provided by the cruciferous vegetable family. At a minimum, include cruciferous vegetables as part of your diet 2-3 times per week, and make the serving size at least 1-1/2 cups. Even better from a health standpoint, enjoy cauliflower and other vegetables from the cruciferous vegetable group 4-5 times per week, and increase your serving size to 2 cups.
As with all vegetables be sure not to overcook cauliflower. We suggest Healthy Sautéeing cauliflower rather than the more traditional methods of boiling or steaming, which makes them waterlogged, mushy and lose much of its flavor. Cut cauliflower florets into quarters and let sit for 5 minutes before cooking. For great tasting cauliflower add 1 tsp of turmeric when adding the cauliflower to the skillet. …..read more
This is Church steeple from office window, I liked the clouds. Better in real life