I think I enjoy the cooking more than eating, there is nothing better than to watch the smile grow after someone’s first bite. Note from Steve: I am a flow of thought writer and apologize up front if I lose you. My family is used to it.
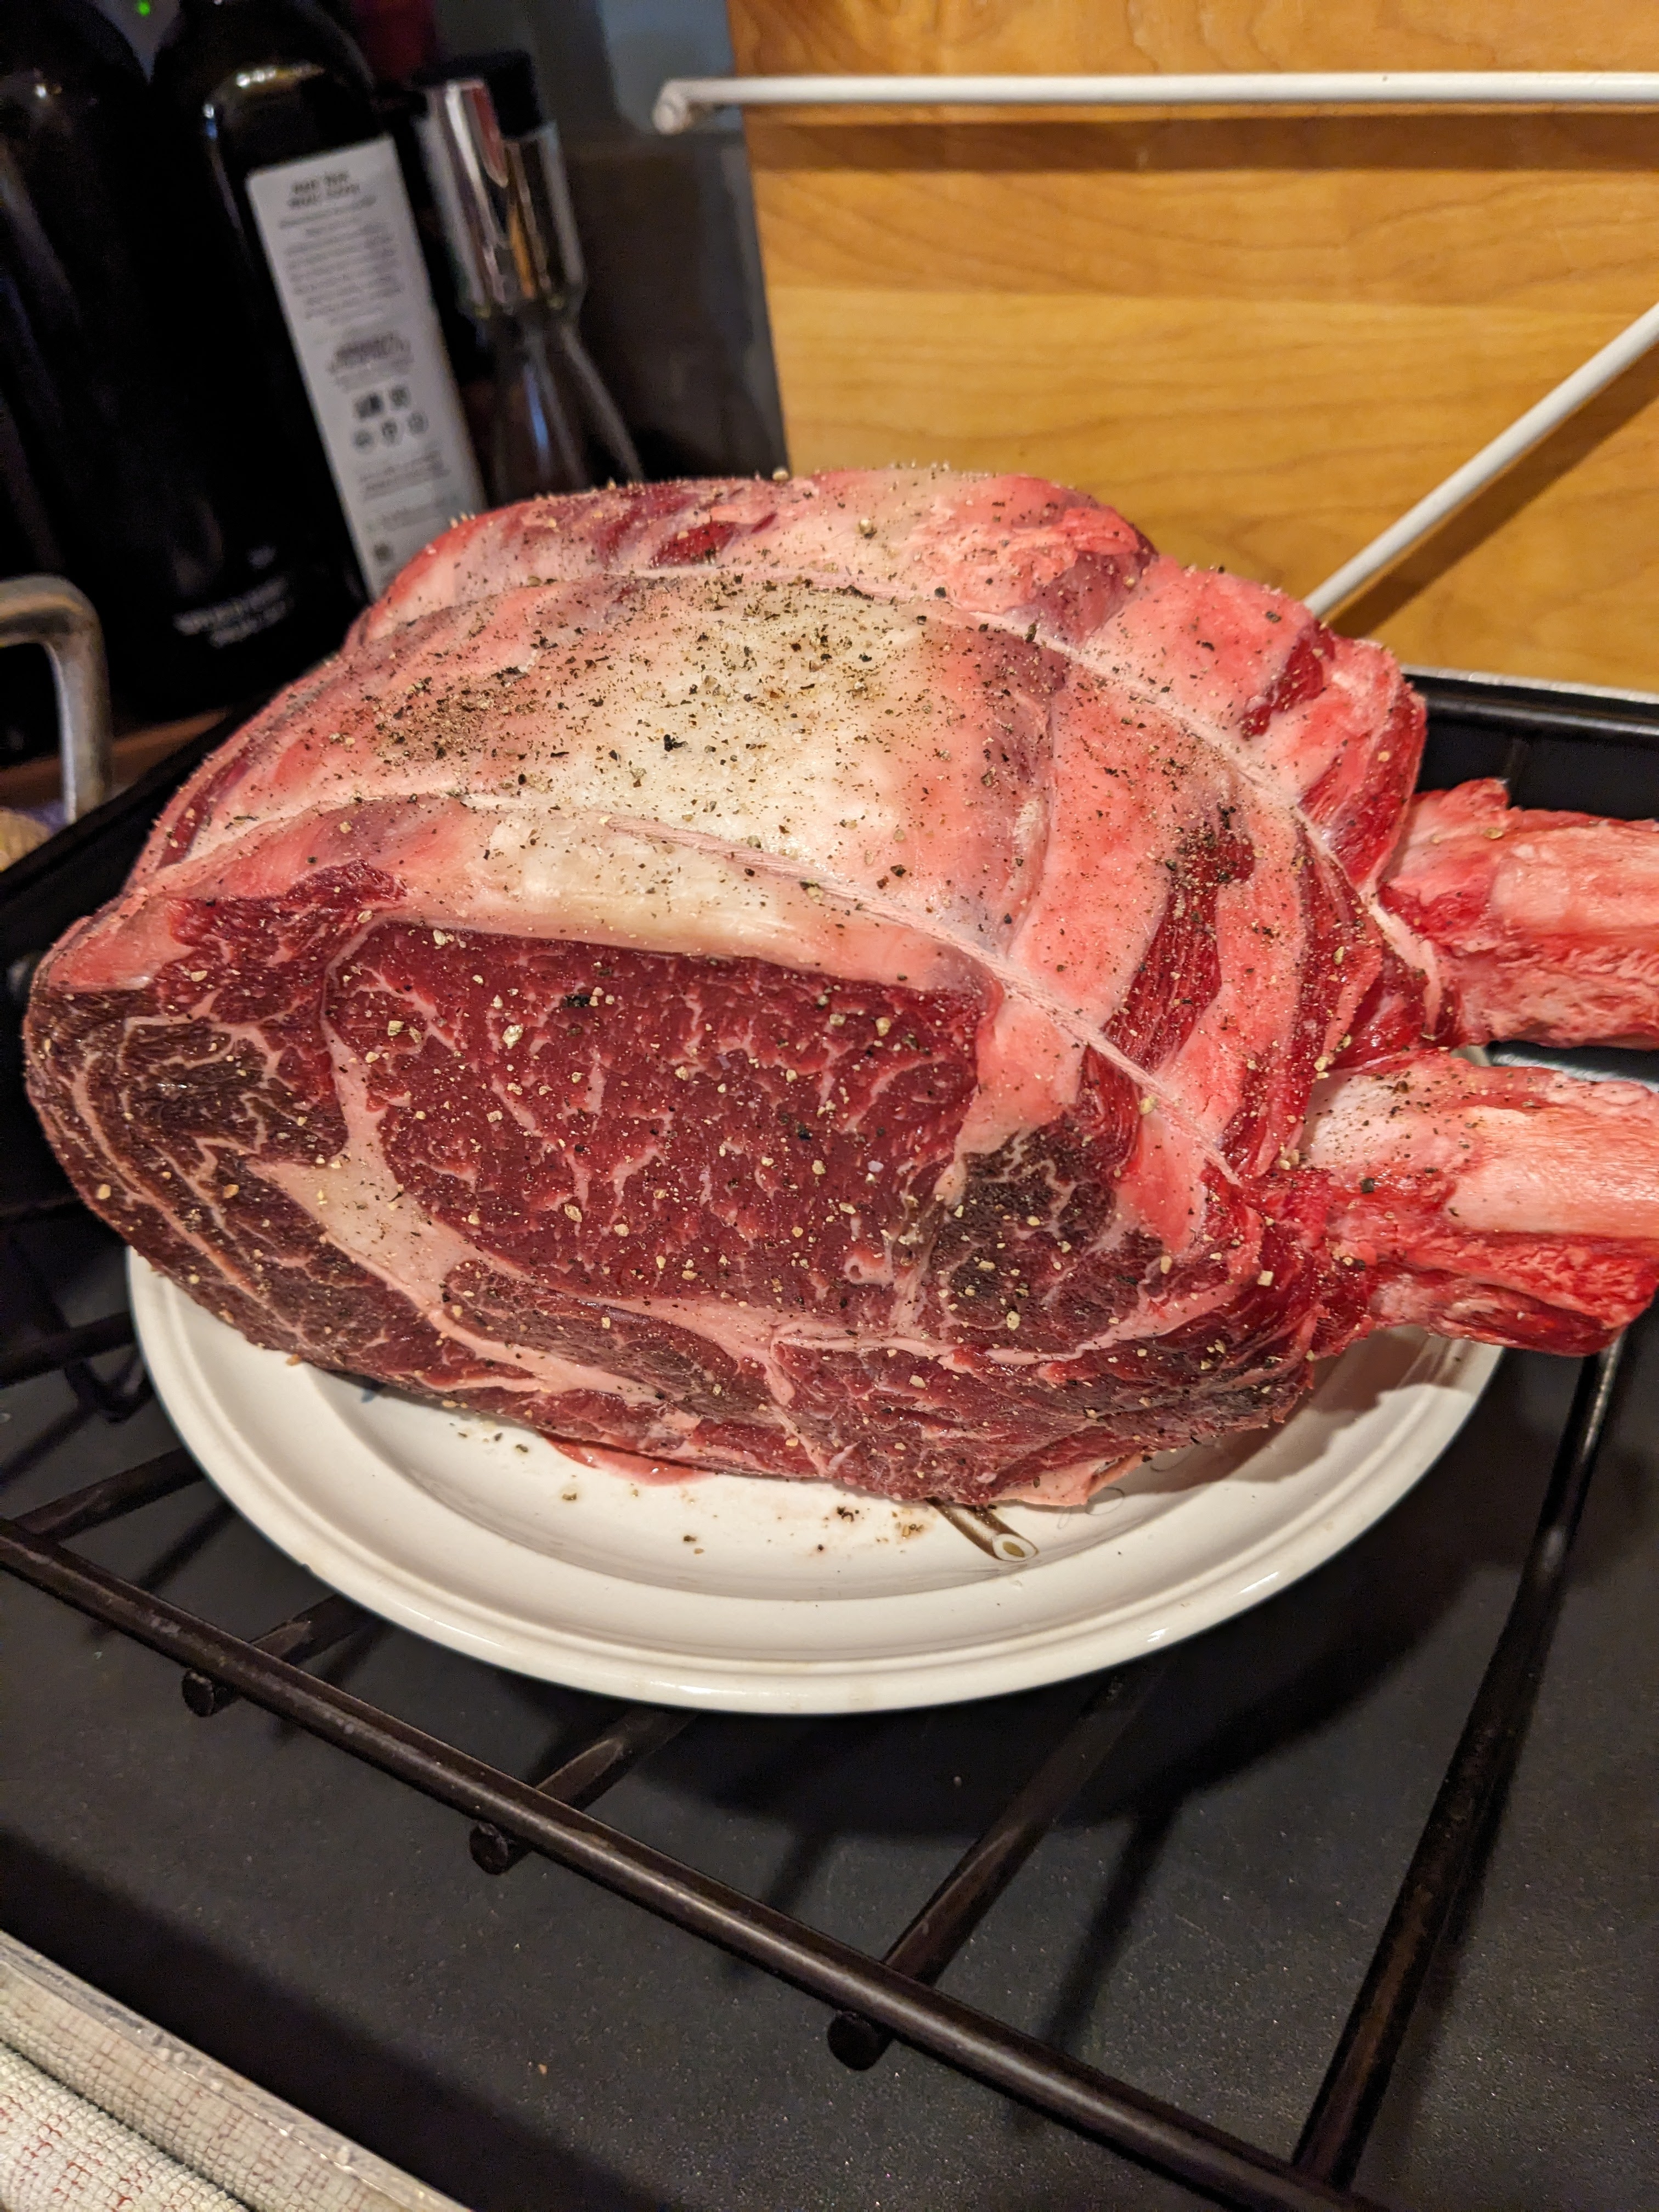
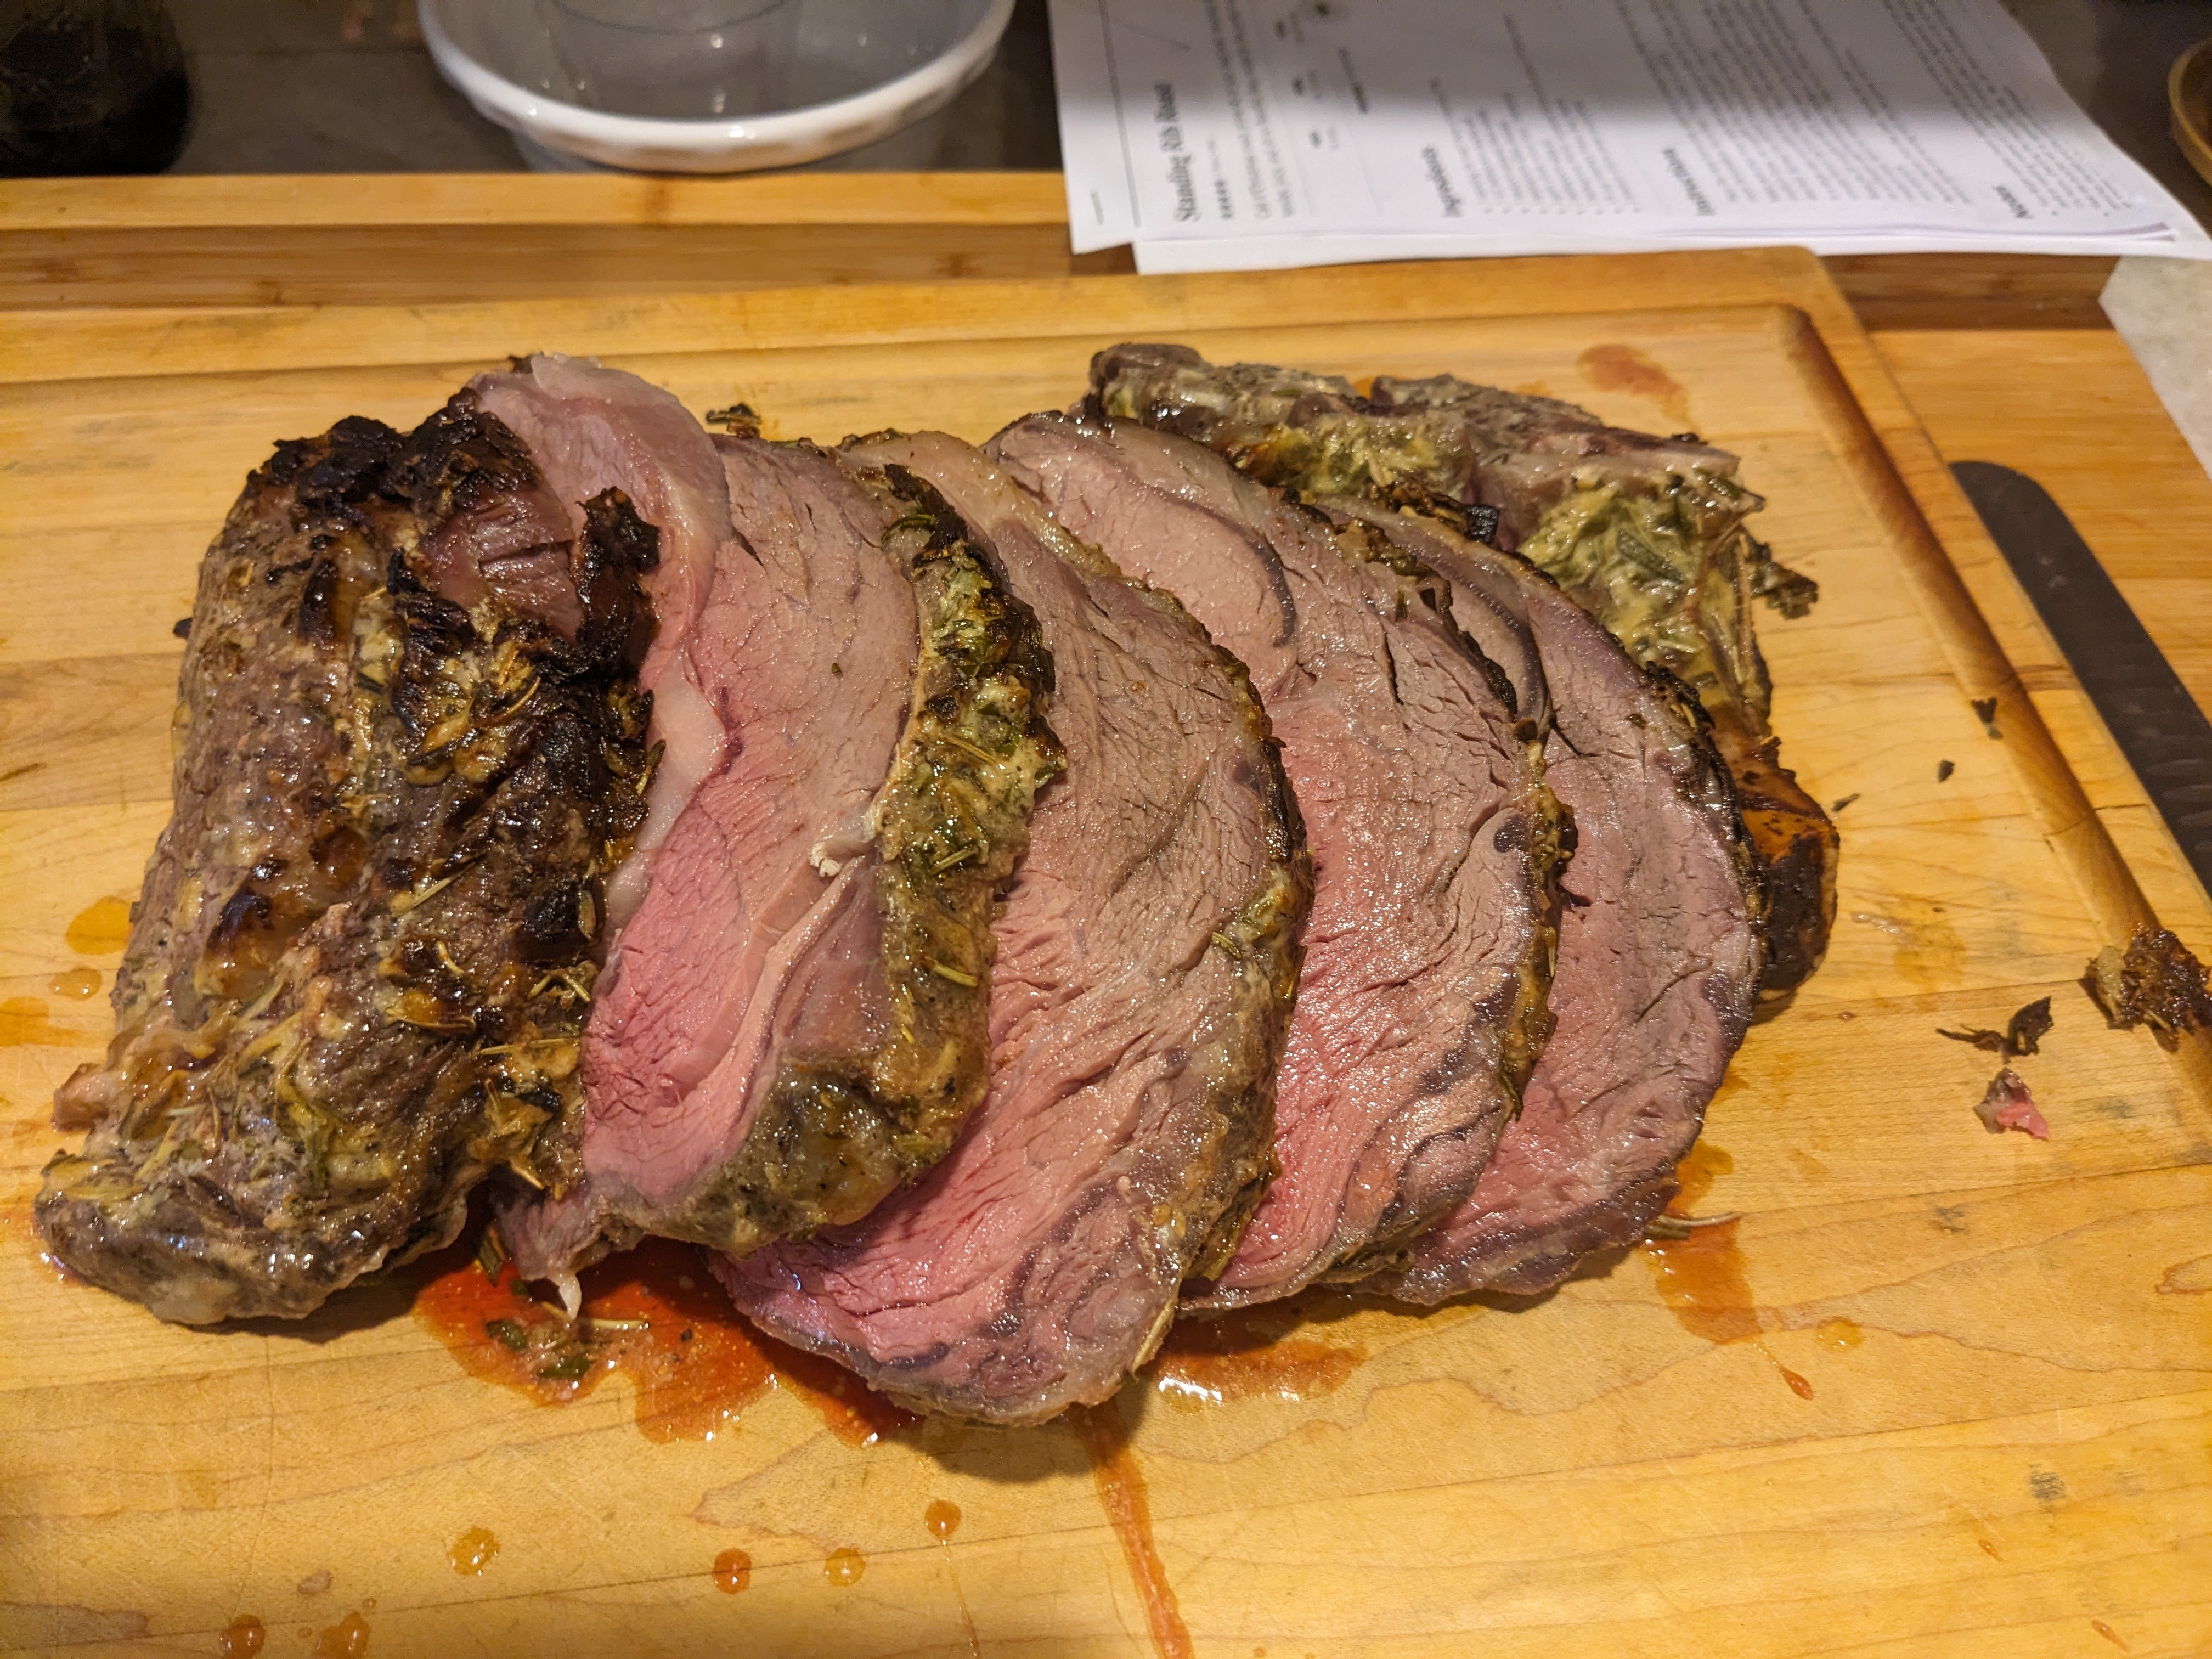
I never made a rib roast before and I always kid my wife that I want to make one. Kid because she knows as well as I do that it goes right through me. But I love it so tender and the taste of the crust out of this world. The last time I had one was the year I retired and on my goodbye tour to the Florida office I drove to my brothers over by Jacksonville. Didn’t realize that it would be a 4ish hour drive, but he and Nancy are worth it.
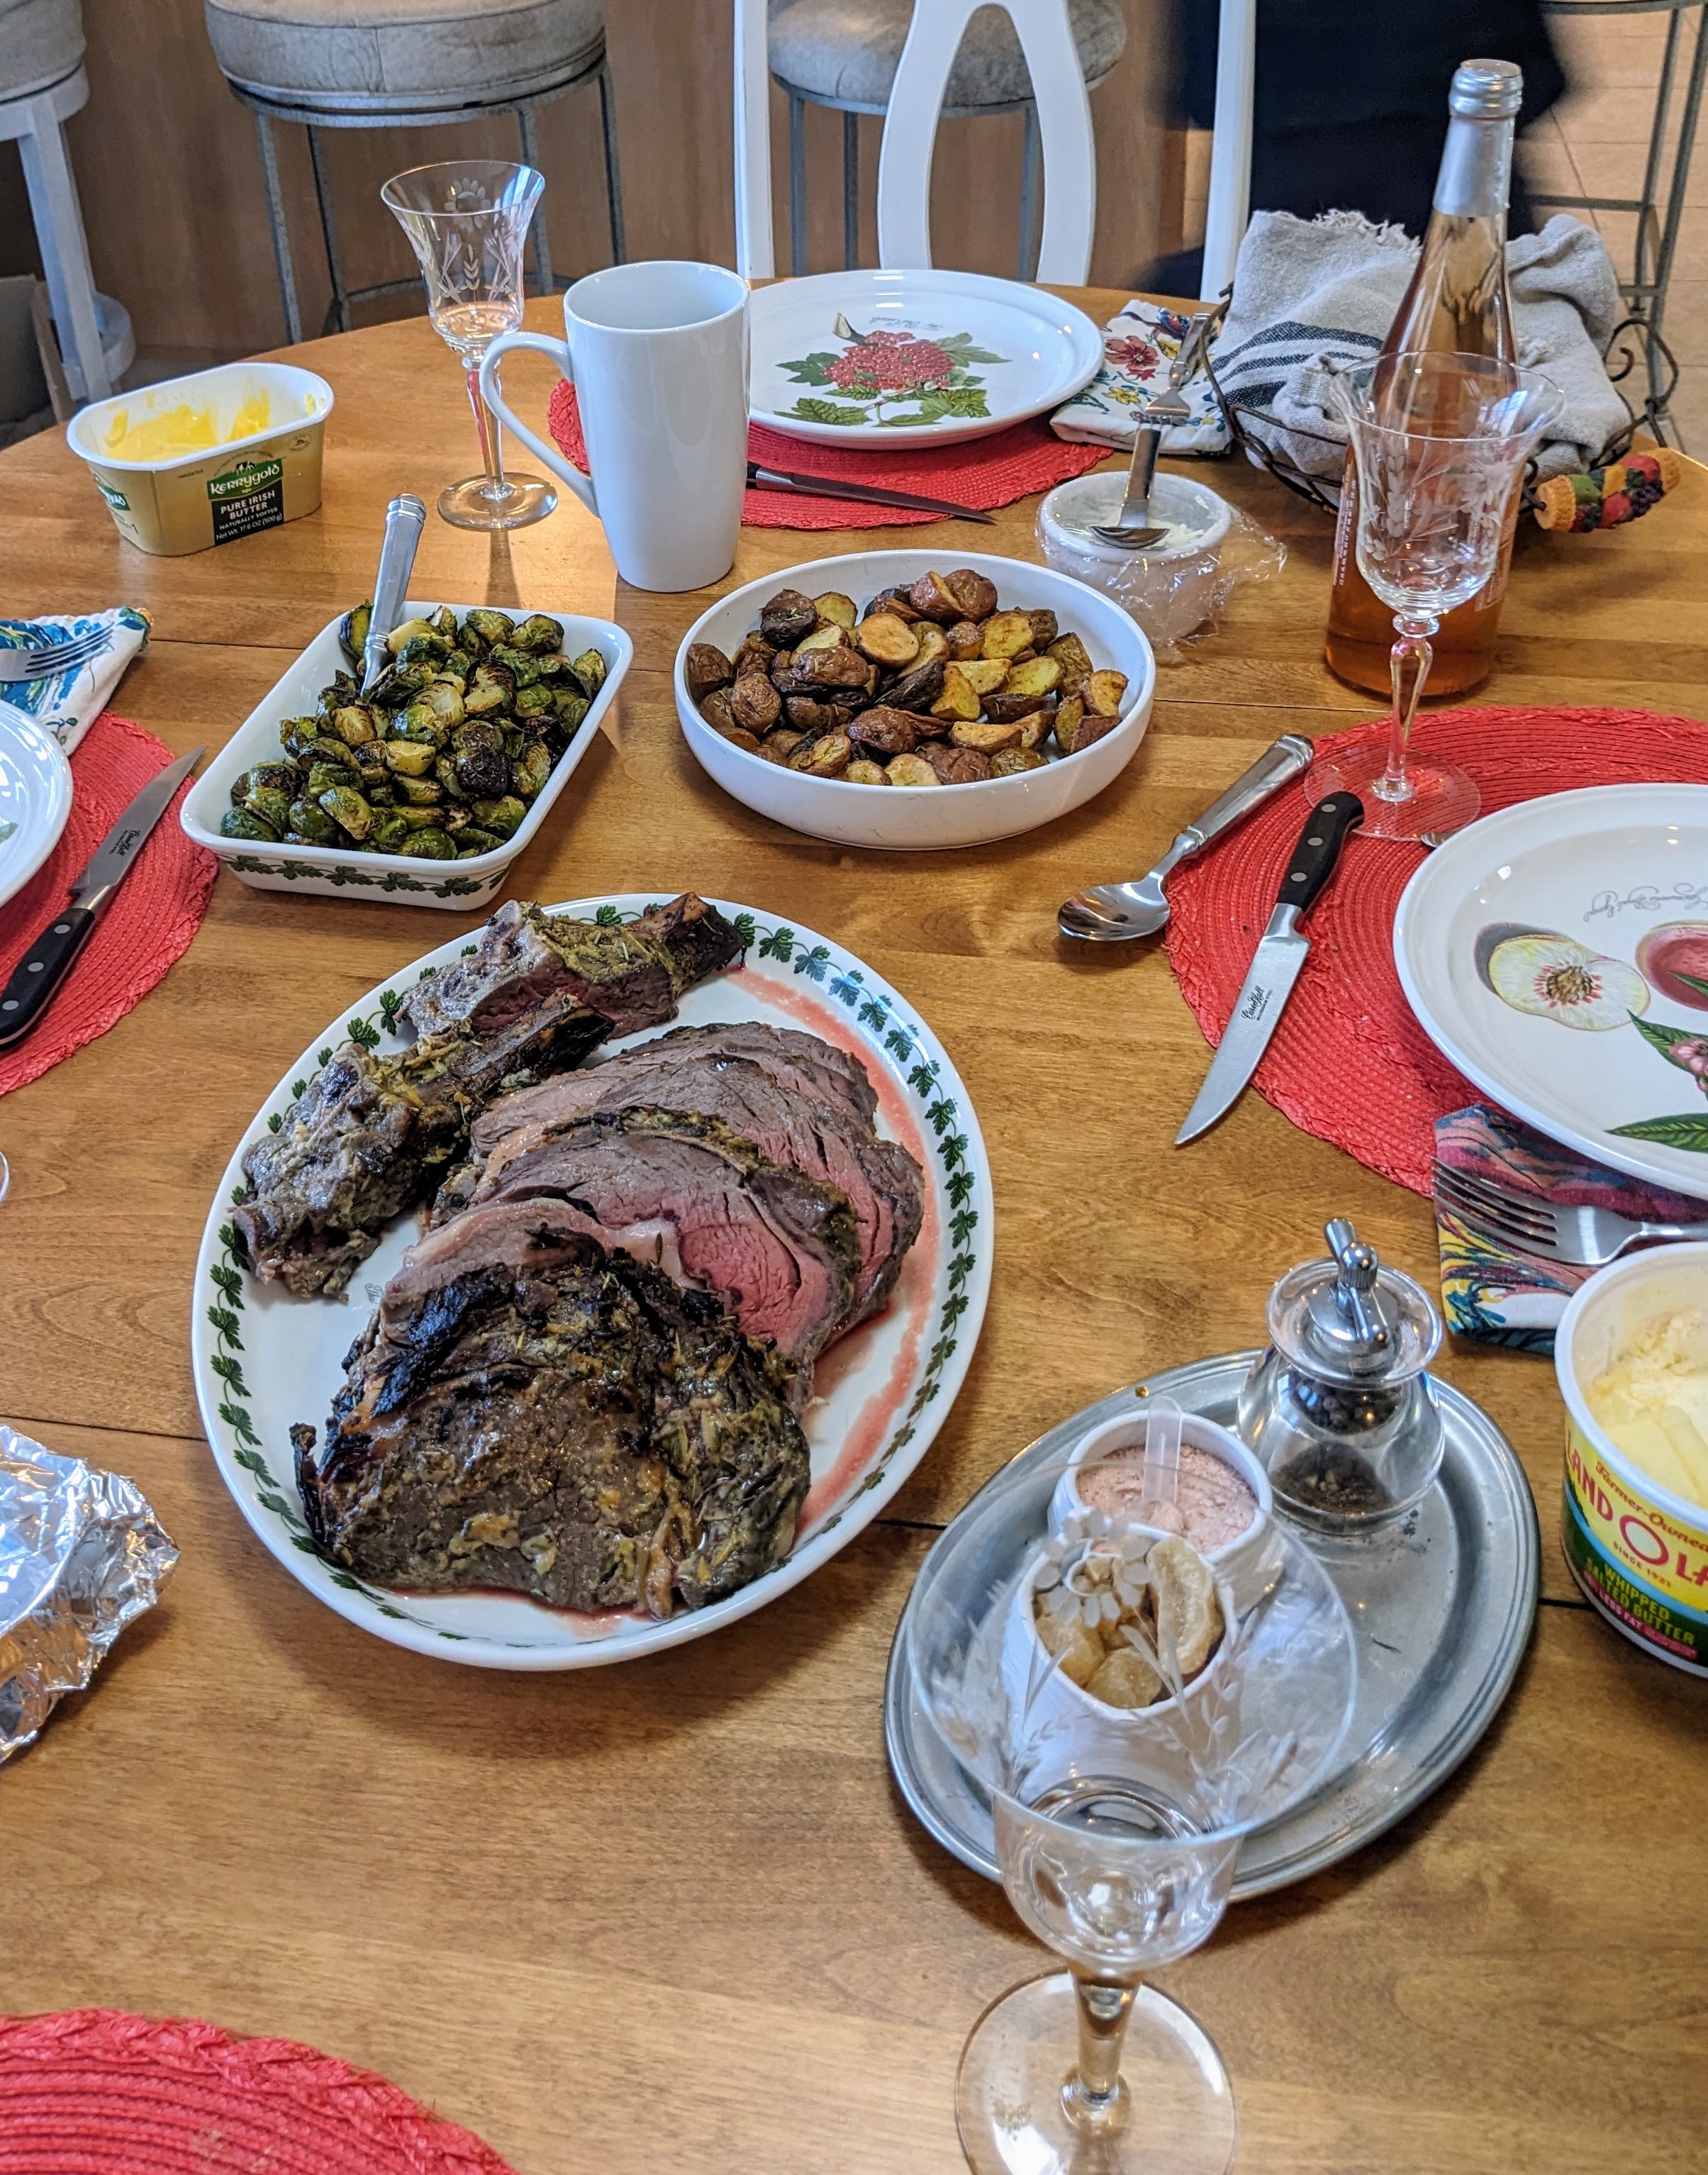
Anyway I was nostalgic this year and remembering we always had one for family holiday especially when Diane bought a 8 rib roast thinking that it was 1 rib per person not per couple. and I must have made a good enough argument because we had one this year for Xmas. And to answer your question yes it did live up to all expectations.
Whole foods was having a sale on their grass fed roast so I picked up a 4 lb. 2 rib.
Ingredients
1 standing rib roast* bone-in (4 pounds, 2 ribs)
1 1/2 tablespoons kosher salt
1 teaspoon ground black pepper
3 tablespoons Dijon mustard
3 garlic cloves minced (about 1 tablespoon)
2 tablespoons olive oil
2 tablespoons freshly squeezed lemon juice about 1/2 medium lemon
1/4 cup rosemary leaves finely chopped
How
For at least an hour but I did day before salt and pepper generously about 3/4 tsp per pound, pepper to taste about 1/2 for mine. mix together in small bowl and rub into all sides
Place the meat bone side down on a rimmed baking sheet and sprinkle on all sides with the salt and pepper. Let stand at room temperature for at least 1 hour prior to cooking
Note: I did something I’ve been playing with for meats and saw many did in other recipe, the day before I did the salt and pepper and stored in refrigerator uncovered. I also allowed 4-5 hours to get to room temperature.
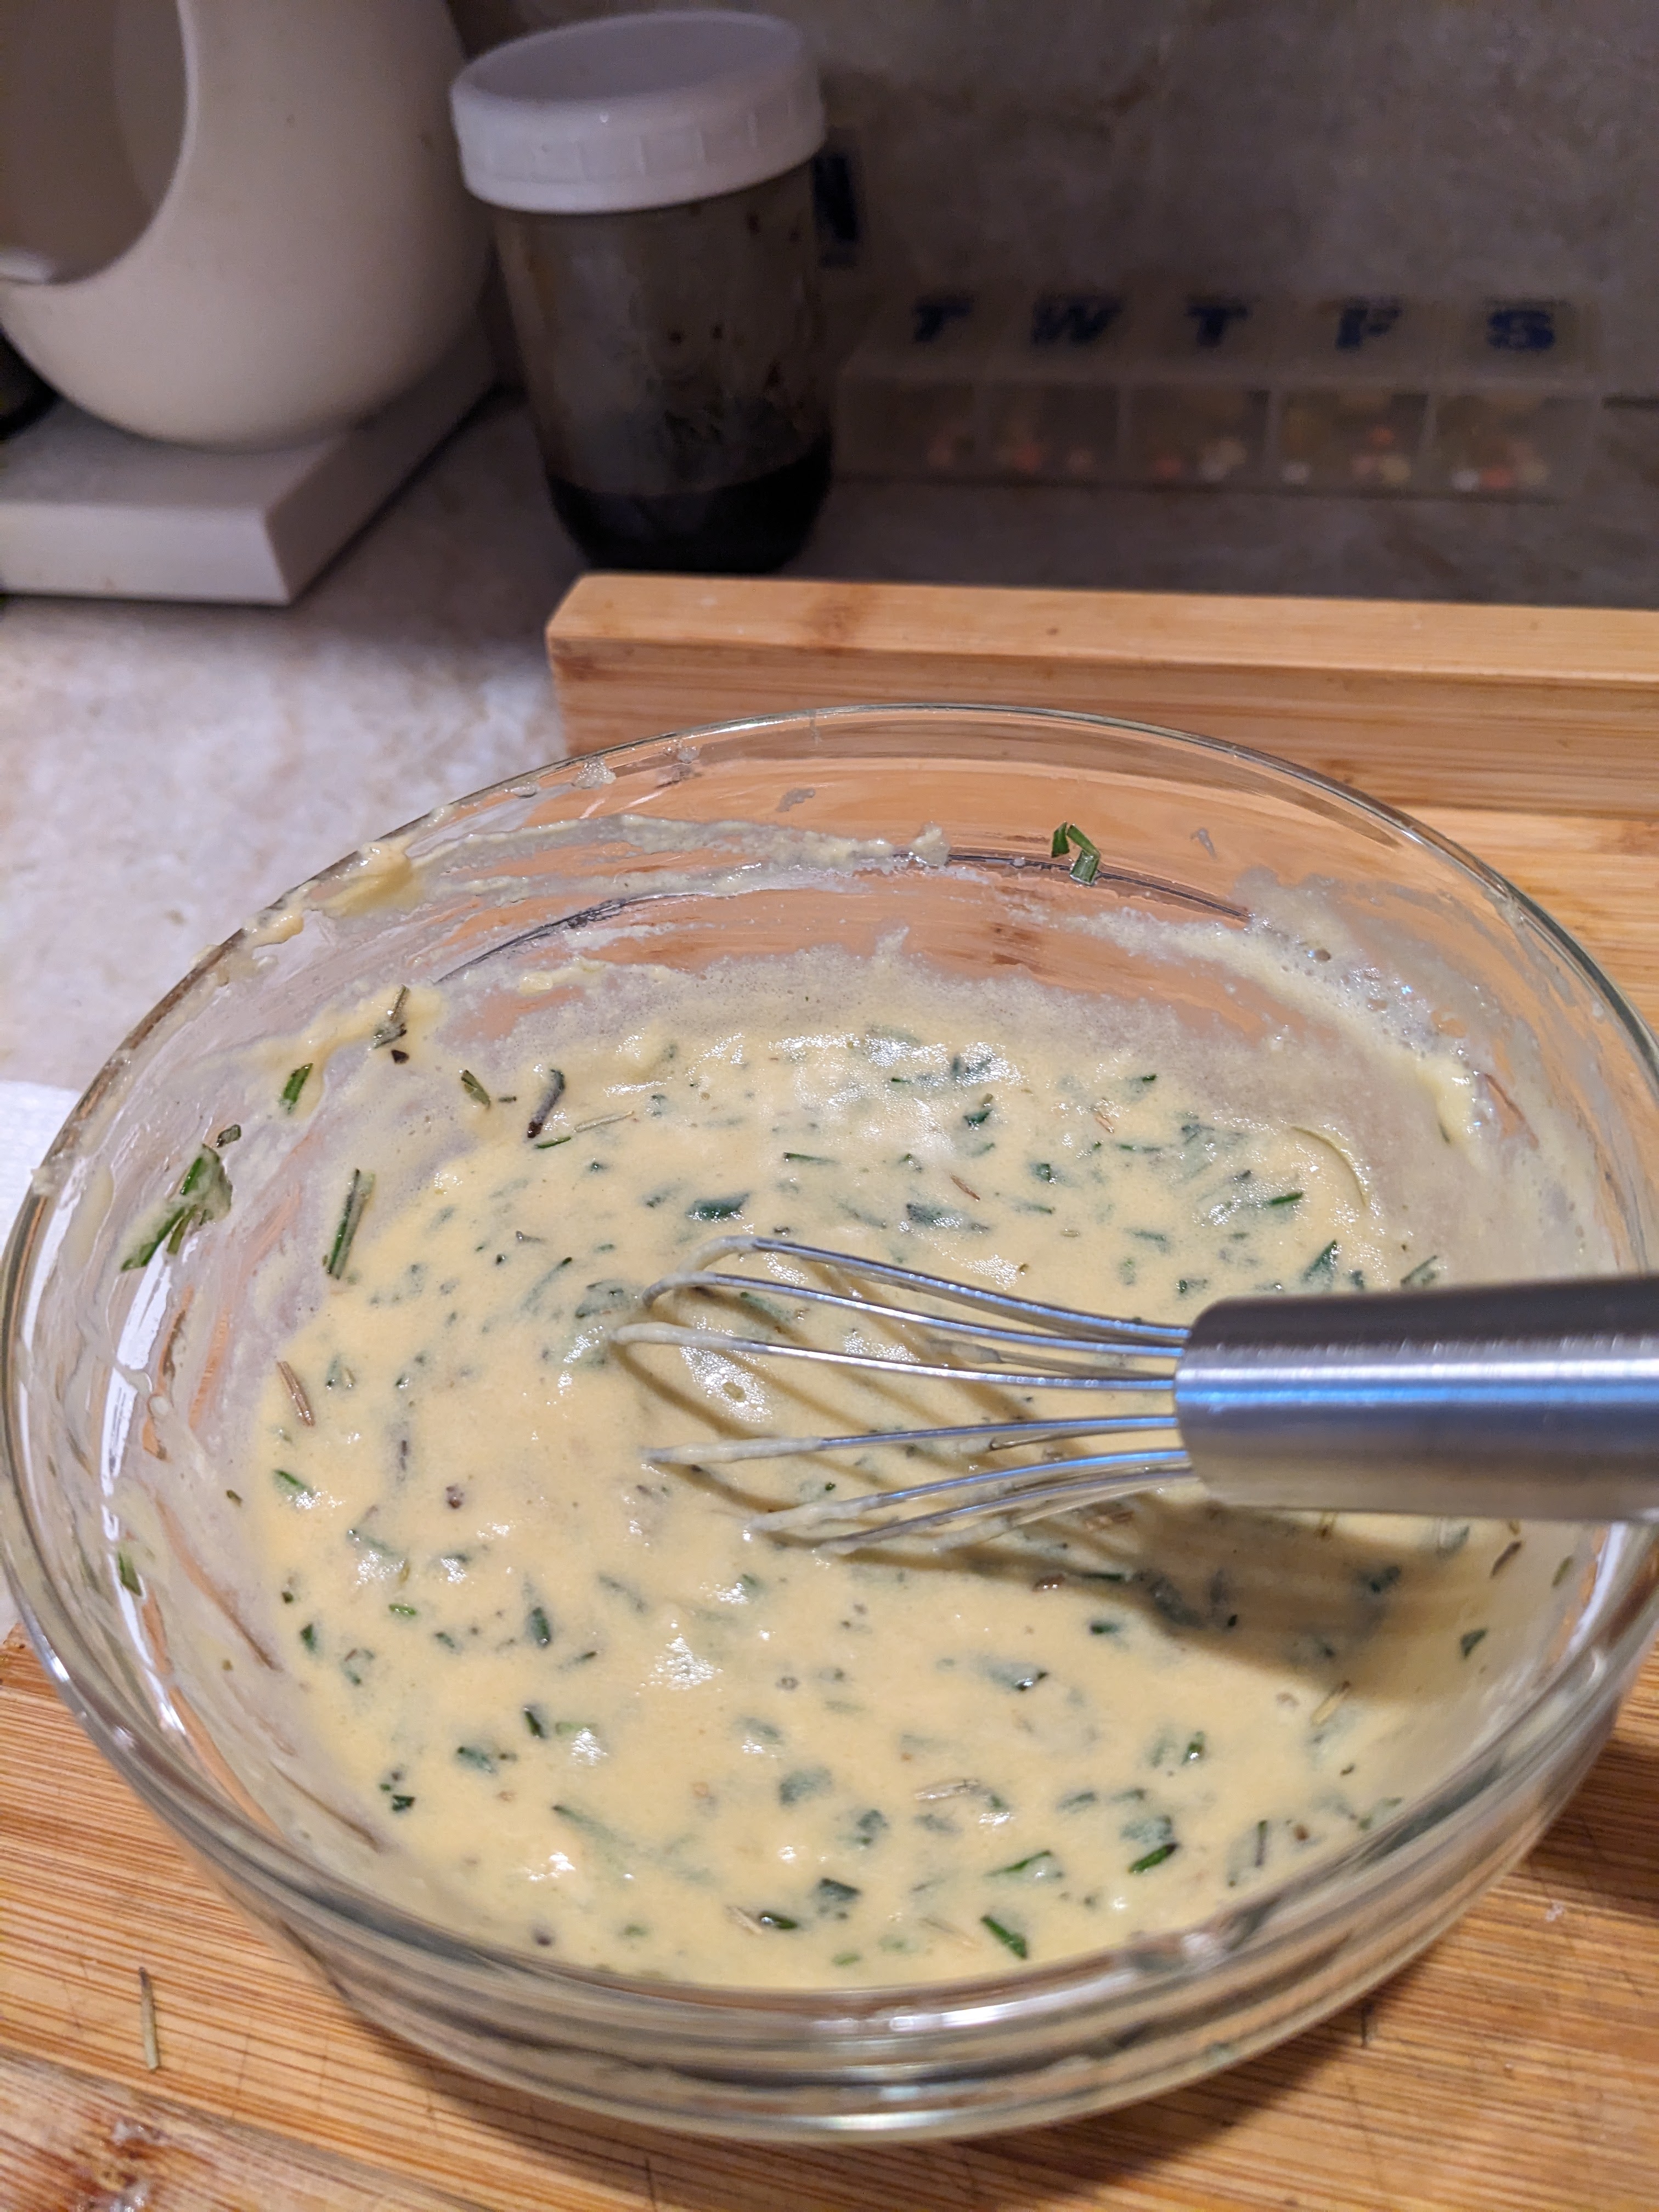
Make sure your oven racks are positioned such that the rib roast can fit comfortably. Preheat the oven to 450°F. In a medium bowl, stir together the mustard, garlic, olive oil, lemon juice, and rosemary. Spread the mustard mixture all over the meat. Sorry forgot to take picture of this
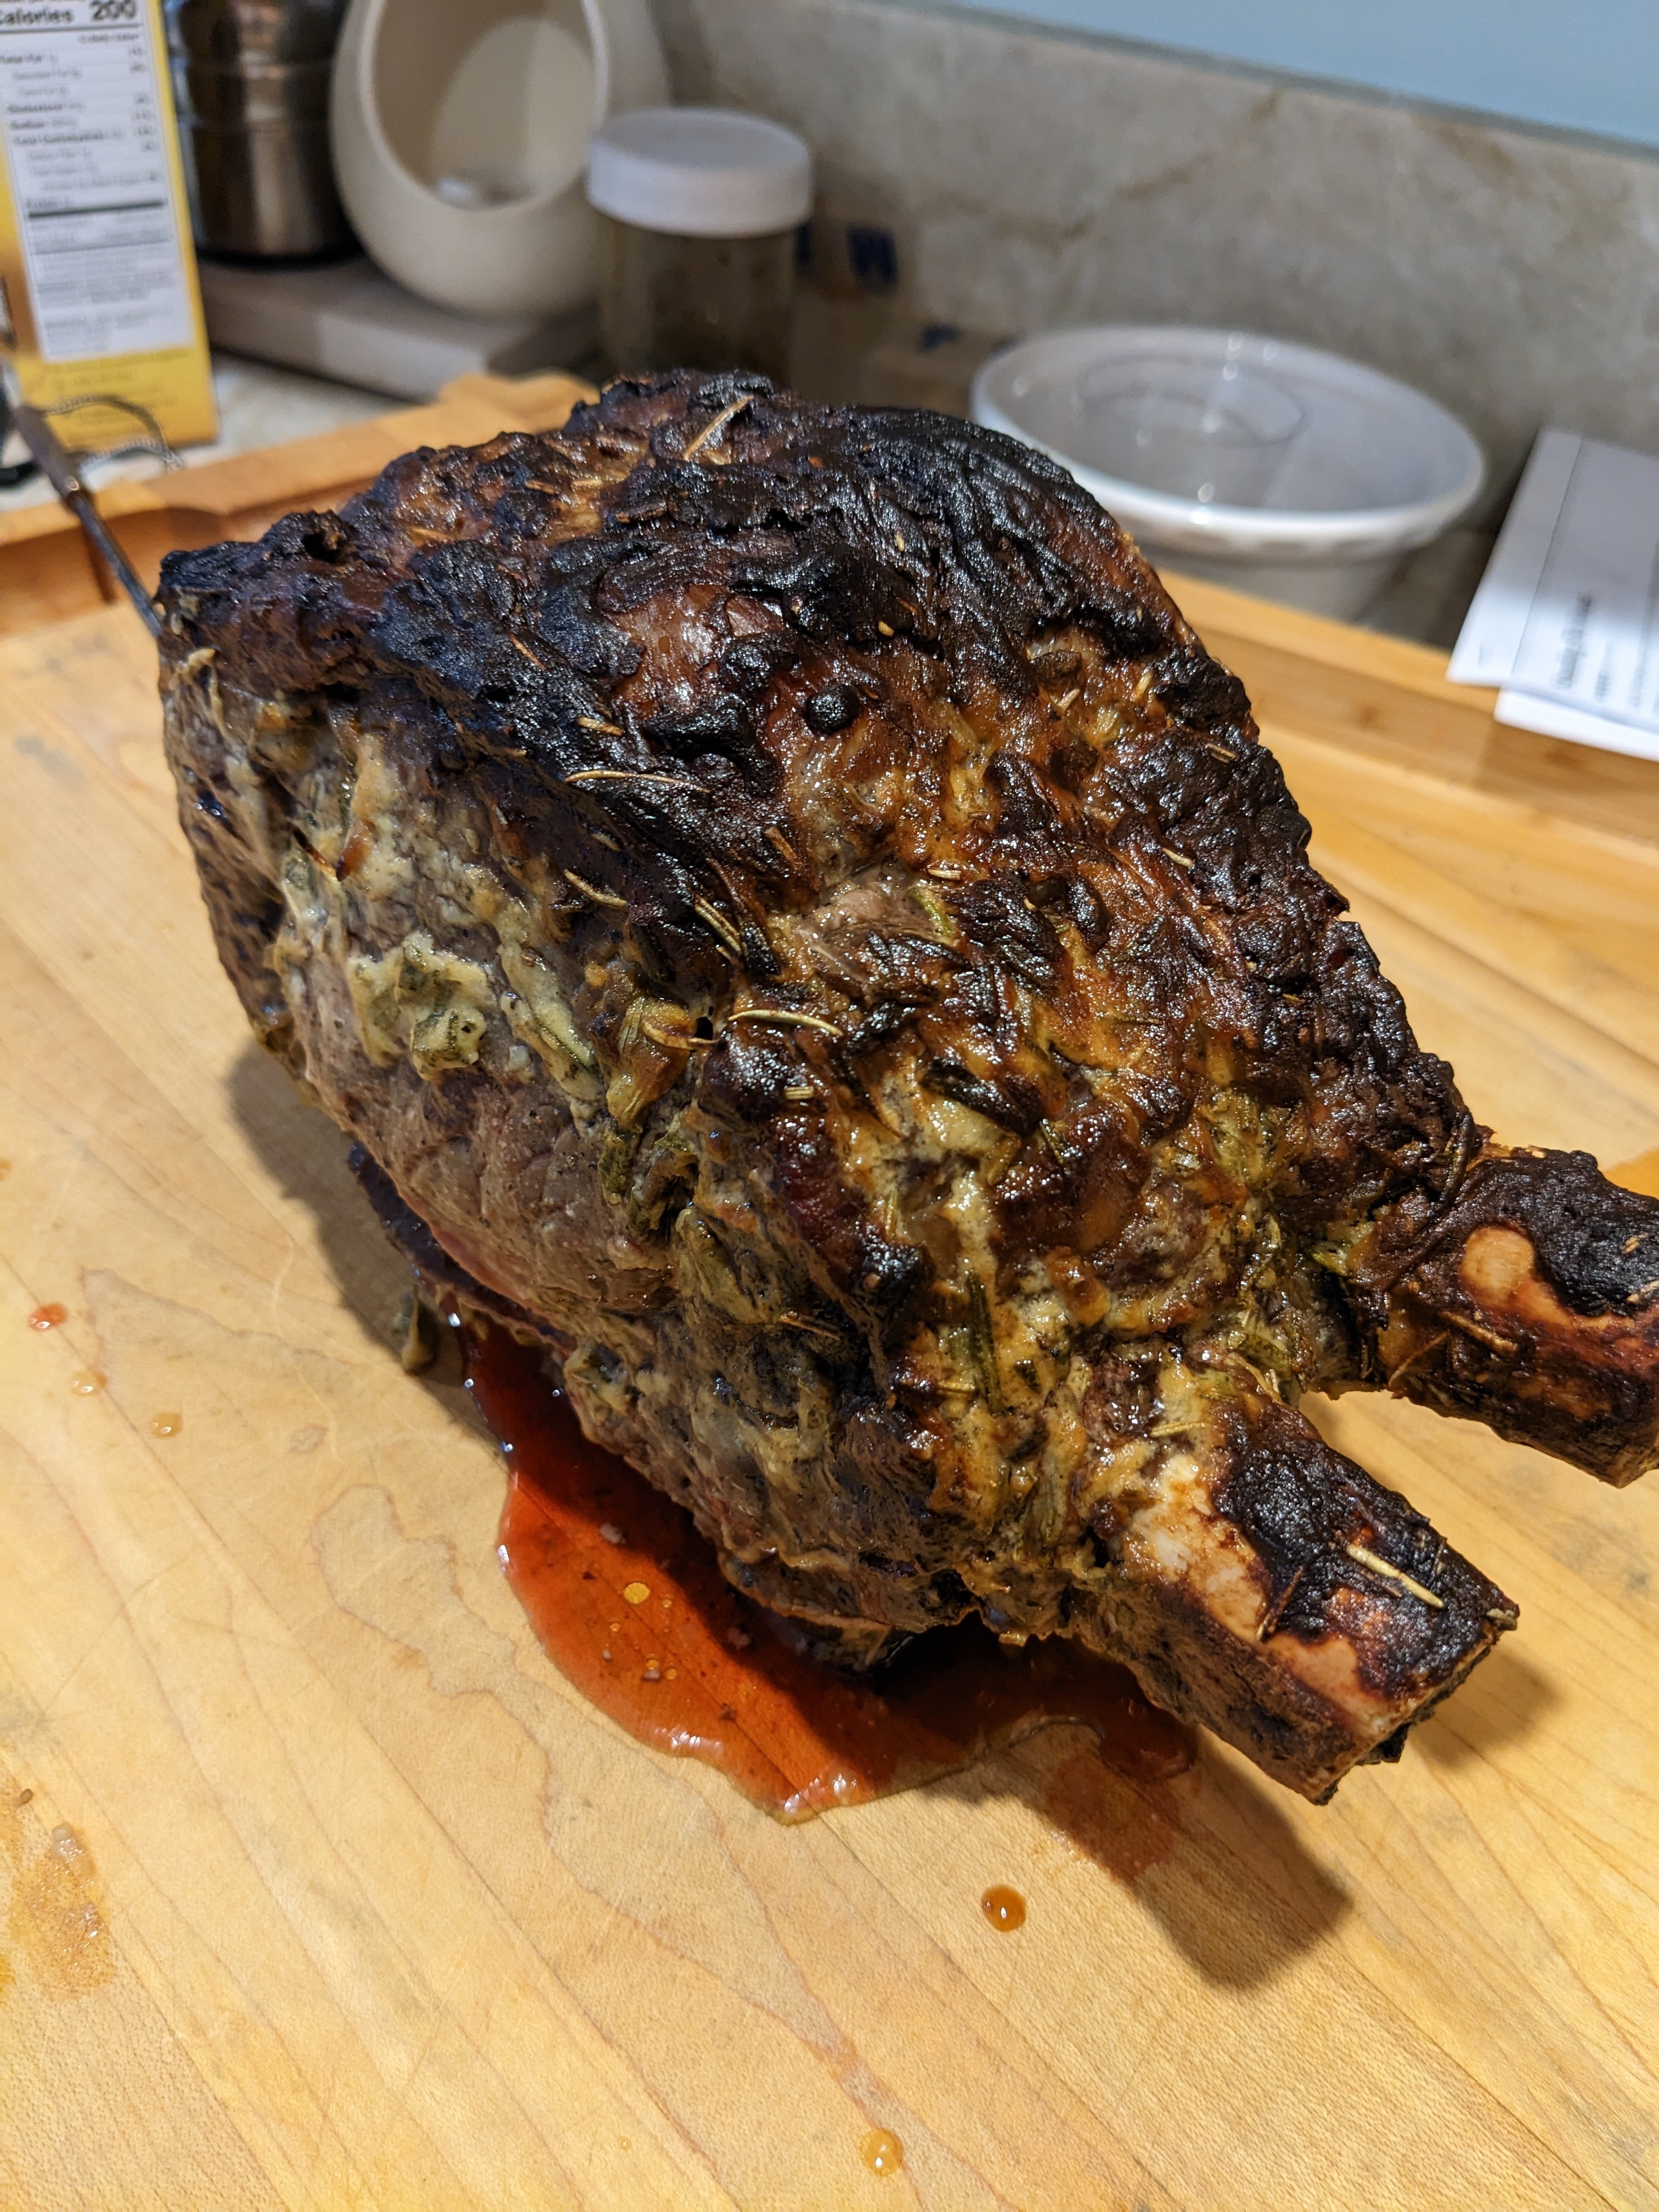
Roast for 20 minutes at 450°F, then reduce the oven temperature to 350°F. Continue roasting until the meat registers 115°F on an instant-read thermometer inserted as close as possible to the center of the meat without touching bone (or 125°F for medium-rare), about 45 minutes to 1 hour more. Prime rib can overcook quickly, so check early and often. You want it to be nice and pink.
This depends a lot on your oven i was looking for more medium rare to medium and when the thermometer registered 134°F I took it out and covered loosely.
Remove the pan from the oven. Transfer the meat to a cutting board, tent with foil, and let rest for at least 20 minutes before slicing and serving
I recently made a turkey meatloaf with a quick BBQ glaze which both Lyn and I said will make again. I thought the glaze or similar might be good on skinless chicken thighs.
Ingredients for 5-7 skinless boneless chicken thighs
Glaze
1/4 cup ketchup
3 tbsp brown sugar , lightly packed
1.5 tbsp Coconut Secret* or soy sauce , all purpose or light (NOT dark)
1 tbsp apple cider vinegar
1 tbsp olive oil
2 tsp Worcestershire Sauce
2 clove garlics , minced
*We use this all the time instead of soy
Instructions
Preheat oven to 420 F
Use a pan large enough to fit the thighs lying flat (not bunched up/folded)
Line pan with foil (make super easy clean up), place thighs in pan.
Whisk together Glaze. Spoon over about 2/3 of the Glaze on the surface of each (not underside), put the rest to the side.
Bake 15 minutes, remove pan.
change to broiler on high, (I remember that there never used to settings for broil ) adjust shelf to be 7-8″ from heat source.
Spoon pan juices over chicken. Then spoon/dab remaining Glaze onto chicken.
Broil chicken for 8 to 10 minutes until surface is nicely caramelized.
Remove and stand for a few minutes (uncovered) before serving.
Fill a medium bowl with ice water. Cut the radicchio into quarters lengthwise, then cut away any core; thinly slice the radicchio. Submerge the radicchio in the ice water while you prepare the rest of the meal.
Peel and thinly slice enough onion to measure 1 cup (2 cups). Set aside ¼ cup (½ cup) for the salad.
In a medium frying pan over medium-high heat, warm 2 to 3 teaspoons oil until hot but not smoking. Add ¾ cup (1½ cups) onion, season with salt and pepper, and cook, stirring occasionally, until starting to soften, 2 to 3 minutes. Transfer to a plate. Wipe out the pan. While the onion is cooking, prepare the remaining pizza toppings.
Make the radicchio-hazelnut salad
Using the bottom of a bowl or cup, lightly crush the hazelnuts.
Remove the radicchio from the ice water and thoroughly dry with a paper or kitchen towel. Wipe out the bowl and return the radicchio to the bowl.
In the dry pan used for the onion, toast the hazelnuts over medium heat, stirring often, until lightly browned and fragrant, 2 to 4 minutes. Transfer to the bowl with the radicchio. Add the remaining sliced onion and maple-balsamic vinaigrette and toss to combine; season to taste with salt and pepper.
Maple syrup adds a touch of sweetness to this balsamic vinaigrette. Toss with a salad of apples, Cheddar and spinach, or serve over hot or room-temperature asparagus. Also this salad.
Make the radicchio-hazelnut salad
Using the bottom of a bowl or cup, lightly crush the hazelnuts.
Remove the radicchio from the ice water and thoroughly dry with a paper or kitchen towel. Wipe out the bowl and return the radicchio to the bowl. In the dry pan used for the onion, toast the hazelnuts over medium heat, stirring often, until lightly browned and fragrant, 2 to 4 minutes. Transfer to the bowl with the radicchio. Add the remaining sliced onion and maple-balsamic vinaigrette and toss to combine; season to taste with salt and pepper.
Combine oil, vinegar, maple syrup and mustard in a small bowl or a jar with a tight-fitting lid; whisk or shake until well blended. Season with salt and pepper to taste.
Tips
Make Ahead Tip: Cover and refrigerate for up to 3 days.
So I had 2 lbs of ground Turkey from Butcher Box and it was Taco Tuesday but that was just not hitting the spot. So instead of making my usually turkey meatloaf I google and found this . We both agreed this would be a repeat.
Servings: 6
Total Time: 1 Hour 15 Minutes
INGREDIENTS
FOR THE GLAZE
⅔ cup ketchup
⅓ cup dark brown sugar, packed
1½ tablespoons apple cider vinegar
½ teaspoon Dijon mustard
FOR THE MEATLOAF
1 tablespoon olive oil
1 medium yellow onion, minced
3 cloves garlic, minced
1¼ teaspoon salt
¾ teaspoon freshly ground black pepper
2 teaspoons paprika
1 teaspoon dried thyme
1½ tablespoons Worcestershire sauce
1½ tablespoons Dijon mustard
2 large eggs
2 pounds ground turkey (93/7)
¾ cup Italian seasoned breadcrumbs
A few springs chopped fresh parsley, for garnish (optional)
INSTRUCTIONS
Set oven rack to middle position and preheat oven to 350°F. Line a rimmed baking sheet with heavy-duty aluminum foil; grease the foil with olive oil or non-stick cooking spray.
Make the Glaze: In a medium bowl, whisk together the ketchup, brown sugar, cider vinegar, and Dijon mustard. Set aside.
Make the Meatloaf: Heat the olive oil in a small sauté pan over medium heat. Cook the onions, stirring occasionally, until soft, about 5 minutes. Add the garlic and cook for 1 to 2 minutes more. Do not brown. Set aside to cool.
In a large bowl, combine the salt, pepper, paprika, thyme, Worcestershire sauce, Dijon mustard, eggs, and ¼ cup of the BBQ glaze. Whisk until well combined. Stir in the onion mixture. Add the ground turkey and breadcrumbs and mix with your hands until evenly combined.
Transfer the meat mixture into two even piles onto the prepared baking sheet. Shape into two long loaves about 1½ in high x 6 in long x 4 in wide. Spread the remaining BBQ glaze over the loaves, letting it drip down the sides a bit. Bake for about 45 minutes, until the meatloaves are cooked through. Scrape any fat away from the sides of the loaves, then transfer the loaves to a platter. Slice and garnish with parsley if desired.
Freezer-Friendly Instructions: The cooked meatloaf can be frozen for up to 3 months. When ready to serve, defrost it in the refrigerator for 24 hours and then reheat it in a 300°F oven until hot in the middle.
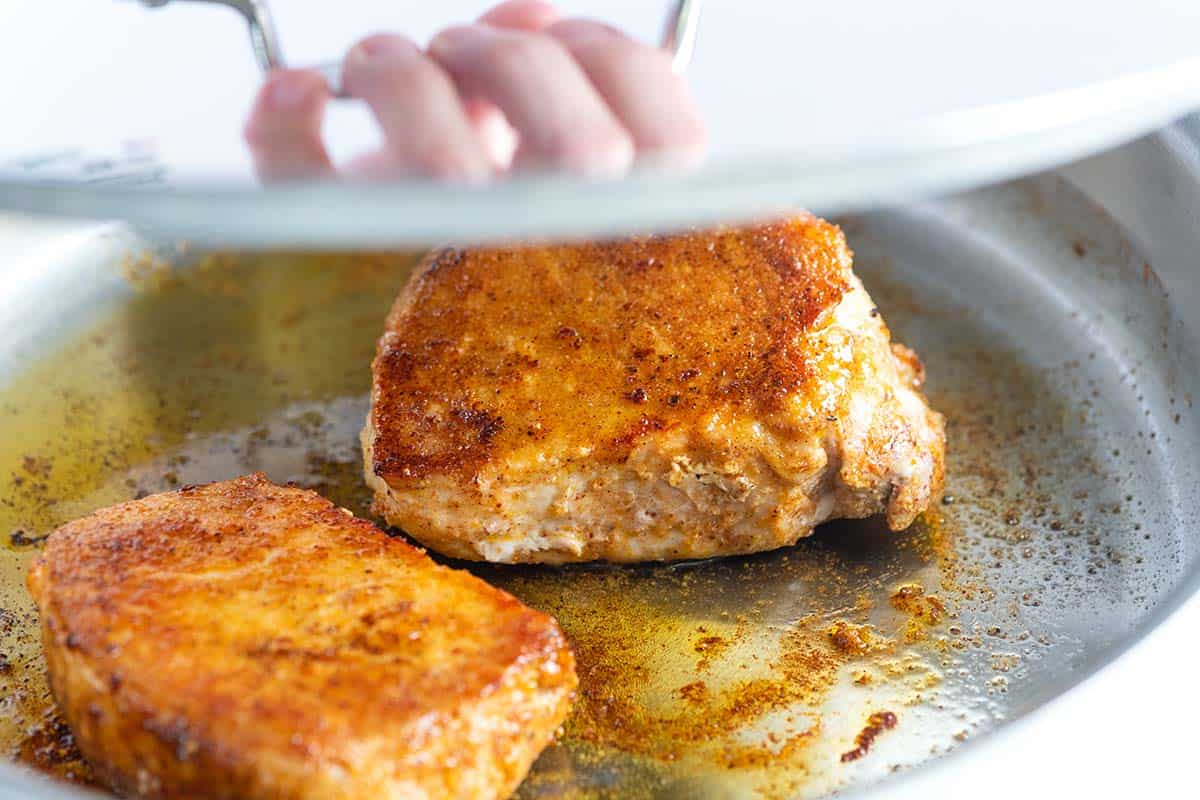
I was looking for a variation of how I usually cook porkchops and found this it was really good. From inspired taste
Pork chops are a quick, healthy and simple dinner. Our method ensures juicy, tender, and flavorful pork chops with little fuss. Check the notes section for our tips on which pork chops are best.
You Will Need
4 pork chops, about 1-inch thick and 6 to 7 ounces each, see notes
1. Take the pork chops out of the refrigerator and season on both sides with salt — we use just less than 1/4 teaspoon of salt per pork chop. Set the chops aside to rest for 30 minutes.
2. Meanwhile, make the spice rub. Mix the flour, chili powder, garlic powder, onion powder, smoked paprika, and 1/2 teaspoon of black pepper in a small bowl.
3. After 30 minutes, use a paper towel to dry the pork chops, then rub both sides of the chops with the spice rub.
4. Heat the oil in a skillet (with a lid) over medium-high heat. When the oil is hot and looks shimmery, add the pork. Cook until golden, 2 to 3 minutes.
5. Flip the pork so that the seared side is facing up. If there is a fattier side of the pork, use kitchen tongs to hold the chops fat-side-down until it sizzles and browns slightly, about 30 seconds.
6. Reduce the heat to low, then cover the skillet with a lid. Cook for 6 to 12 minutes or until an instant-read thermometer reads 145° F when inserted into the thickest part of the chop. Cook time depends on the thickness of the chops, so check for doneness at 5 minutes, then go from there, checking every 2 minutes after that. If you do not have a thermometer, you will know they are done, if, when cutting into the chops, the juices run clear.
7. Transfer pork chops to a plate, then cover loosely with aluminum foil. Let the pork rest for 5 minutes.
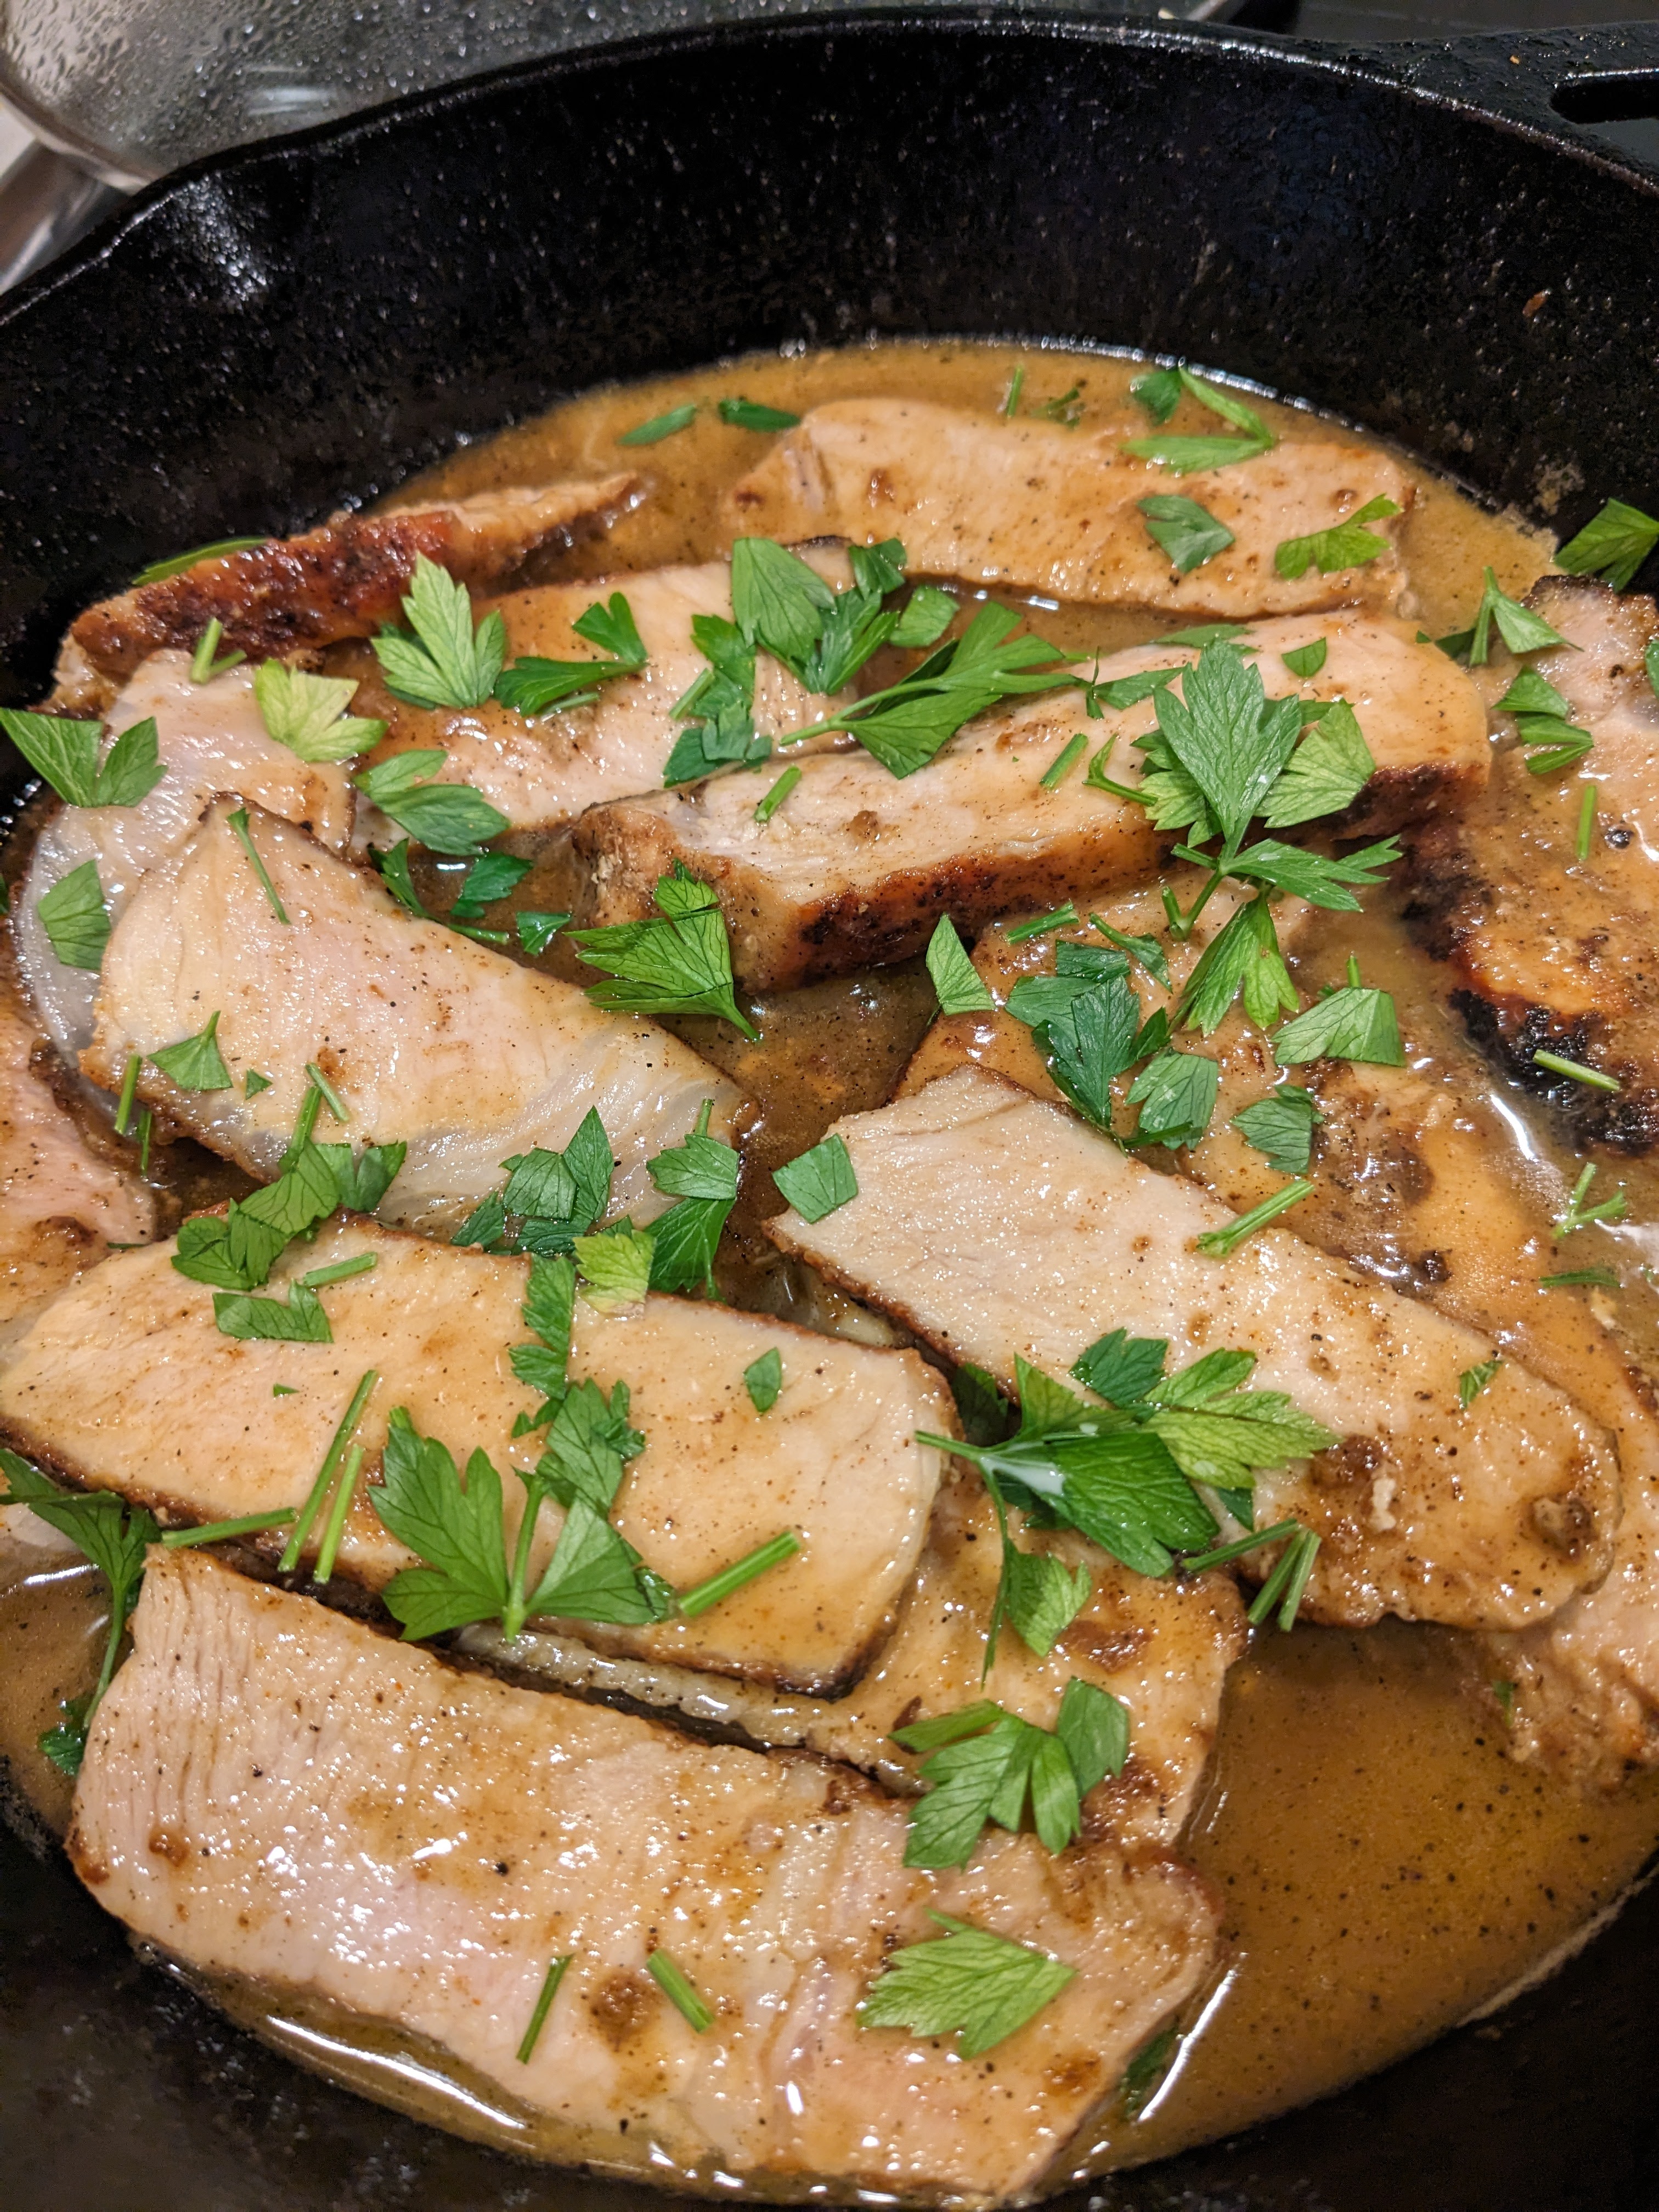
MAKE PAN SAUCE
While the chops rest off of the heat, add chicken stock, a little bit of apple cider vinegar and sliced apples to the skillet.
Bring everything to a simmer, and then reduce by about half. When it has reduced, slide the pan away from the heat and swirl in some butter.
Grab your chops and place them back into the skillet. You can add them whole or sliced. We love adding them sliced since the pan sauce gets all over the meat.
And that’s it, our no-fail method for cooking juicy and tender pork chops.
Adam and Joanne’s Tips
What pork chops to use: We call for 1-inch thick chops in the recipe, but you can use thinner or thicker chops as a substitute. Keep in mind that thinner chops will cook much quicker, so keep your thermometer close by. Bone-in chops are an excellent option, too. The bone will add a minute or two of extra cook time.
Can I use my favorite spice rub? Yes, absolutely. Just make sure the spice rub is salt-free.
Gluten-free: If you don’t want to use the flour, it’s okay. The crust won’t be as even, but skipping the flour and just rubbing the spices over the pork will still taste great.
Make an onion-apple pan sauce: After removing the cooked pork chops from the skillet, add sliced onions, apples and a bit of fresh thyme. Cook until sweet and softened then pour in the stock, vinegar, and honey.
Nutrition facts: The nutrition facts provided below are estimates. We have used the USDA database to calculate approximate values.
Steve Note: Mine chops from Butcherbox about 2″ thick so it took a little longer and I chose their suggestion slicing and then adding into pan. I prefer thicker so added a little corn starch to thicken the sauce. Served with roosted Honey nut squash
NUTRITION PER SERVING Serving Size 1 pork chop / Calories 369 / Total Fat 14.3g / Saturated Fat 5.1g / Cholesterol 138.8mg / Sodium 767mg / Total Carbohydrate 11.6g / Dietary Fiber 1.4g / Total Sugars 4.4g / Protein 46.1g
AUTHOR: Adam and Joanne Gallagher
How to cook pork chops so that they are juicy and tender
Tip #1:Don’t cook chops straight from the refrigerator. Thirty minutes before you cook, take the chops out of the fridge. The time out of the refrigerator lets you bring the meat to room temperature, which helps the pork cook more evenly throughout. Use this trick for other cuts of meat like pork tenderloin or steak.
Tip #2: Season the chops with salt half an hour before cooking. This way, the salt has a chance to improve the flavor and texture of the meat. Pork chops are lean, so seasoning with salt before cooking is essential for making the most flavorful chops.
Tip #3: Rub the chops with spices and some flour. Here’s where your favorite spice rub can come in. Alternatively, you can use our spice blend suggested in the recipe below or try this cajun seasoning. Whichever you choose, add a little flour to it. Rubbing a small amount of flour over the chops helps to add a flavorful crust. We use this trick a lot. When cooking scallops, we add a little flour to the outside so that they brown evenly.
Tip #4: Sear on one side, flip, and then cover with a lid. We use this trick a lot — it’s how we cook chicken breasts so they are juicy, and we use the same concept when grilling meat. First, we sear one side of the chops until browned, flip them, turn the heat to low, and cover the skillet with a lid. The second side will slowly turn golden brown, and since we added the lid, the heat from the pan will gently cook the middle. By gently cooking the chops this way, they stay juicy and become tender
Tip #5:Let the cooked chops rest. When they are cooked, transfer them to a clean plate and cover with foil. After 5 minutes, all the juices inside the chops will have distributed around the meat.
How to tell when pork chops are done
Pork is done when an internal thermometer reads 145° F. Depending on how thick the chops are, you might need to subtract or add a few minutes from the suggested cook times in our recipe below.
If you look closely, the pork chop in the back of the pan (pictured above) is thicker than the one in the front. When we were cooking them, we removed the thinner chop first since it reached 145° F a few minutes before the thicker chop. So if your chops aren’t all the same thickness or size, it’s best to check the temperature of each chop and remove them as they finish cooking.
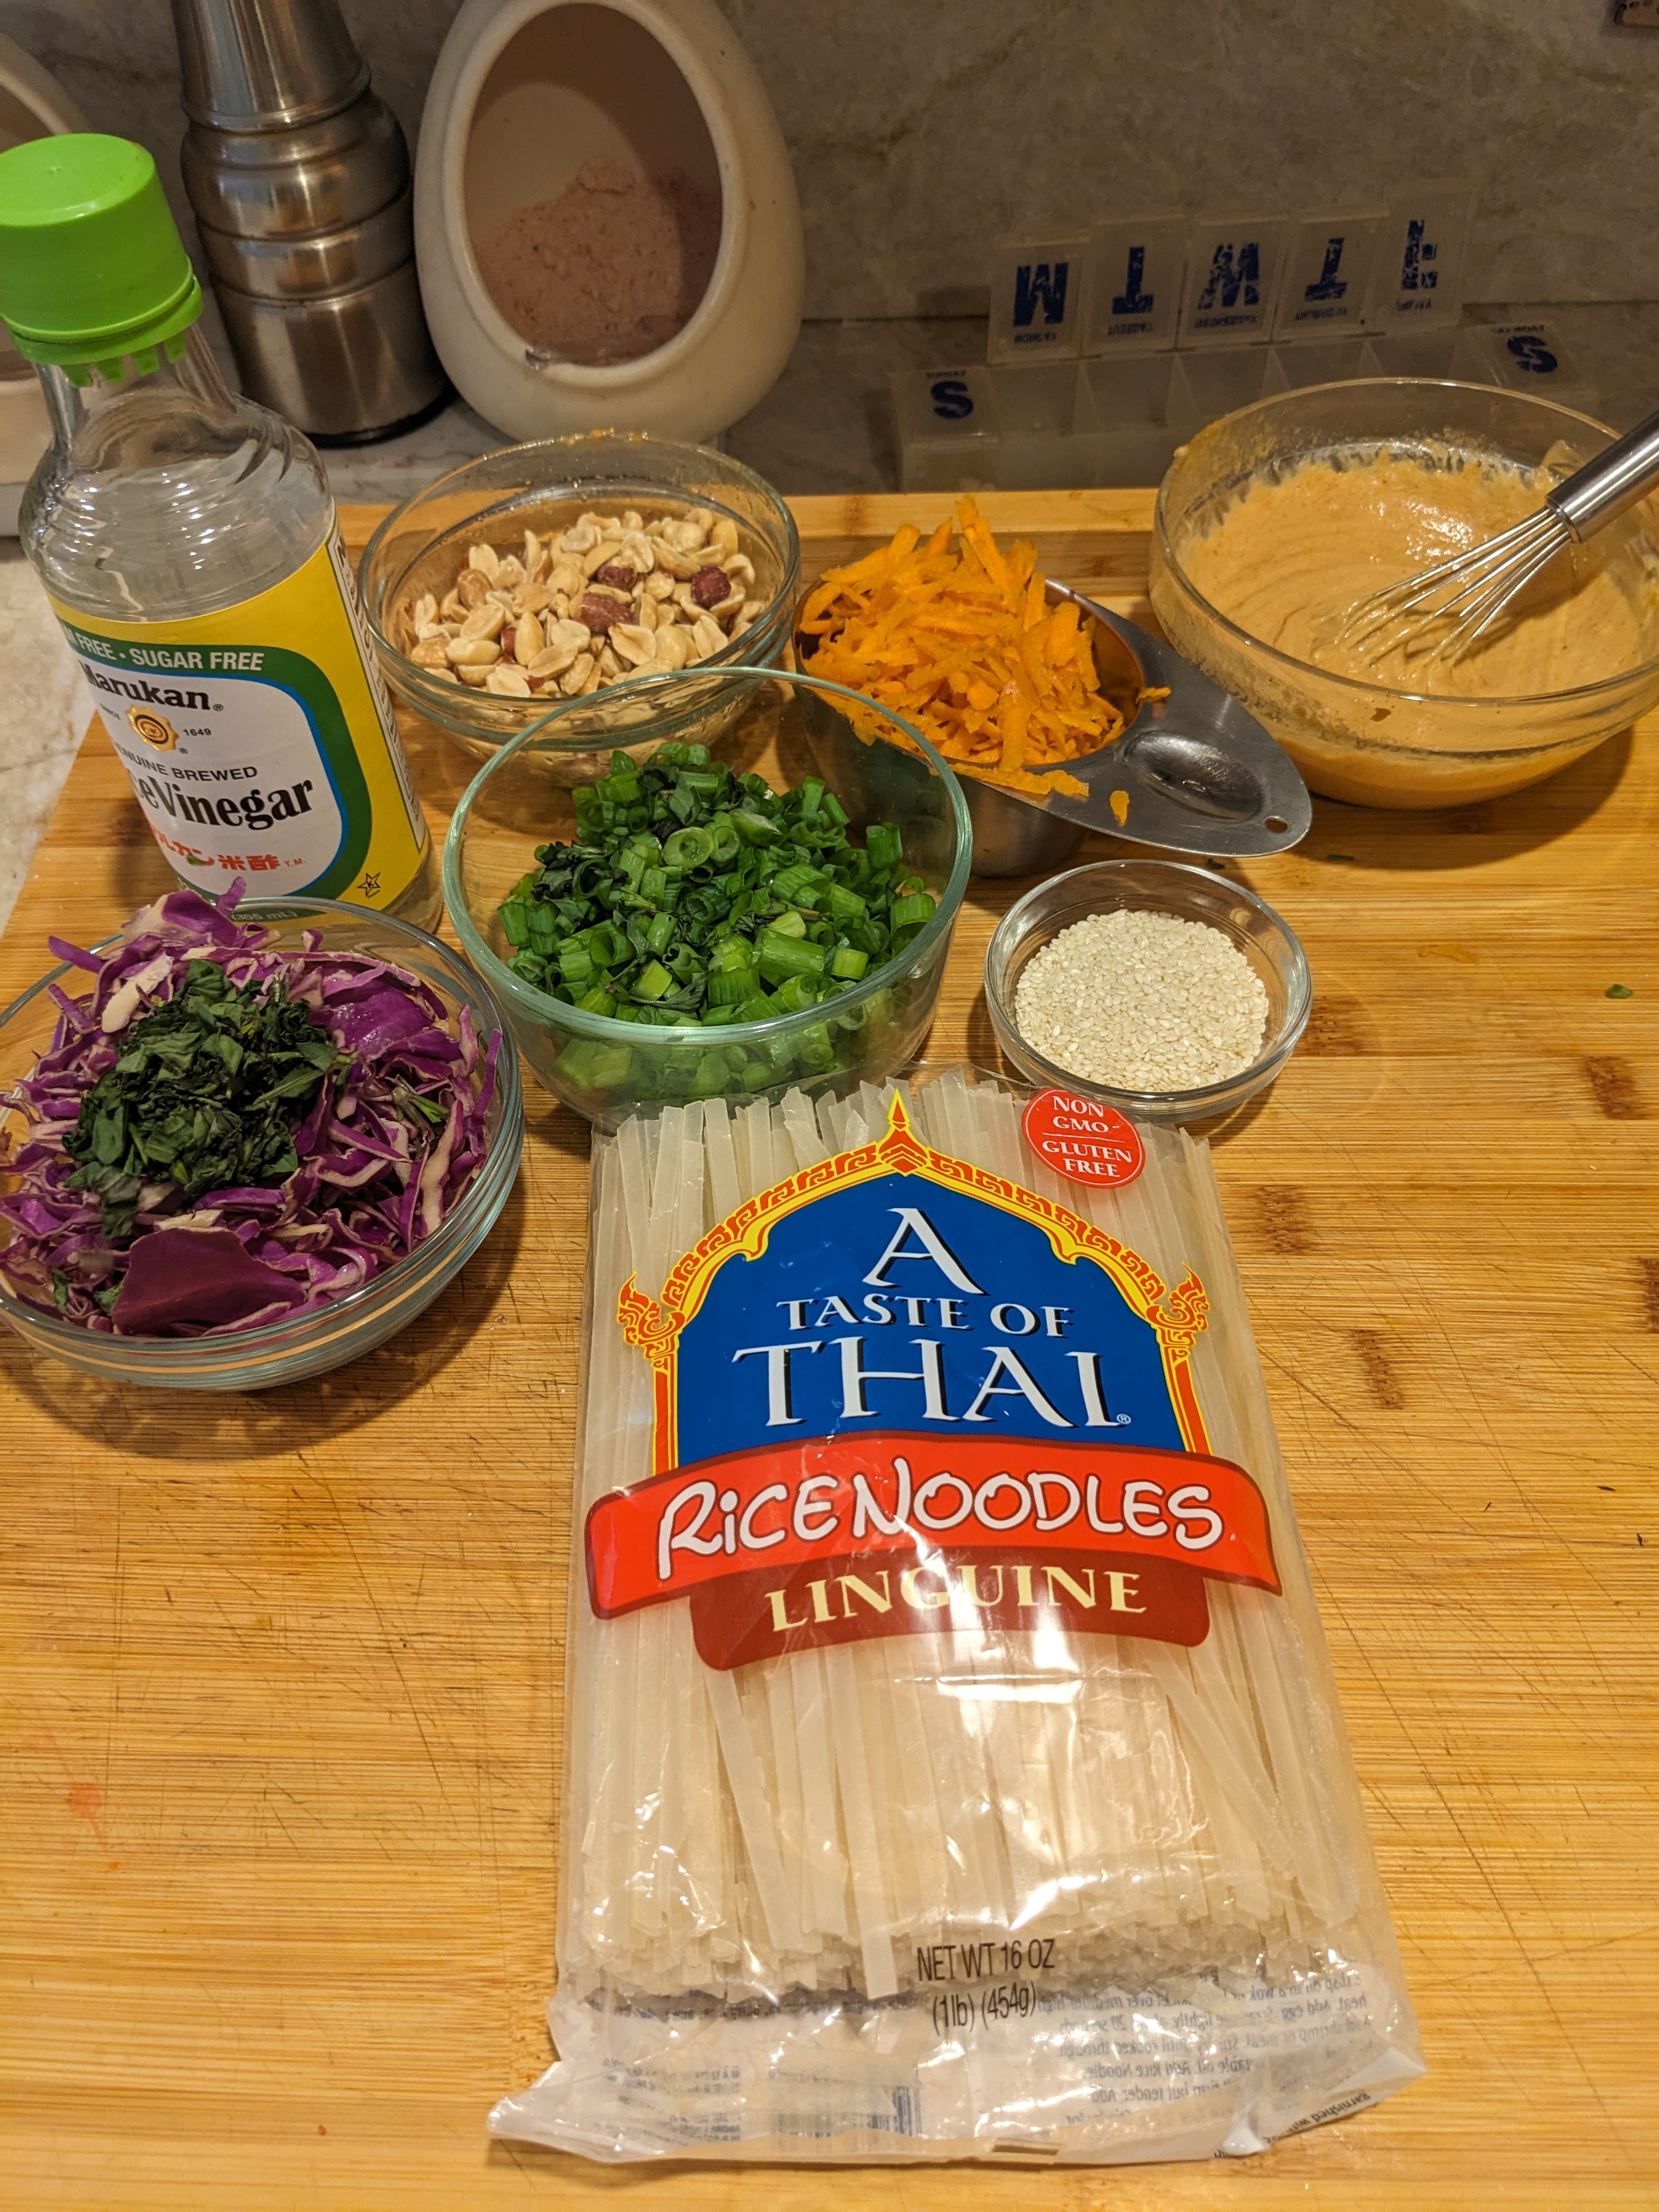
I based mine on this recipe, Thanks Sue, but made some substitutions will mark below with Steve Note:
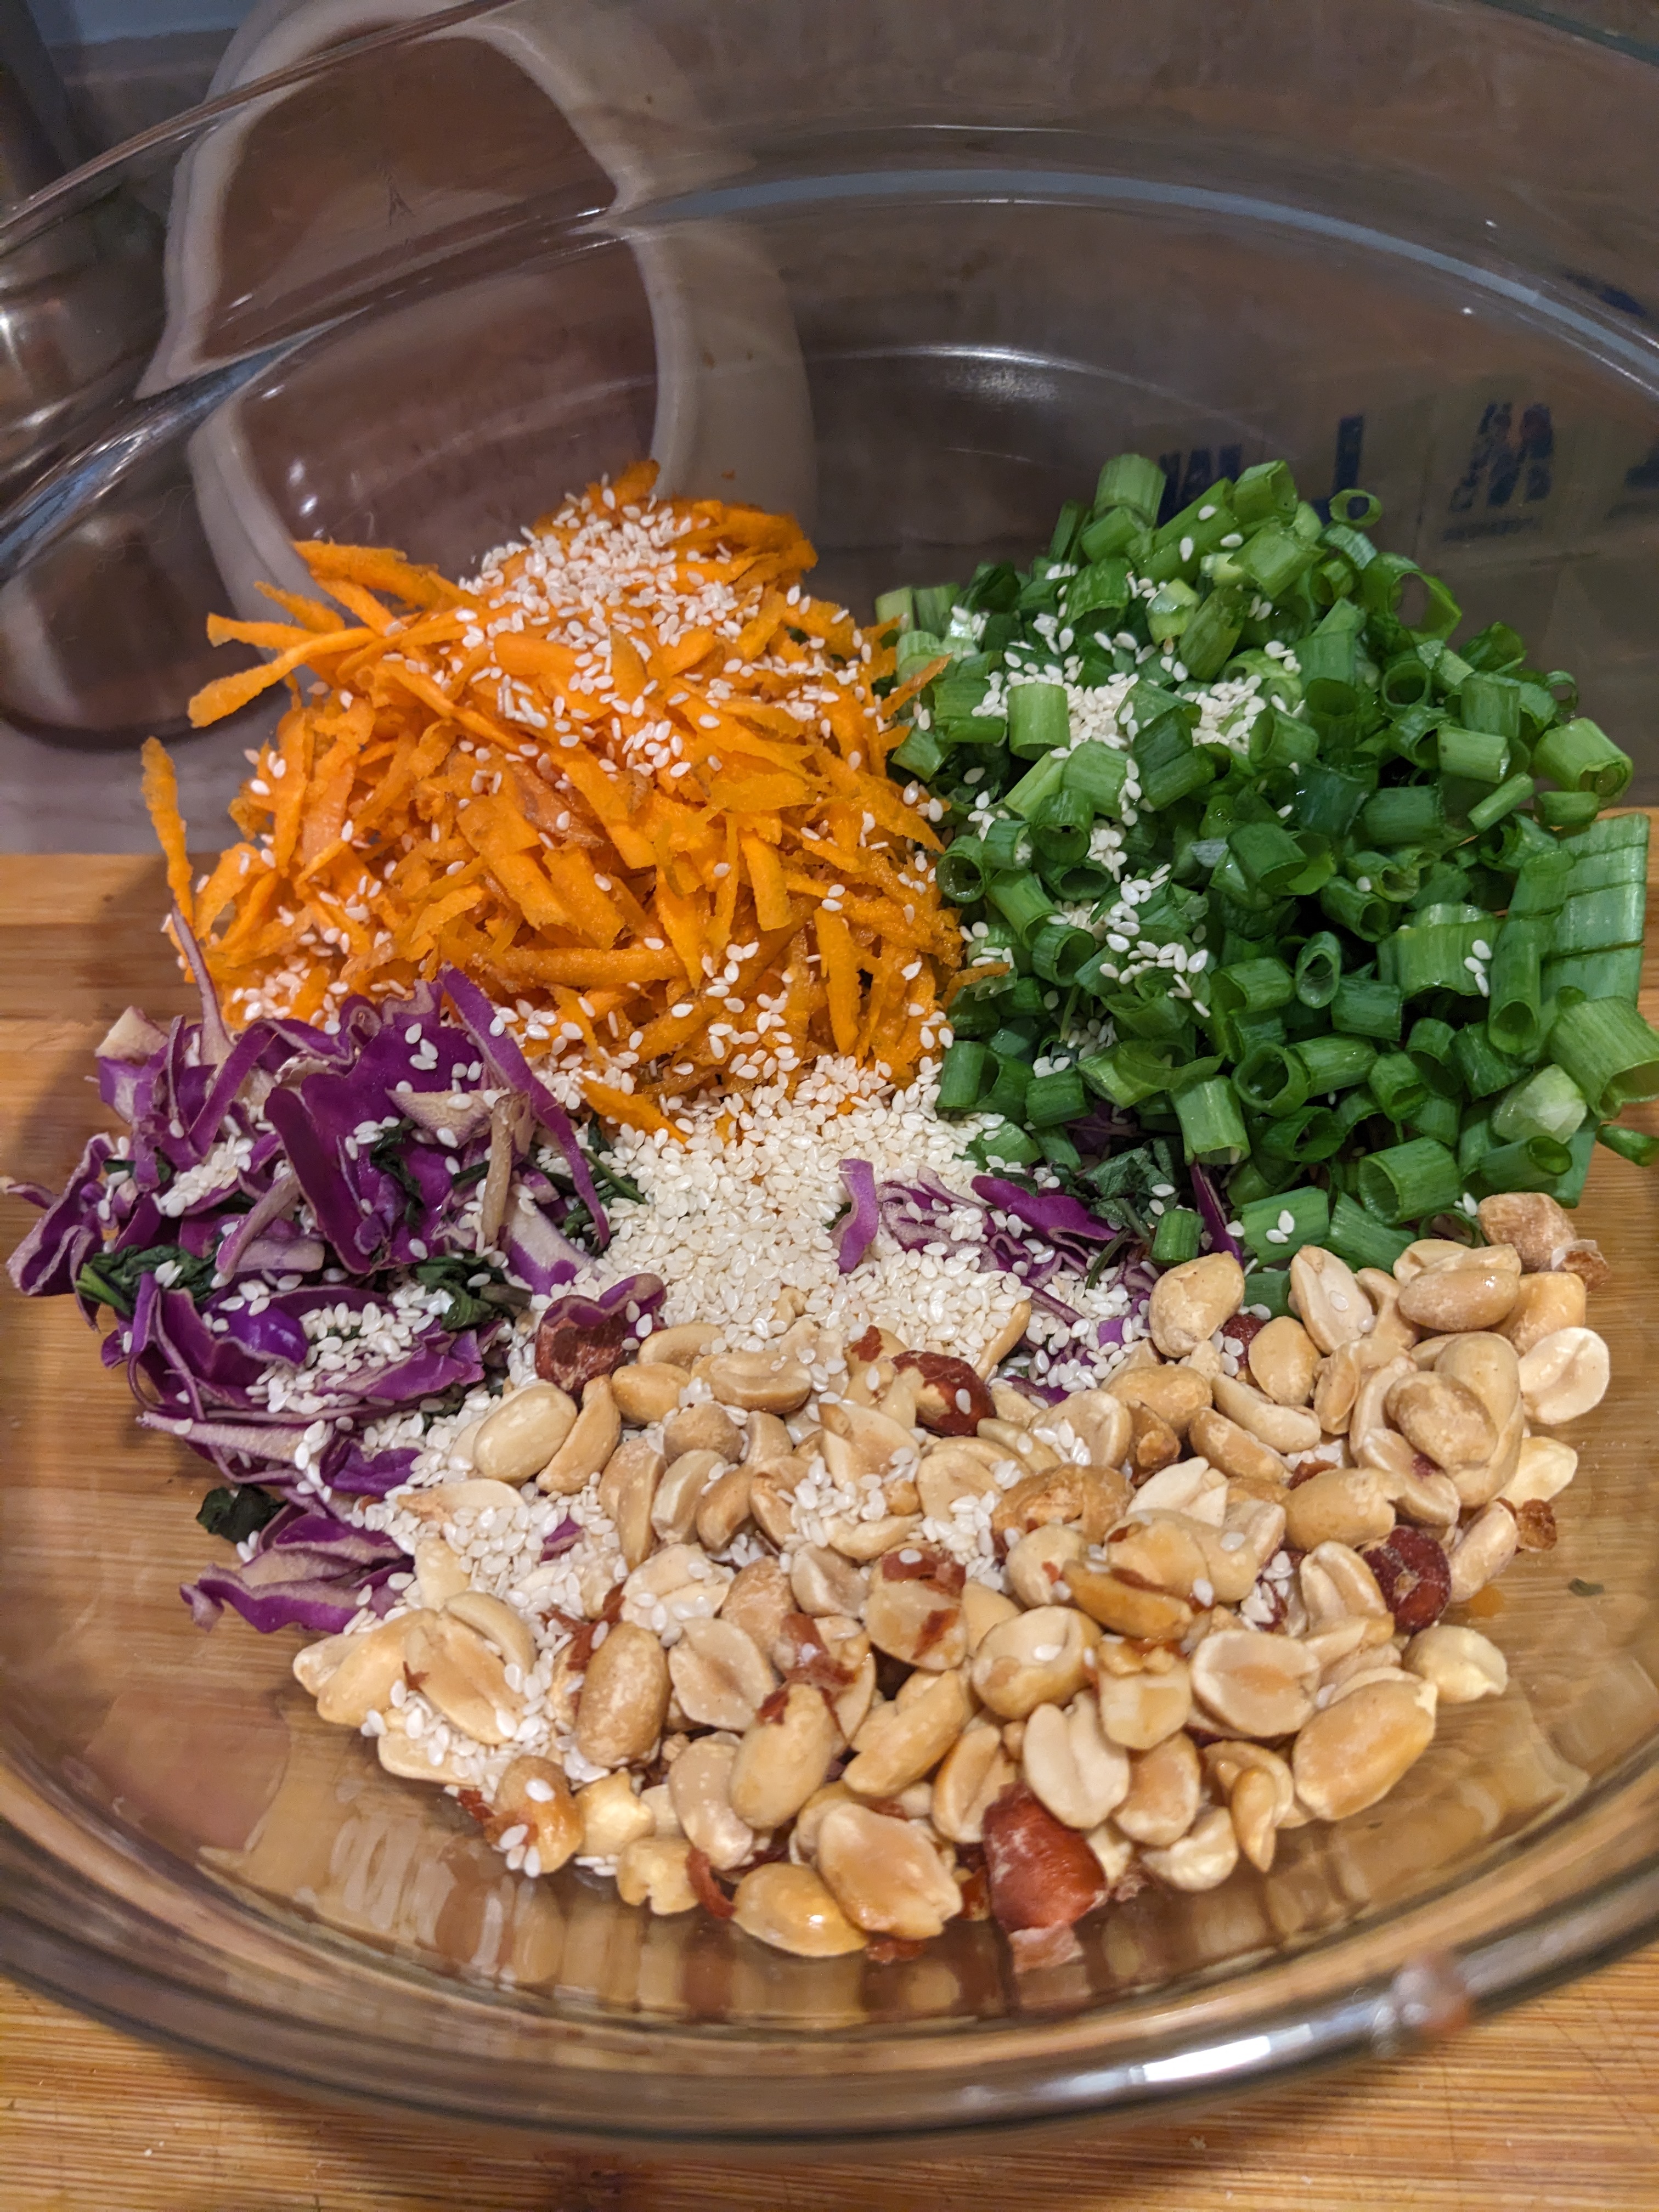
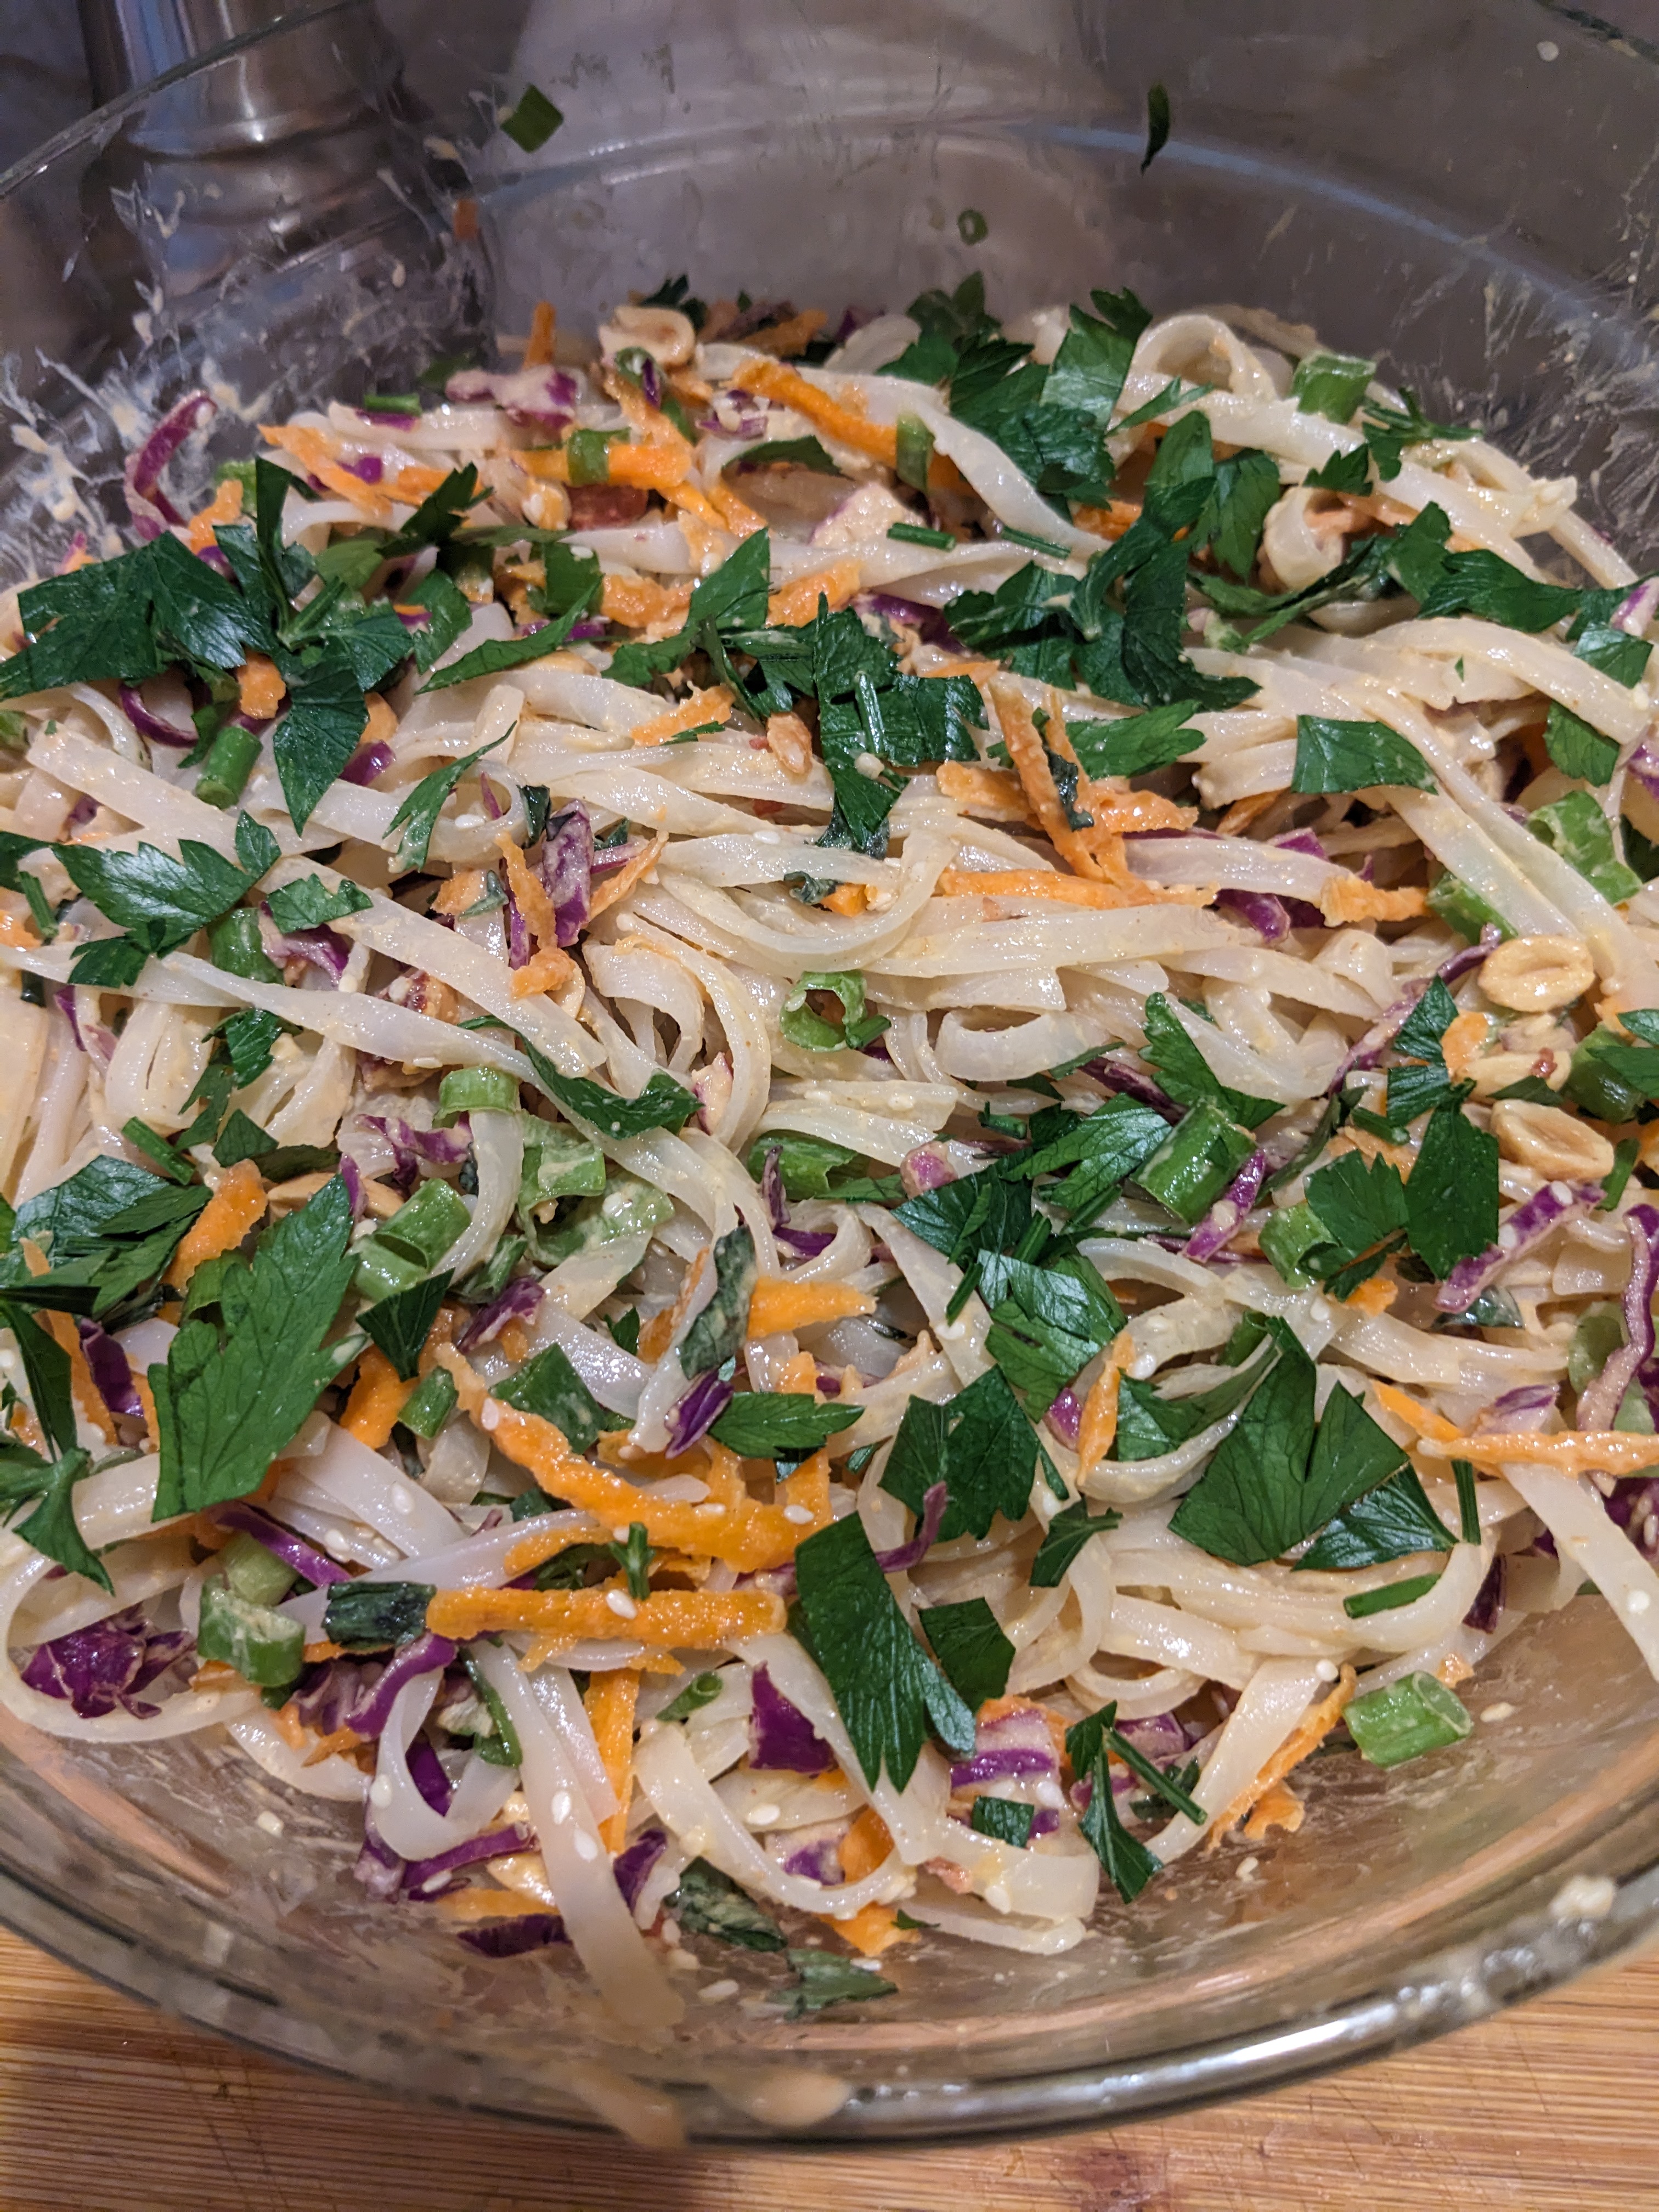
This yummy Thai Spaghetti Salad is an delicious twist on a potluck classic ~ quick to prepare using common ingredients, the Asian flavors in this colorful pasta salad really pop. This easy summer side salad recipe will be your go to for barbecues this season!
To make the dressing put all the ingredients in a small bowl and use an immersion blender to process into an emulsified dressing. Thin with more oil or vinegar to taste, if necessary.
Put the salad ingredients in a large bowl and toss with the dressing. Refrigerate until ready to serve.
Notes we went stickily Veggie
Make it a main course ~ add chunks of chicken, tender steak, or grilled shrimp.
Make it gluten/grain free ~ try this with zucchini noodles (spiralized zucchini) or spaghetti squash.
Make it with more veggies ~ try frozen and thawed edamame beans, broccoli, or bok choy, snap peas, or green beans.