I think I enjoy the cooking more than eating, there is nothing better than to watch the smile grow after someone’s first bite. Note from Steve: I am a flow of thought writer and apologize up front if I lose you. My family is used to it.
It’s the juiciest pork tenderloin you’ll ever make!
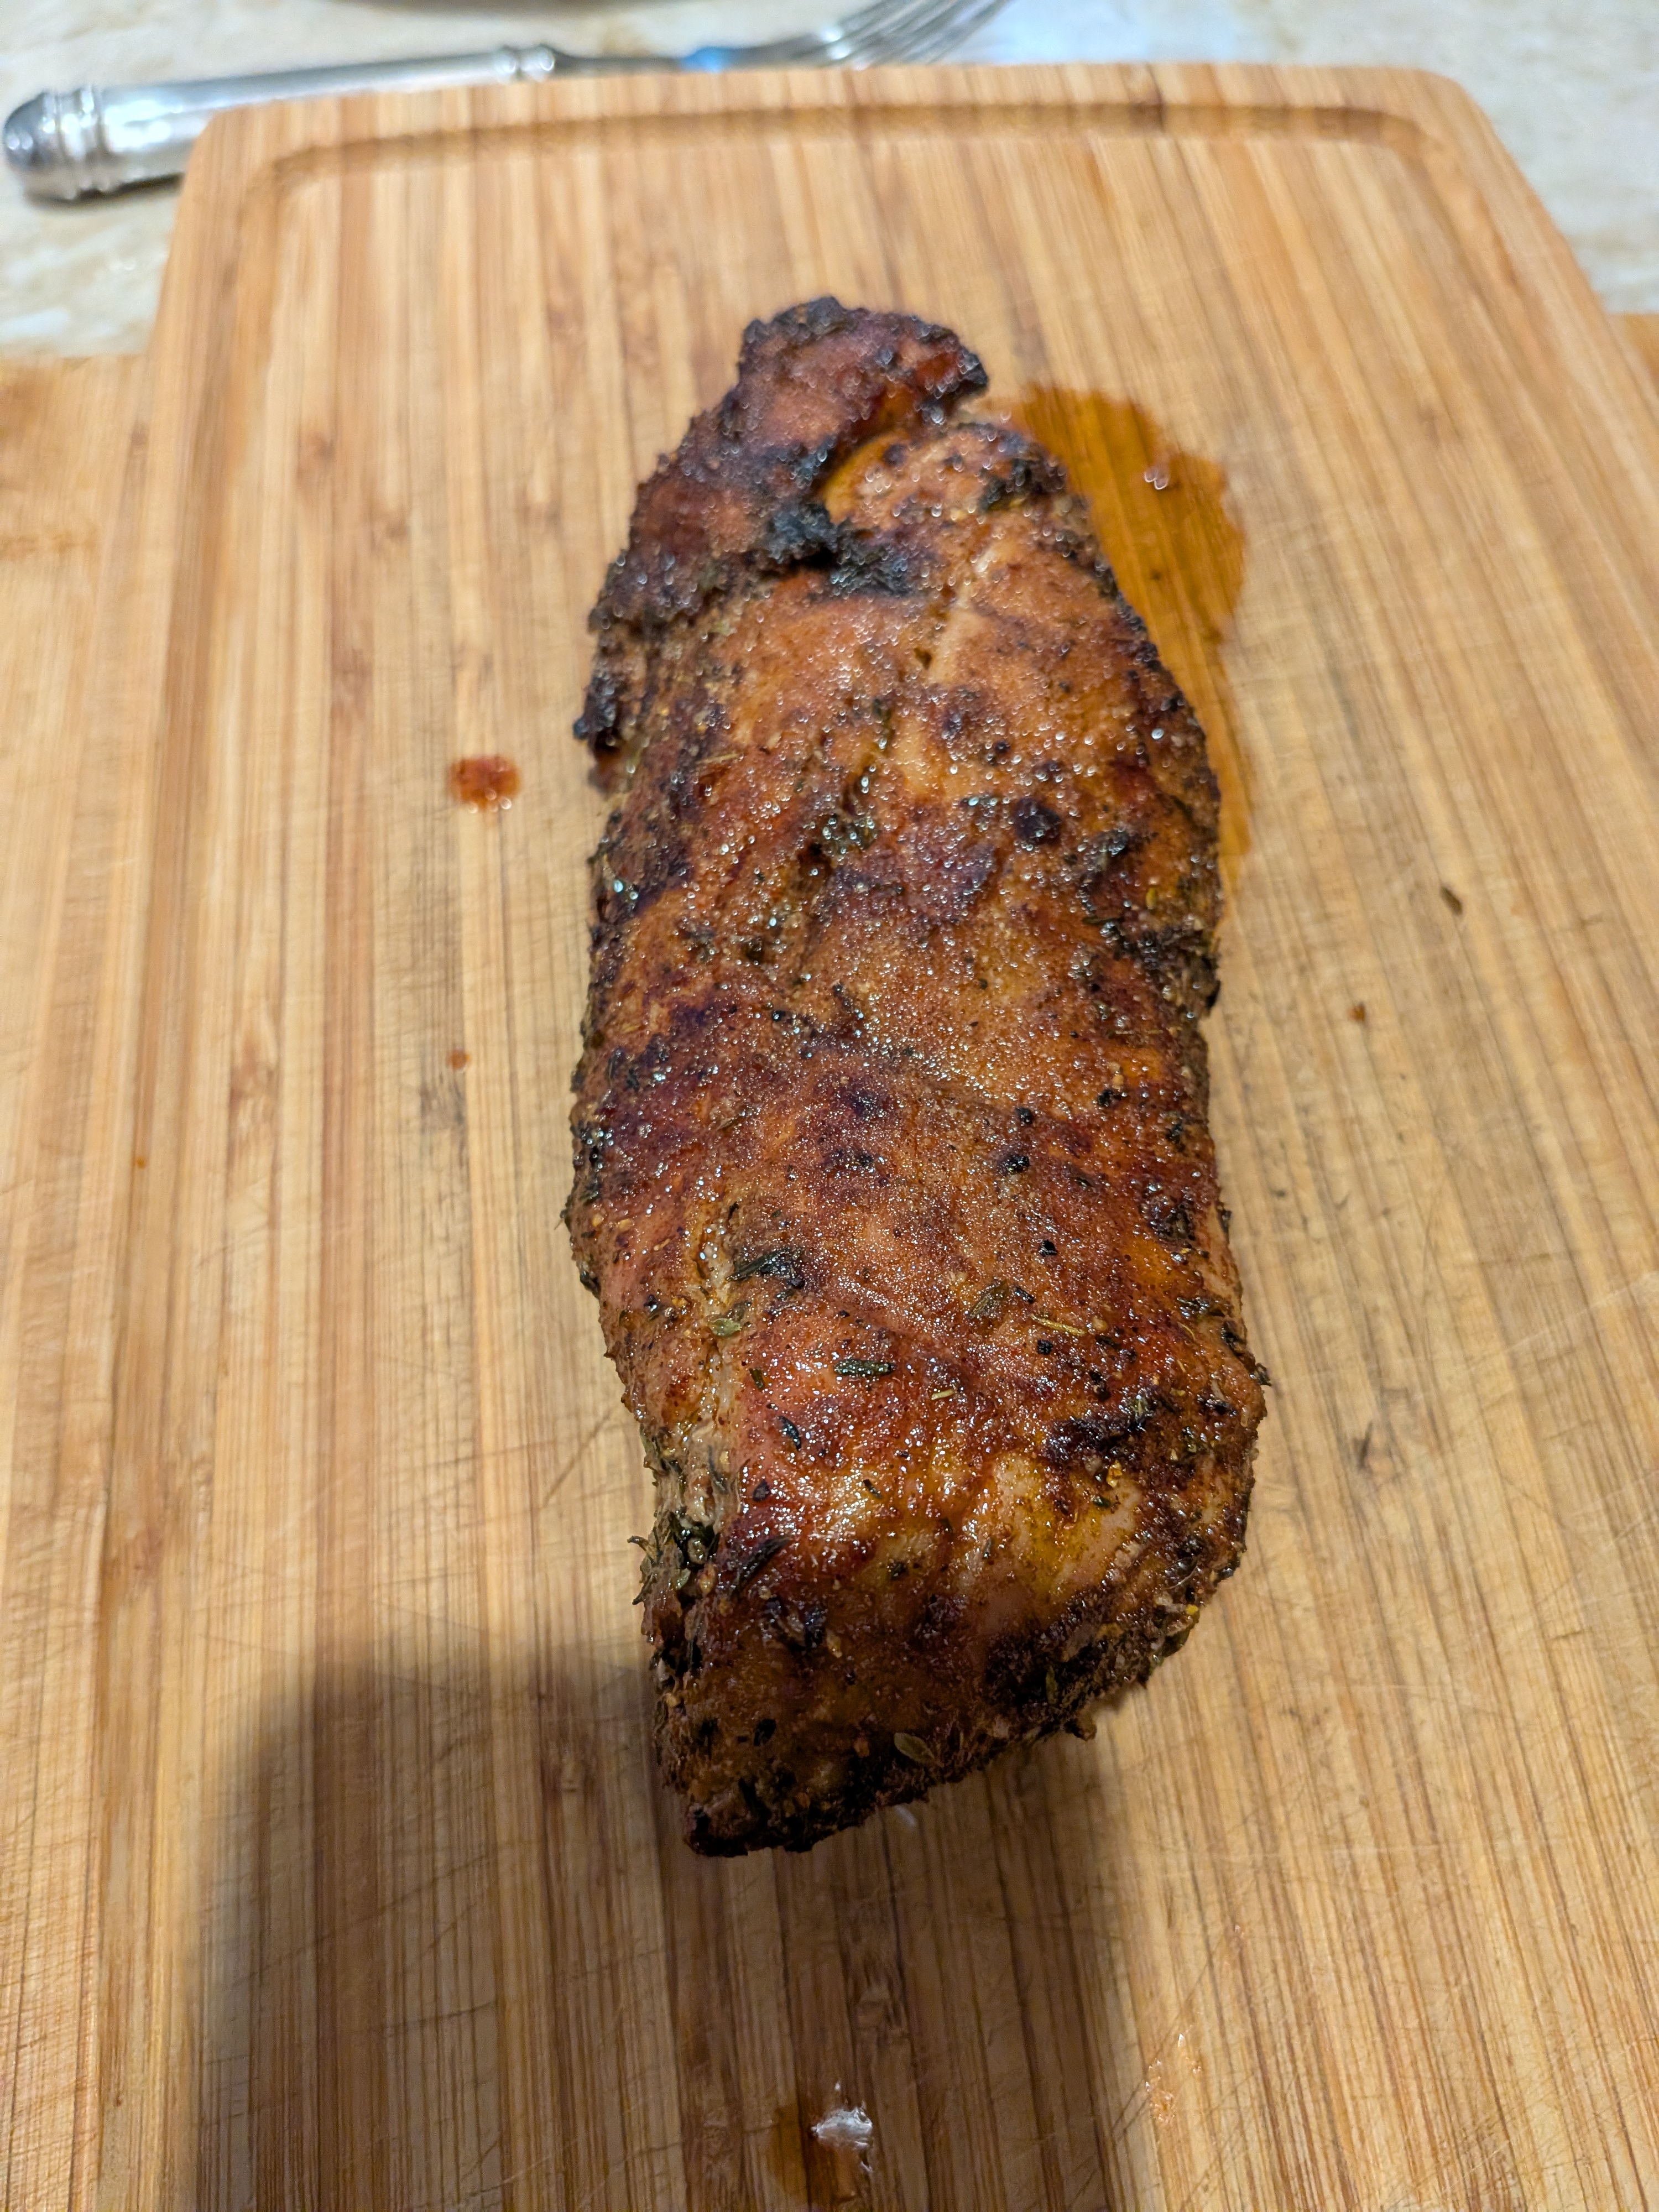
I’ve wanted to try cooking in air fryer, and this popped up. I decided to try something different, so I did a search and Pioneer Women recipe. I was kind of BBQ tasting next time I might use smoked paprika.
Ingredients
1 1/2 lb. pork tenderloin Note: mine was a smaller piece so I did not have to cut in half
2 tsp. kosher salt
2 tsp. light brown sugar
1 tsp. ground black pepper
1 tsp. dried thyme
1 tsp. paprika
1/2 tsp. garlic powder
1 Tbsp. olive oil
Directions
Remove the pork tenderloin from the refrigerator and pat very dry. Cut in half so that it will fit into the basket of a 6-quart air fryer.
In a small bowl, combine the salt, brown sugar, pepper, thyme, paprika, and garlic powder. Brush or rub the olive all over the pork tenderloin. Sprinkle the spice mixture all over, pressing it in to the pork tenderloin to adhere.
Place the two pieces in the basket of the air fryer with space between. Cook at 400°F for 10 minutes. Flip the pork tenderloin and continue cooking at 350°F for 10 to 15 minutes more, or until the internal temperature in each piece reaches at least 145°F.
Transfer the pork to a cutting board and let rest for 5 minutes before slicing and serving.
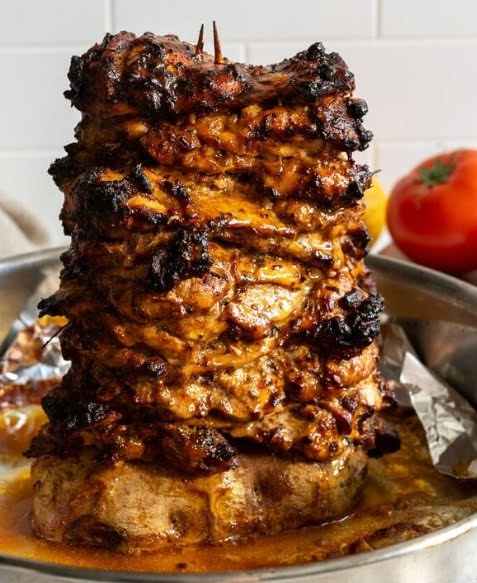
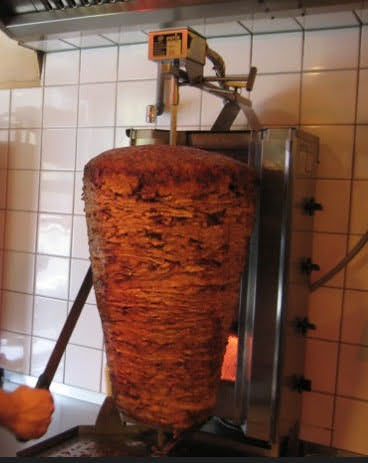
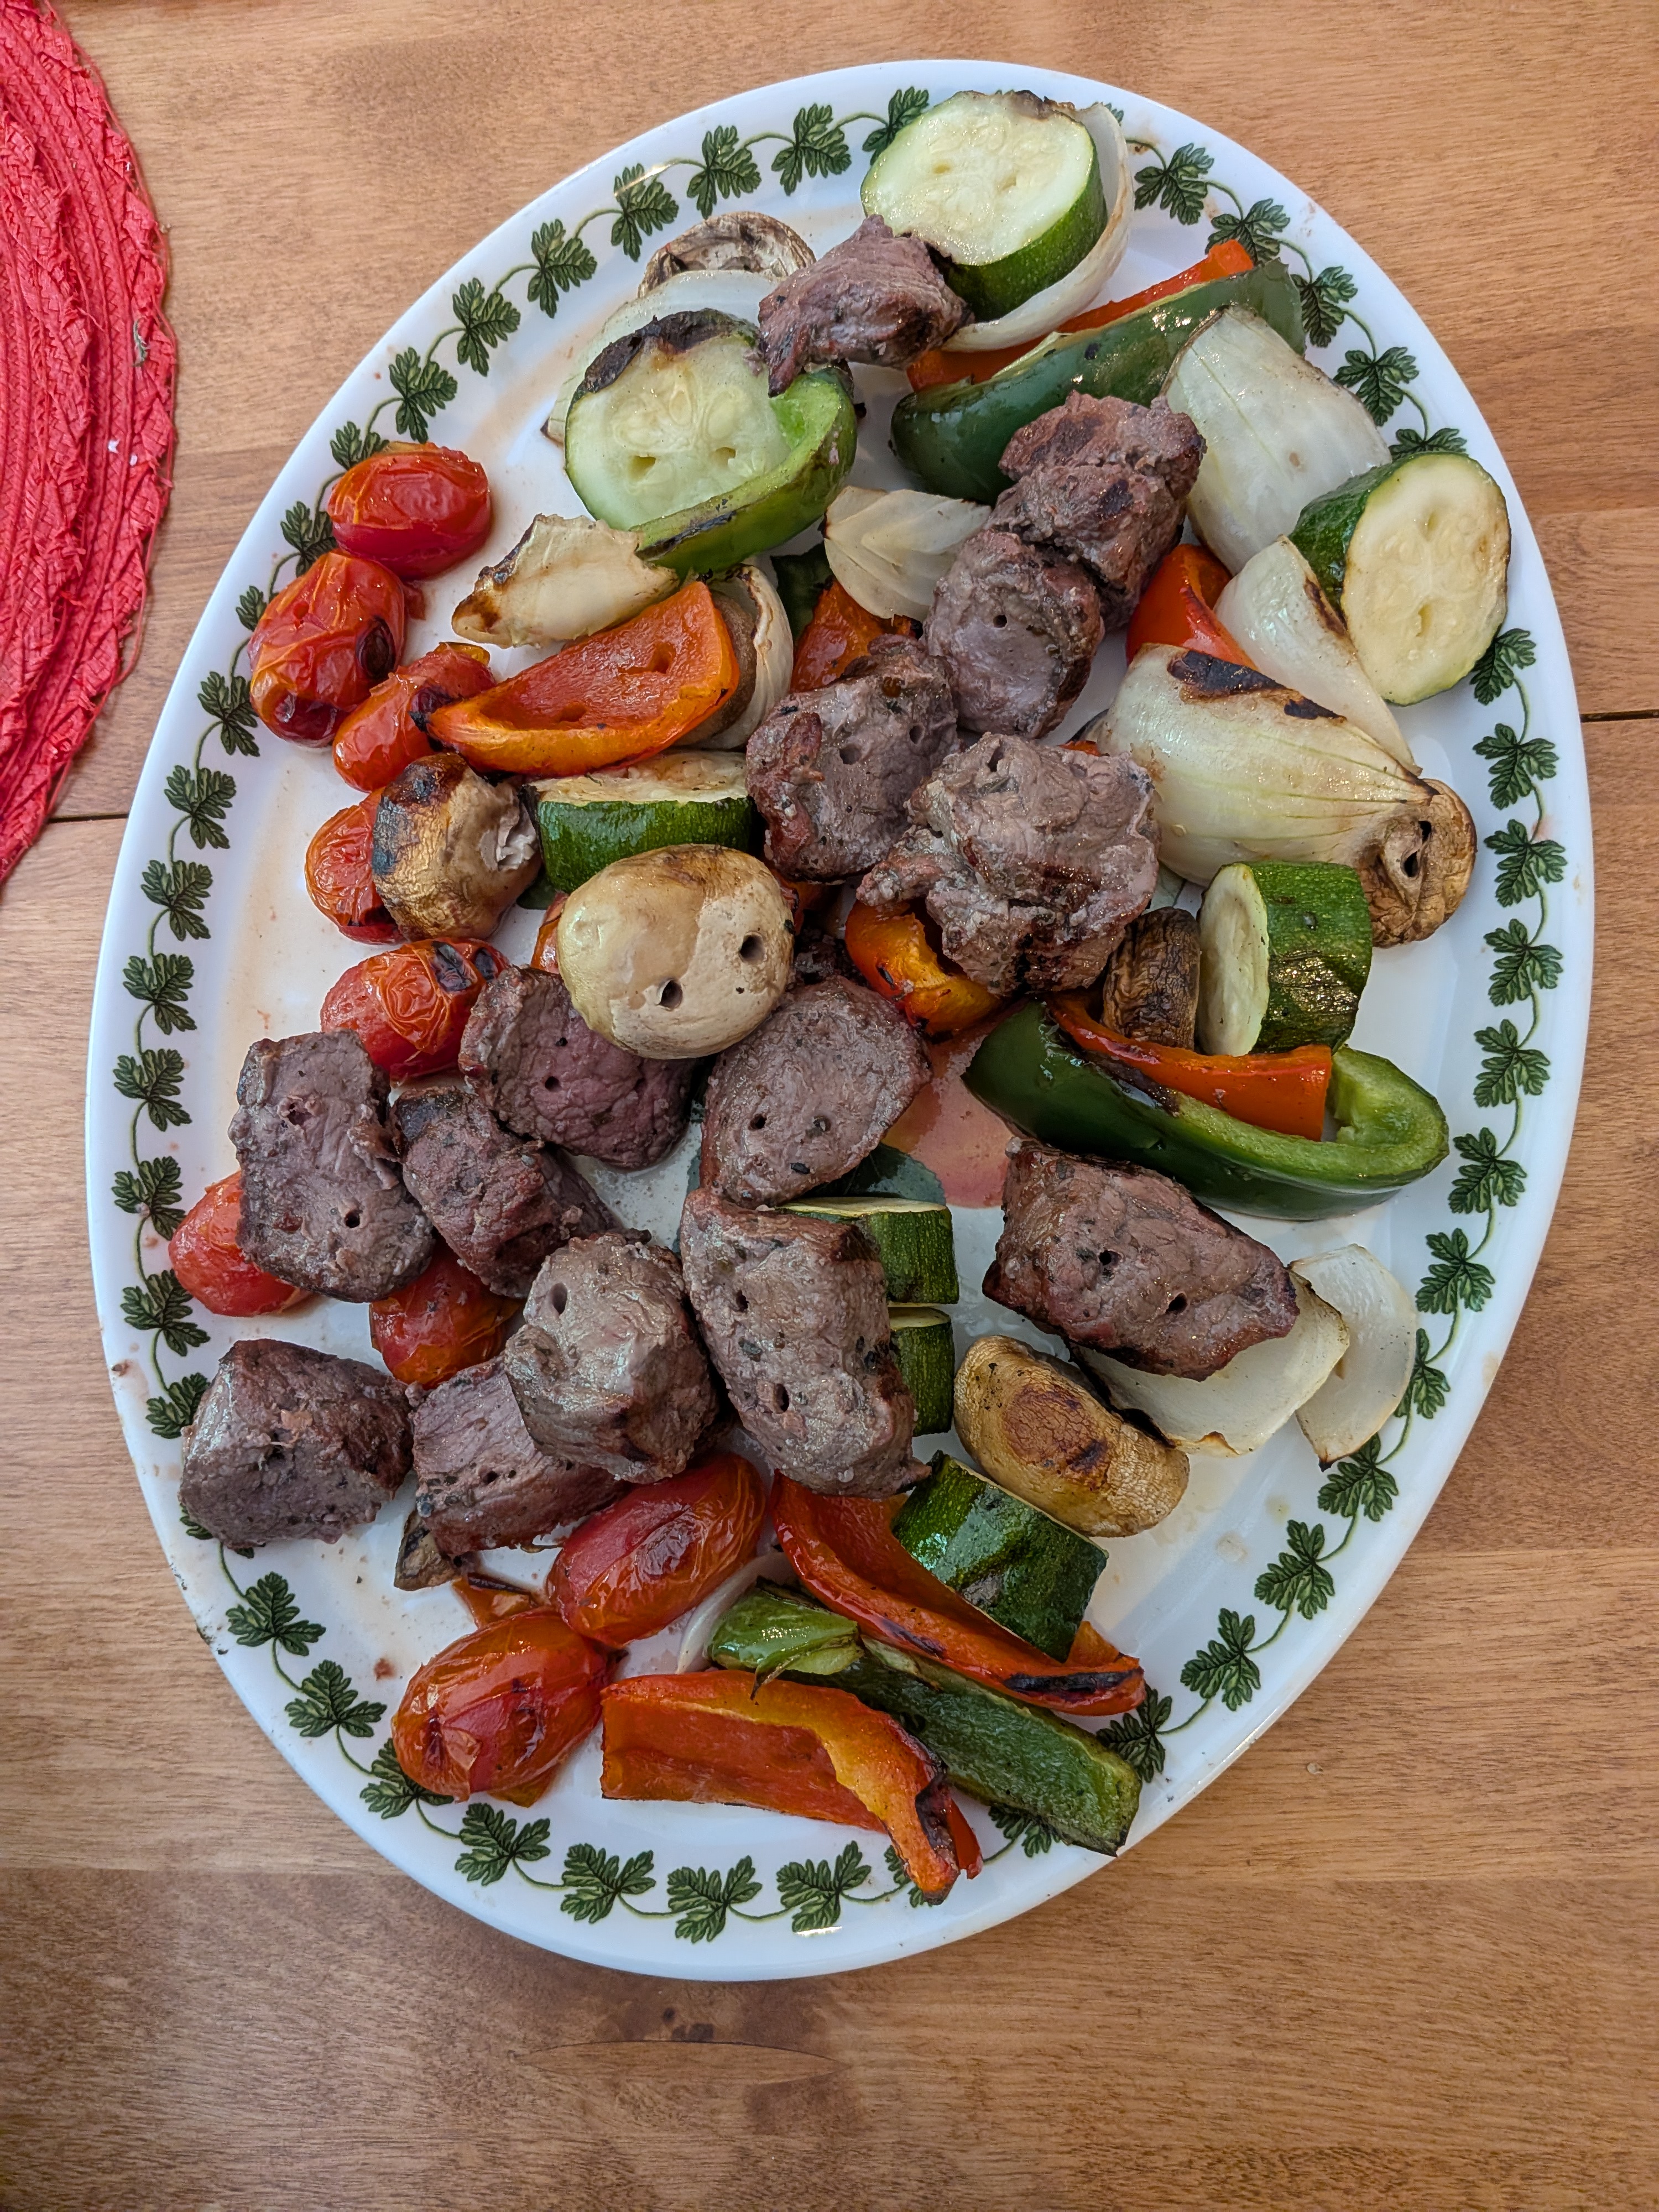
I got turned onto Gyros when i lived in Chicago, thinly sliced meat that was flame broiled on a screwier.
I bought a Gyros pan pictured on left. I’ve done it with chicken and beef and both came out pretty good. The chicken was a killer smelling it while it cooked.
Ingredients
For the Meat:
1 pound ground lamb (Lean is preferred)
2 teaspoons kosher salt (or 1 teaspoon table salt)
1/2 teaspoon freshly ground black pepper
1/2 teaspoon dried or 2 tablespoons fresh oregano leaves
1/2 medium onion, cut into 1-inch chunks
1 clove garlic, sliced
For the Yogurt Sauce:
3/4 cup plain, unsweetened yogurt
Peeled seeded cucumber, minced
1 clove garlic minced or through press
2 teaspoons juice from 1 lemon
2 tablespoons chopped parsley or mint or dill
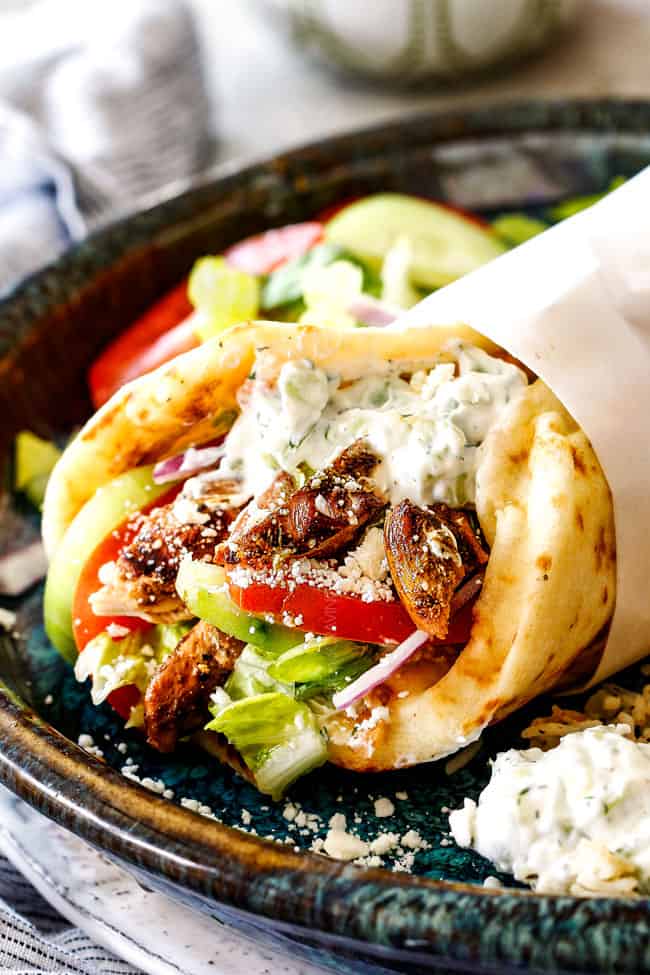
To Serve:
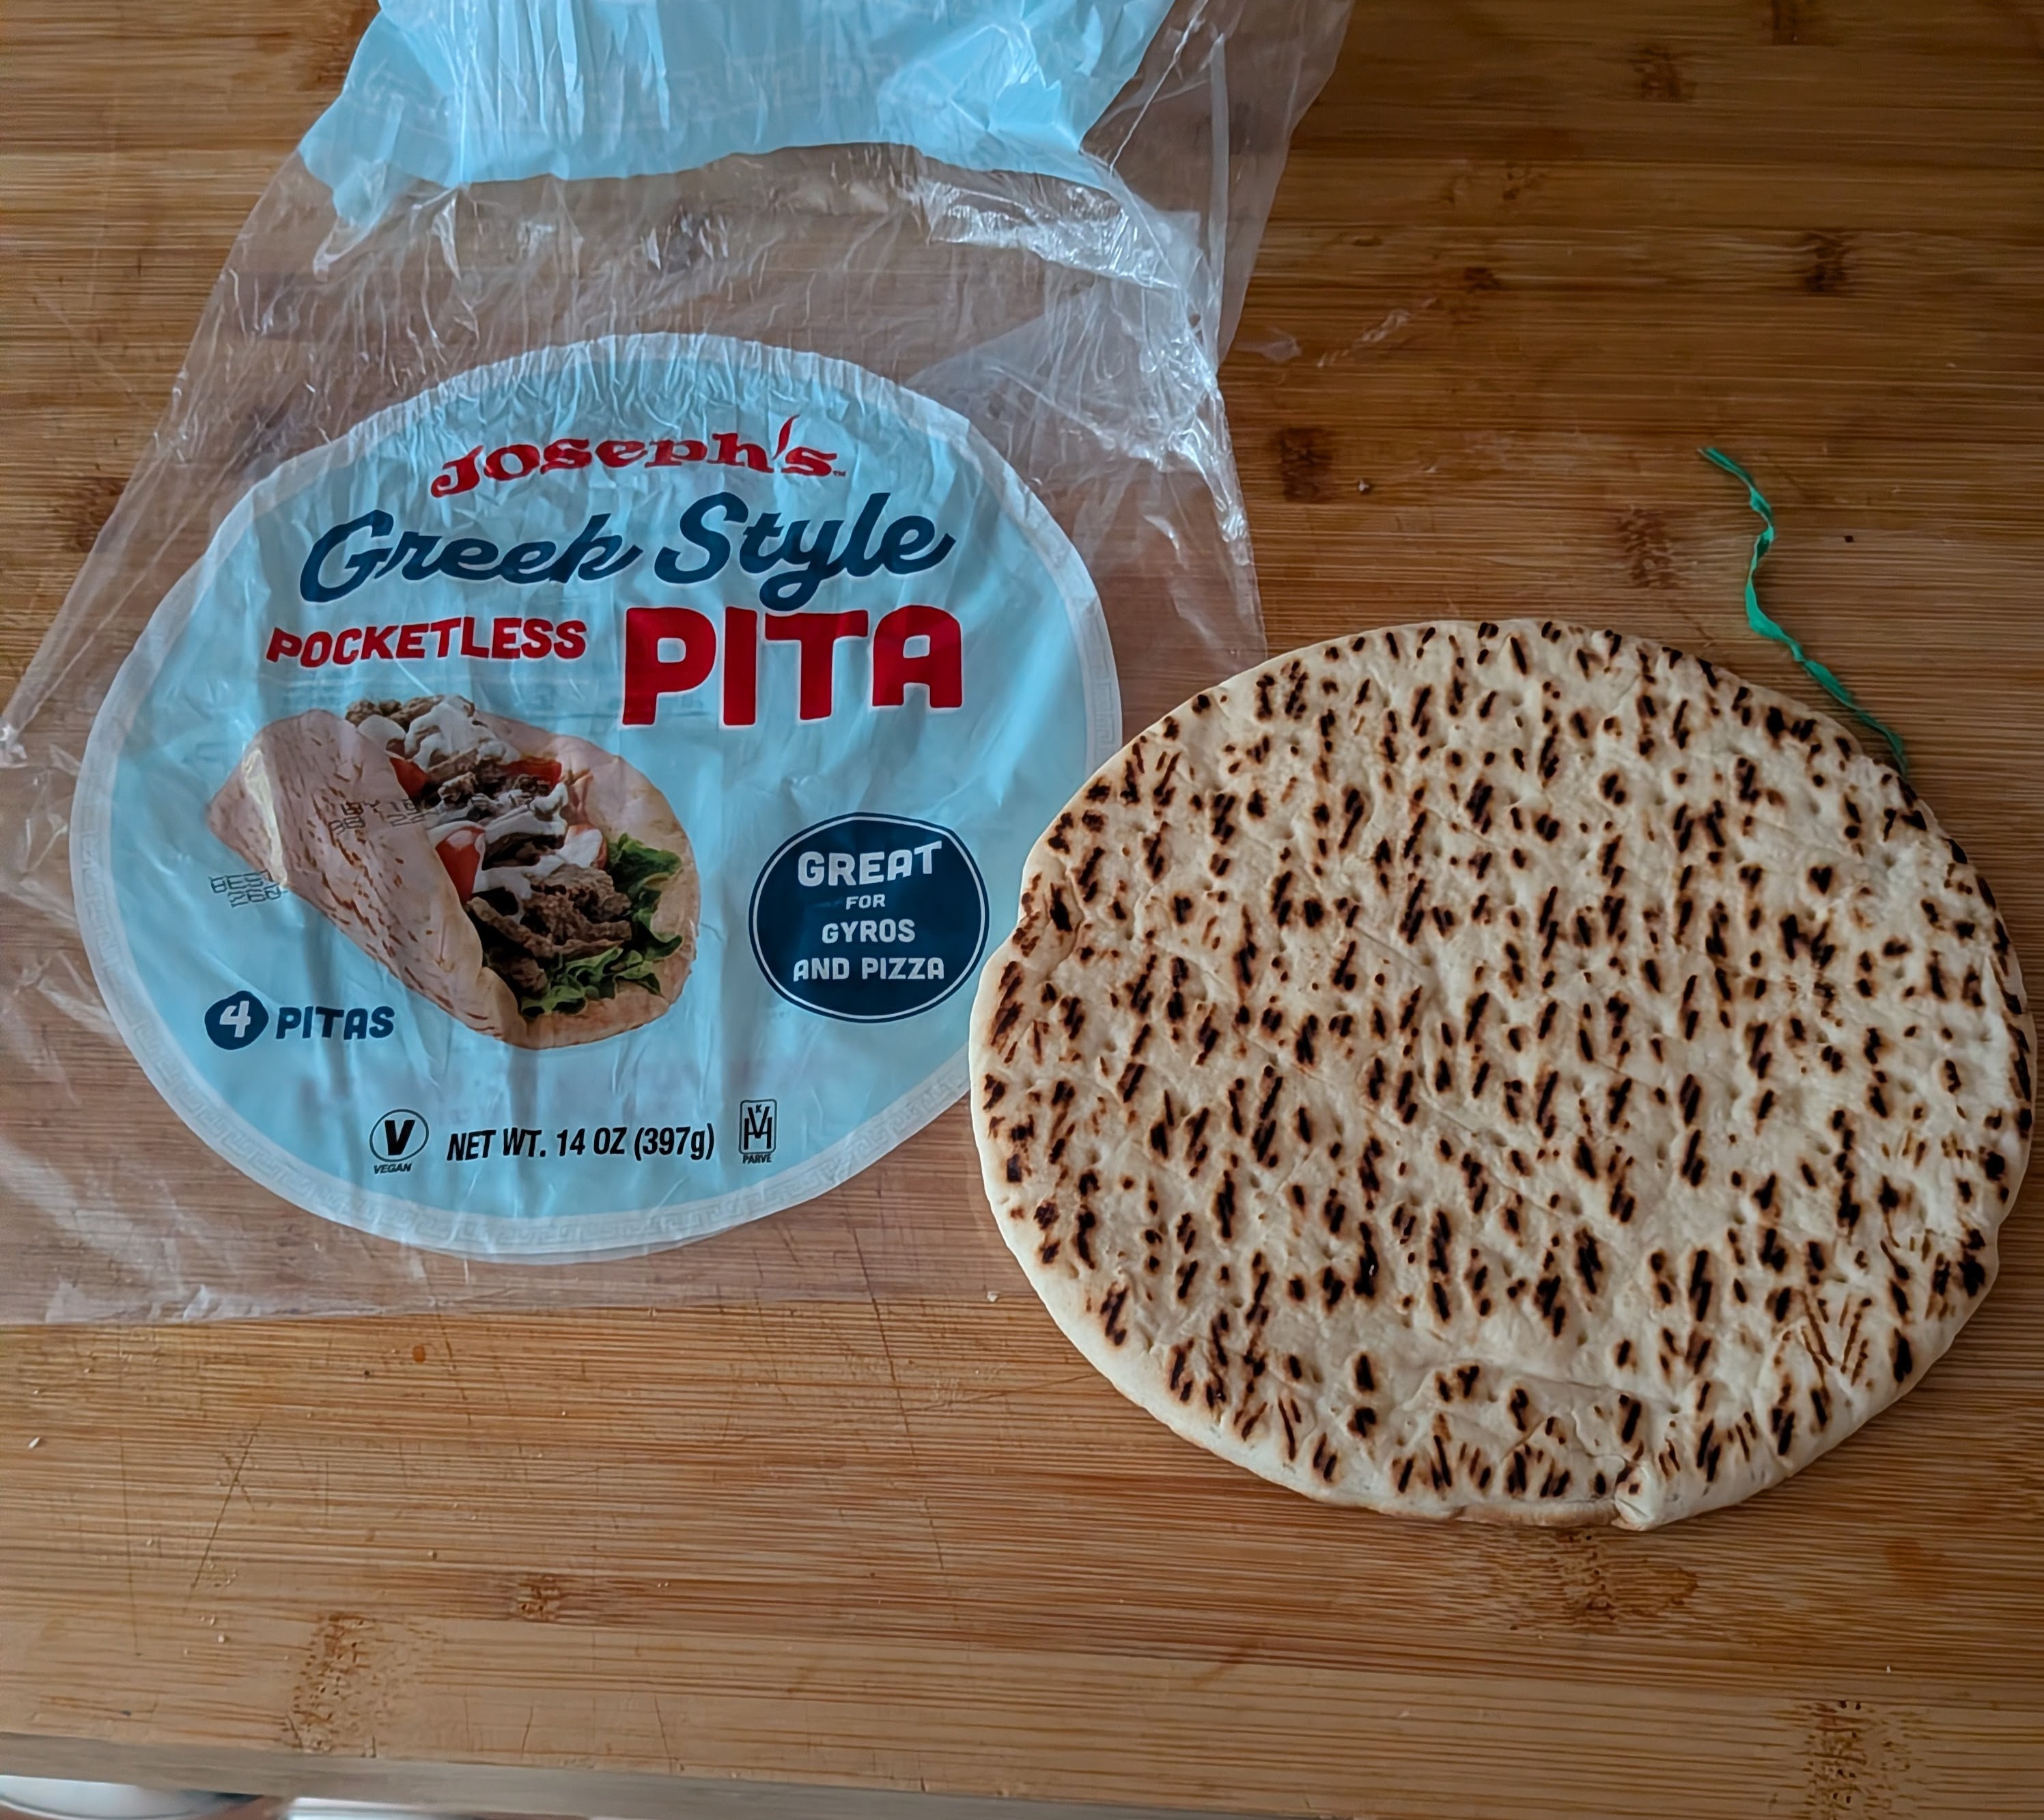
4 pieces soft, Joseph Greek Style pocketless pita)
Chopped fresh tomato
Finely sliced onion
Cubed peeled seeded cucumber
Shredded lettuce
Directions
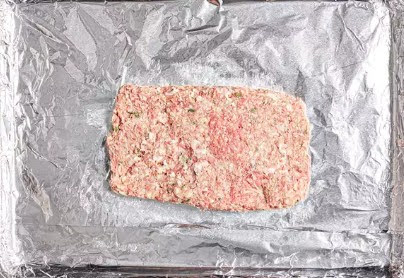
Combine lamb, salt, pepper, and oregano in a medium bowl. Mix with hands until homogeneous. Cover and refrigerate at least 1 hour or up to overnight. Meanwhile, place yogurt in a fine-mesh strainer set over a small bowl. Allow to drain in refrigerator for 1 hour. Adjust oven rack to middle position and preheat oven to 300°F (150°C). Place cold lamb mixture in bowl of food processor with onion, garlic, and bacon. Process until smooth a purée is formed, about 1 minute total, scraping down sides with rubber spatula as necessary.
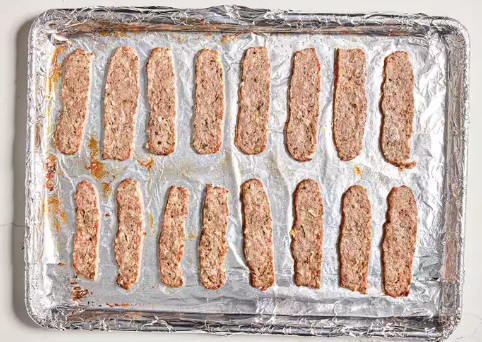
Line rimmed baking sheet with aluminum foil. With moist hands, form meat mixture into rectangles about 1 1/2-inches high, 8-inches long, and 5-inches wide. Bake until center of loaf reads 155°F (68°C) on an instant-read thermometer, about 30 minutes. Allow loaf to rest at room temperature for 15 minutes (or refrigerate for up to a week, see notes).
Meanwhile, make the sauce. Combine strained yogurt, mayonnaise, garlic, lemon juice, and parsley and stir to combine. Season to taste with salt. Refrigerate, covered, until ready to use.
Adjust broiler rack to highest position (about 1 1/2 to 2 inches from broiler element) and preheat broiler. Slice loaf crosswise into 1/8 to 1/4-inch strips (each strip should be about 5-inches long and 1 1/2-inches wide). Lay strips on rimmed baking sheet lined with aluminum foil and broil until edges are brown and crispy, about 2 minutes. Tent with aluminum foil. Warm bread by placing on rimmed baking sheet and broiling until soft and pliant, about 45 seconds per side.
Spread some sauce over each piece of bread. Divide meat evenly between sandwiches. Top as desired, wrap with paper or foil, and serve. Some places serve with French fry but I’m a traditionalist those go on the side or maybe a Greek salad instead
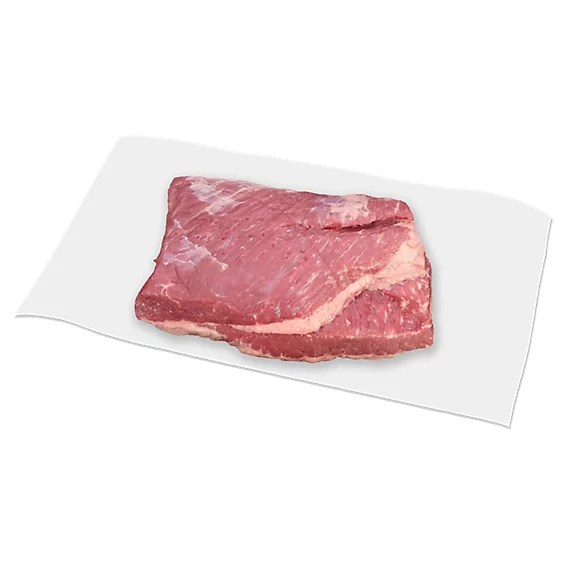
I got a Grass-fed brisket from ButcherBox because Lyn got me a Brisket spice rub for my birthday.
I decide to bypass the liquid smoke and Worcester sauce since the last time I did that it took forever for the smoke aroma to go away. So remember this won’t have that smoked taste unless you use the liquid smoke.
If you are looking for an easy way to make BBQ brisket in the oven but you don’t want to spend all day and night doing it, then this recipe is great !
Ingredients 5 lb Flat cut Beef Brisket Note: I had a 2.5 lbs 1 recipe BBQ Dry Rub BBQ Sauce 1 tablespoon Liquid Smoke (optional) 1 tablespoon Worcestershire Sauce (optional)
Instructions 1. Preheat oven to 300 degrees. Note: I did 275 degrees since I had a class at the center so I cooked longer
2. Liberally season the brisket on all sides with BBQ Dry Rub. The brisket can sit in the fridge overnight to let flavor penetrate (highly suggest), or it can be cooked right away.
3. Set brisket on a large strip of foil, fat cap up, and add liquid smoke and Worcestershire sauce, then wrap the foil around the brisket, sealing tightly.
4. Bake in the oven for 3-4 hours, or until the brisket is perfectly tender. The brisket is done when it can be pierced with a fork with little resistance, and the meat separates when the fork is twisted. Note: I did 4 hours because of lower temperature and only half the weight
5. Remove brisket from oven, unwrap from foil, and turn the broiler on high.
6. Set brisket under the broiler and broil the fat cap until it begins to crisp. Watch carefully so it does not burn. Note( I also broiled all sides, fat cap longer) to get a good bark on it.
7. Remove brisket from the oven and paint liberally with BBQ sauce, then set under the broiler again to allow the BBQ sauce to thicken into a jam-like consistency. The sauce will burn quickly, so keep your eye on it.
8. Note( I also broiled all sides, fat cap longer) to get a good bark on it.
9. Remove from oven, let brisket rest for 10 minutes and serve
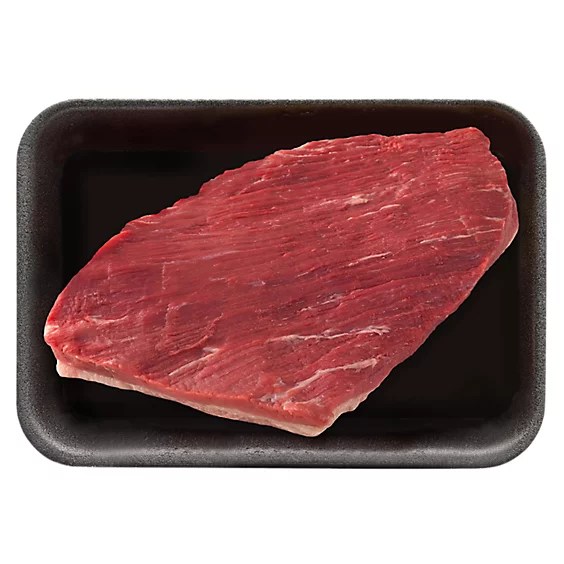
When you’re not buying a whole brisket — those can be around 10 to 16 pounds — there are two distinct cuts of brisket, depending on which end you use.
The flat cut is wider, less thick, and more evenly shaped, with a layer of fat on one side. Flat cuts of brisket are typically used for classic oven-baked brisket. The flat cut, also known as the lean cut, holds its shape much better when sliced.
The point cut is more marbled through and thicker with an irregular shape. It also has a bit more connective tissue. Point cut brisket has a shreddy texture once braised, making it an ideal choice for sandwiches and tacos.
The Whole Brisket is the pectoral muscle of the steer or heifer. This muscle gets a workout because of the pasture-raised lifestyle of our animals, making the cut very tough and extremely flavorful, which is why it’s perfect for slow-cooking methods like smoking.
WHOLE FLAT /Single POINT / Single
T
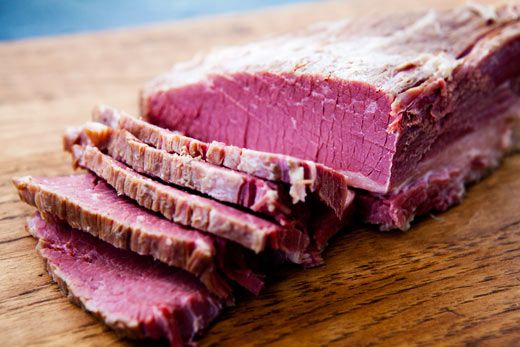
Don’t forget the Corned Beef: A brisket that has been cured in a brine (salt, water, and sometimes spices) for several days, resulting in a salty, tender, and often pinkish-red meat.
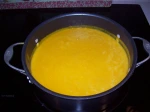
Finally the price has come down to 99 cents per lbs. and that is my signal to start making some of my favorite fall delights. I even saw it for 79 cents at Market Basket the other day. Anyway I made some Butternut and Apple Soup which takes a little effort but well worth it. This is one of those soups you take a taste and you say mmmm at least we did.
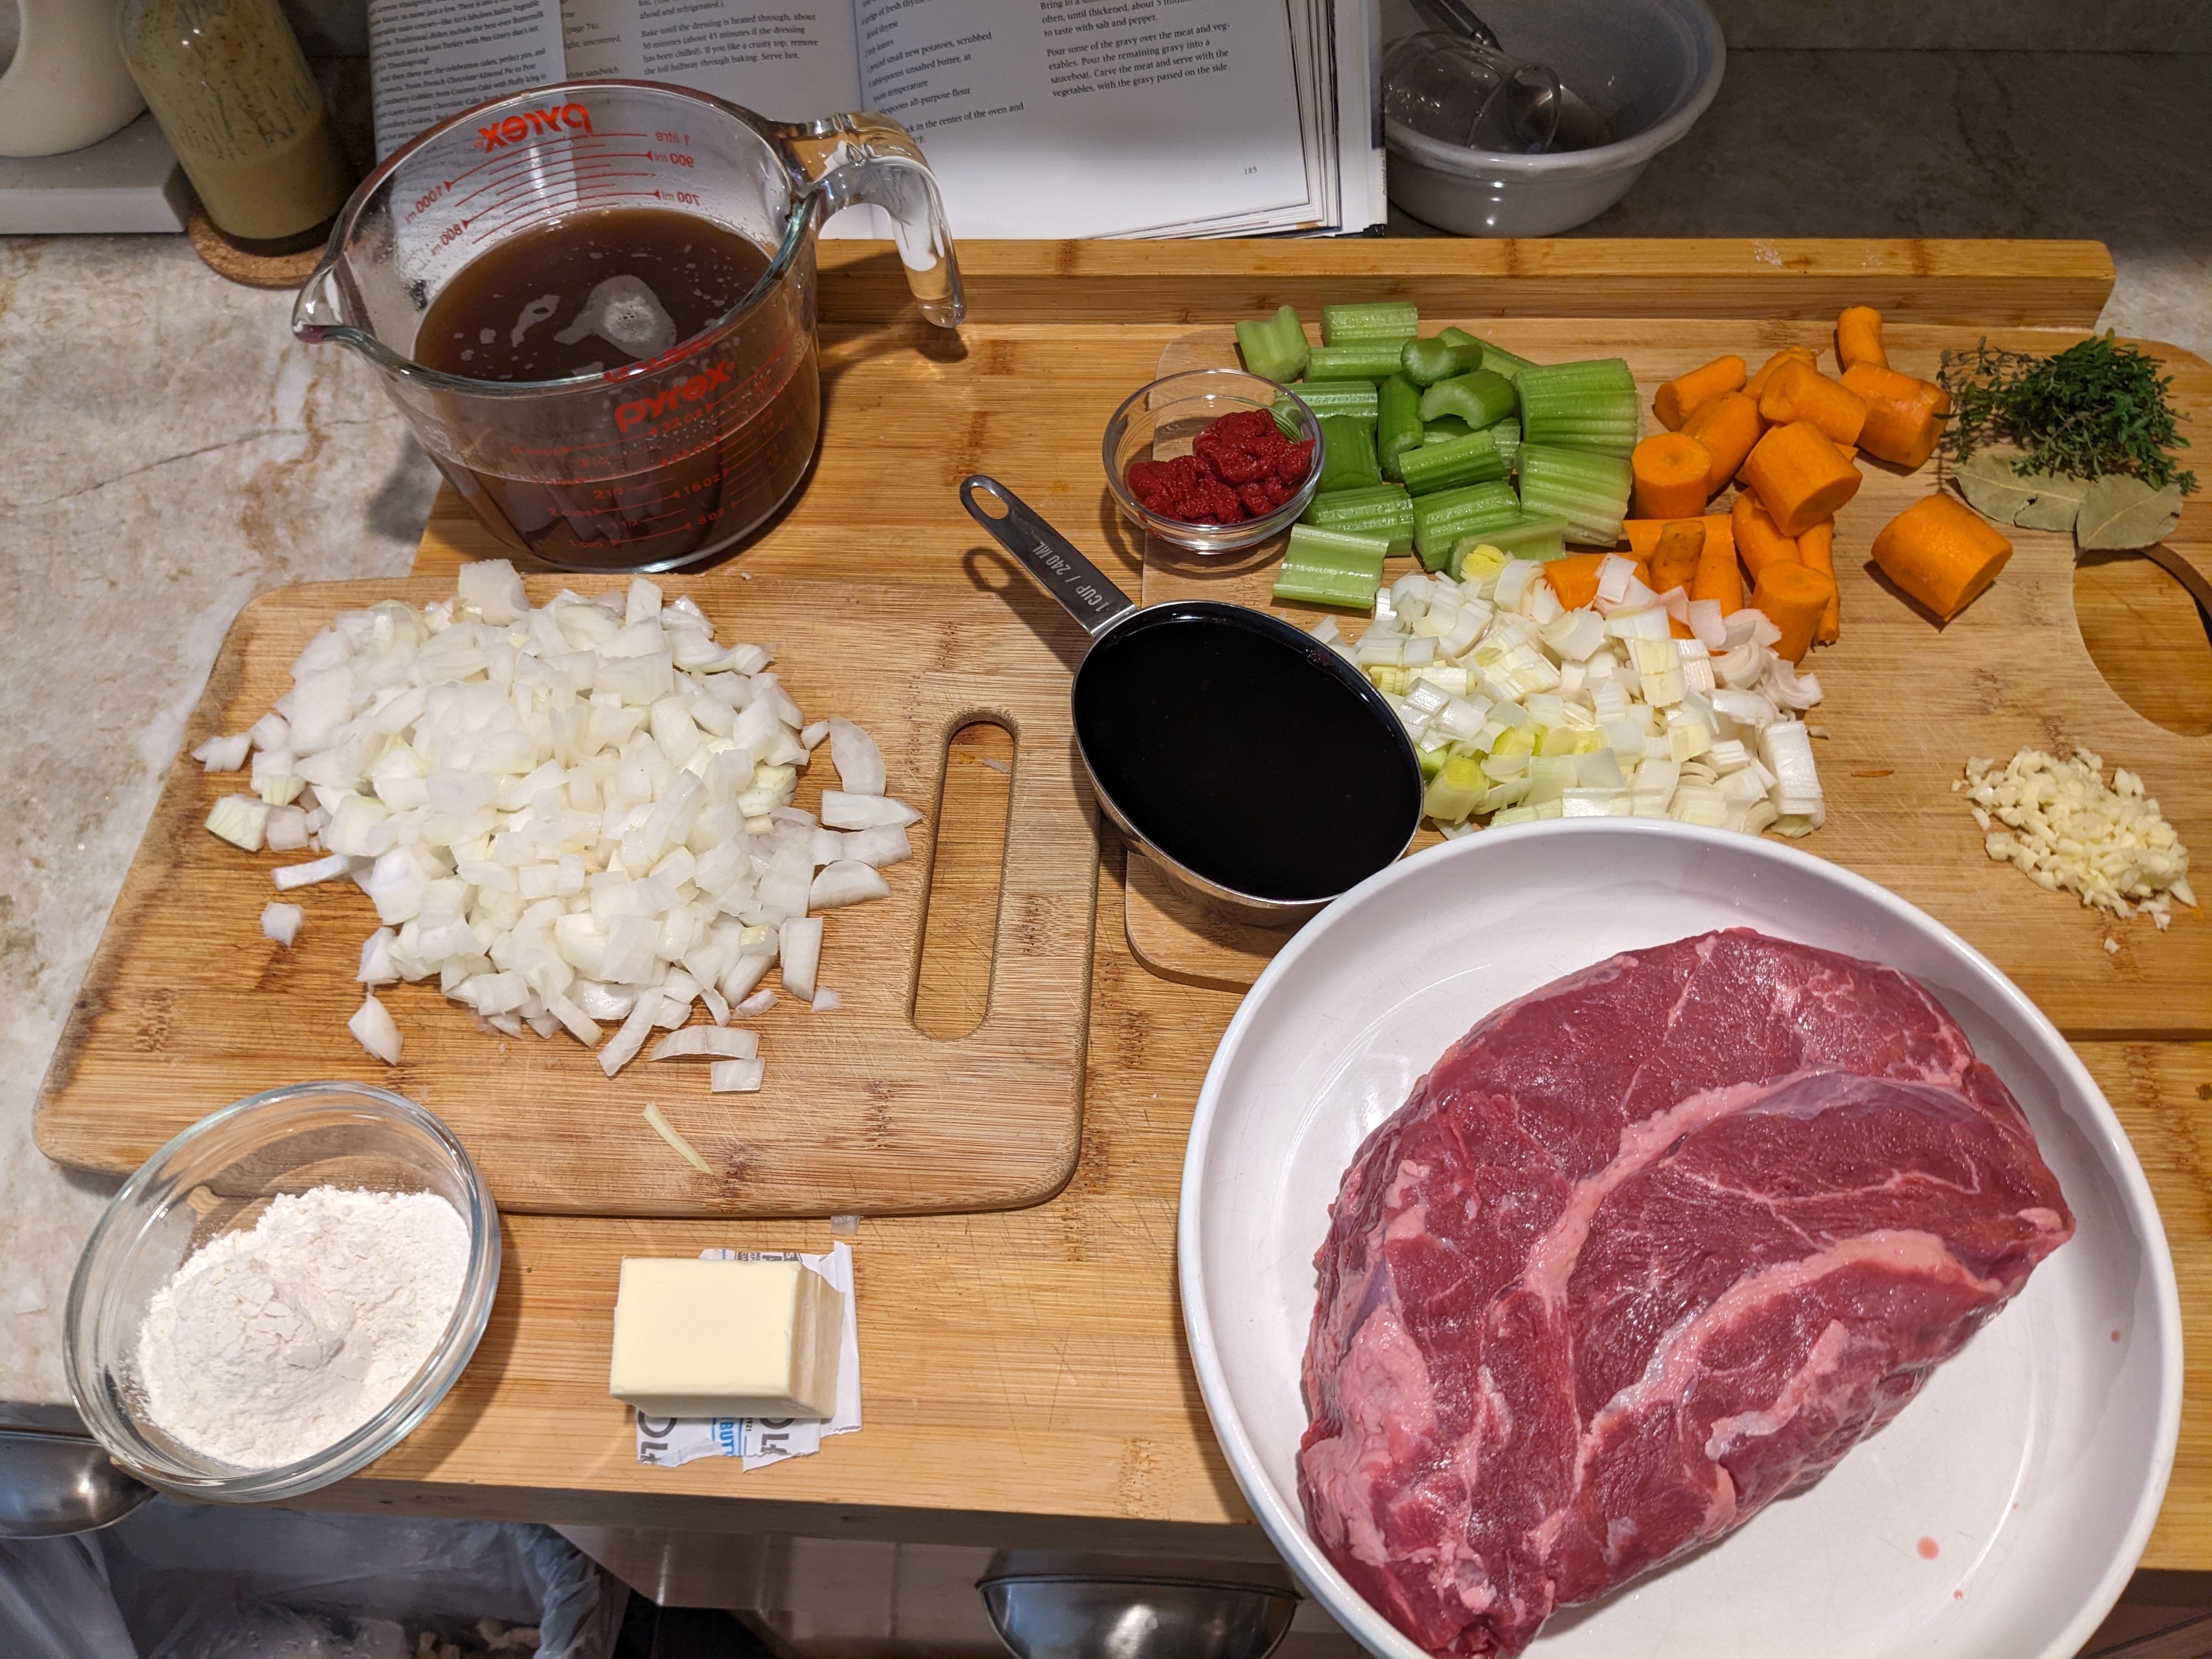
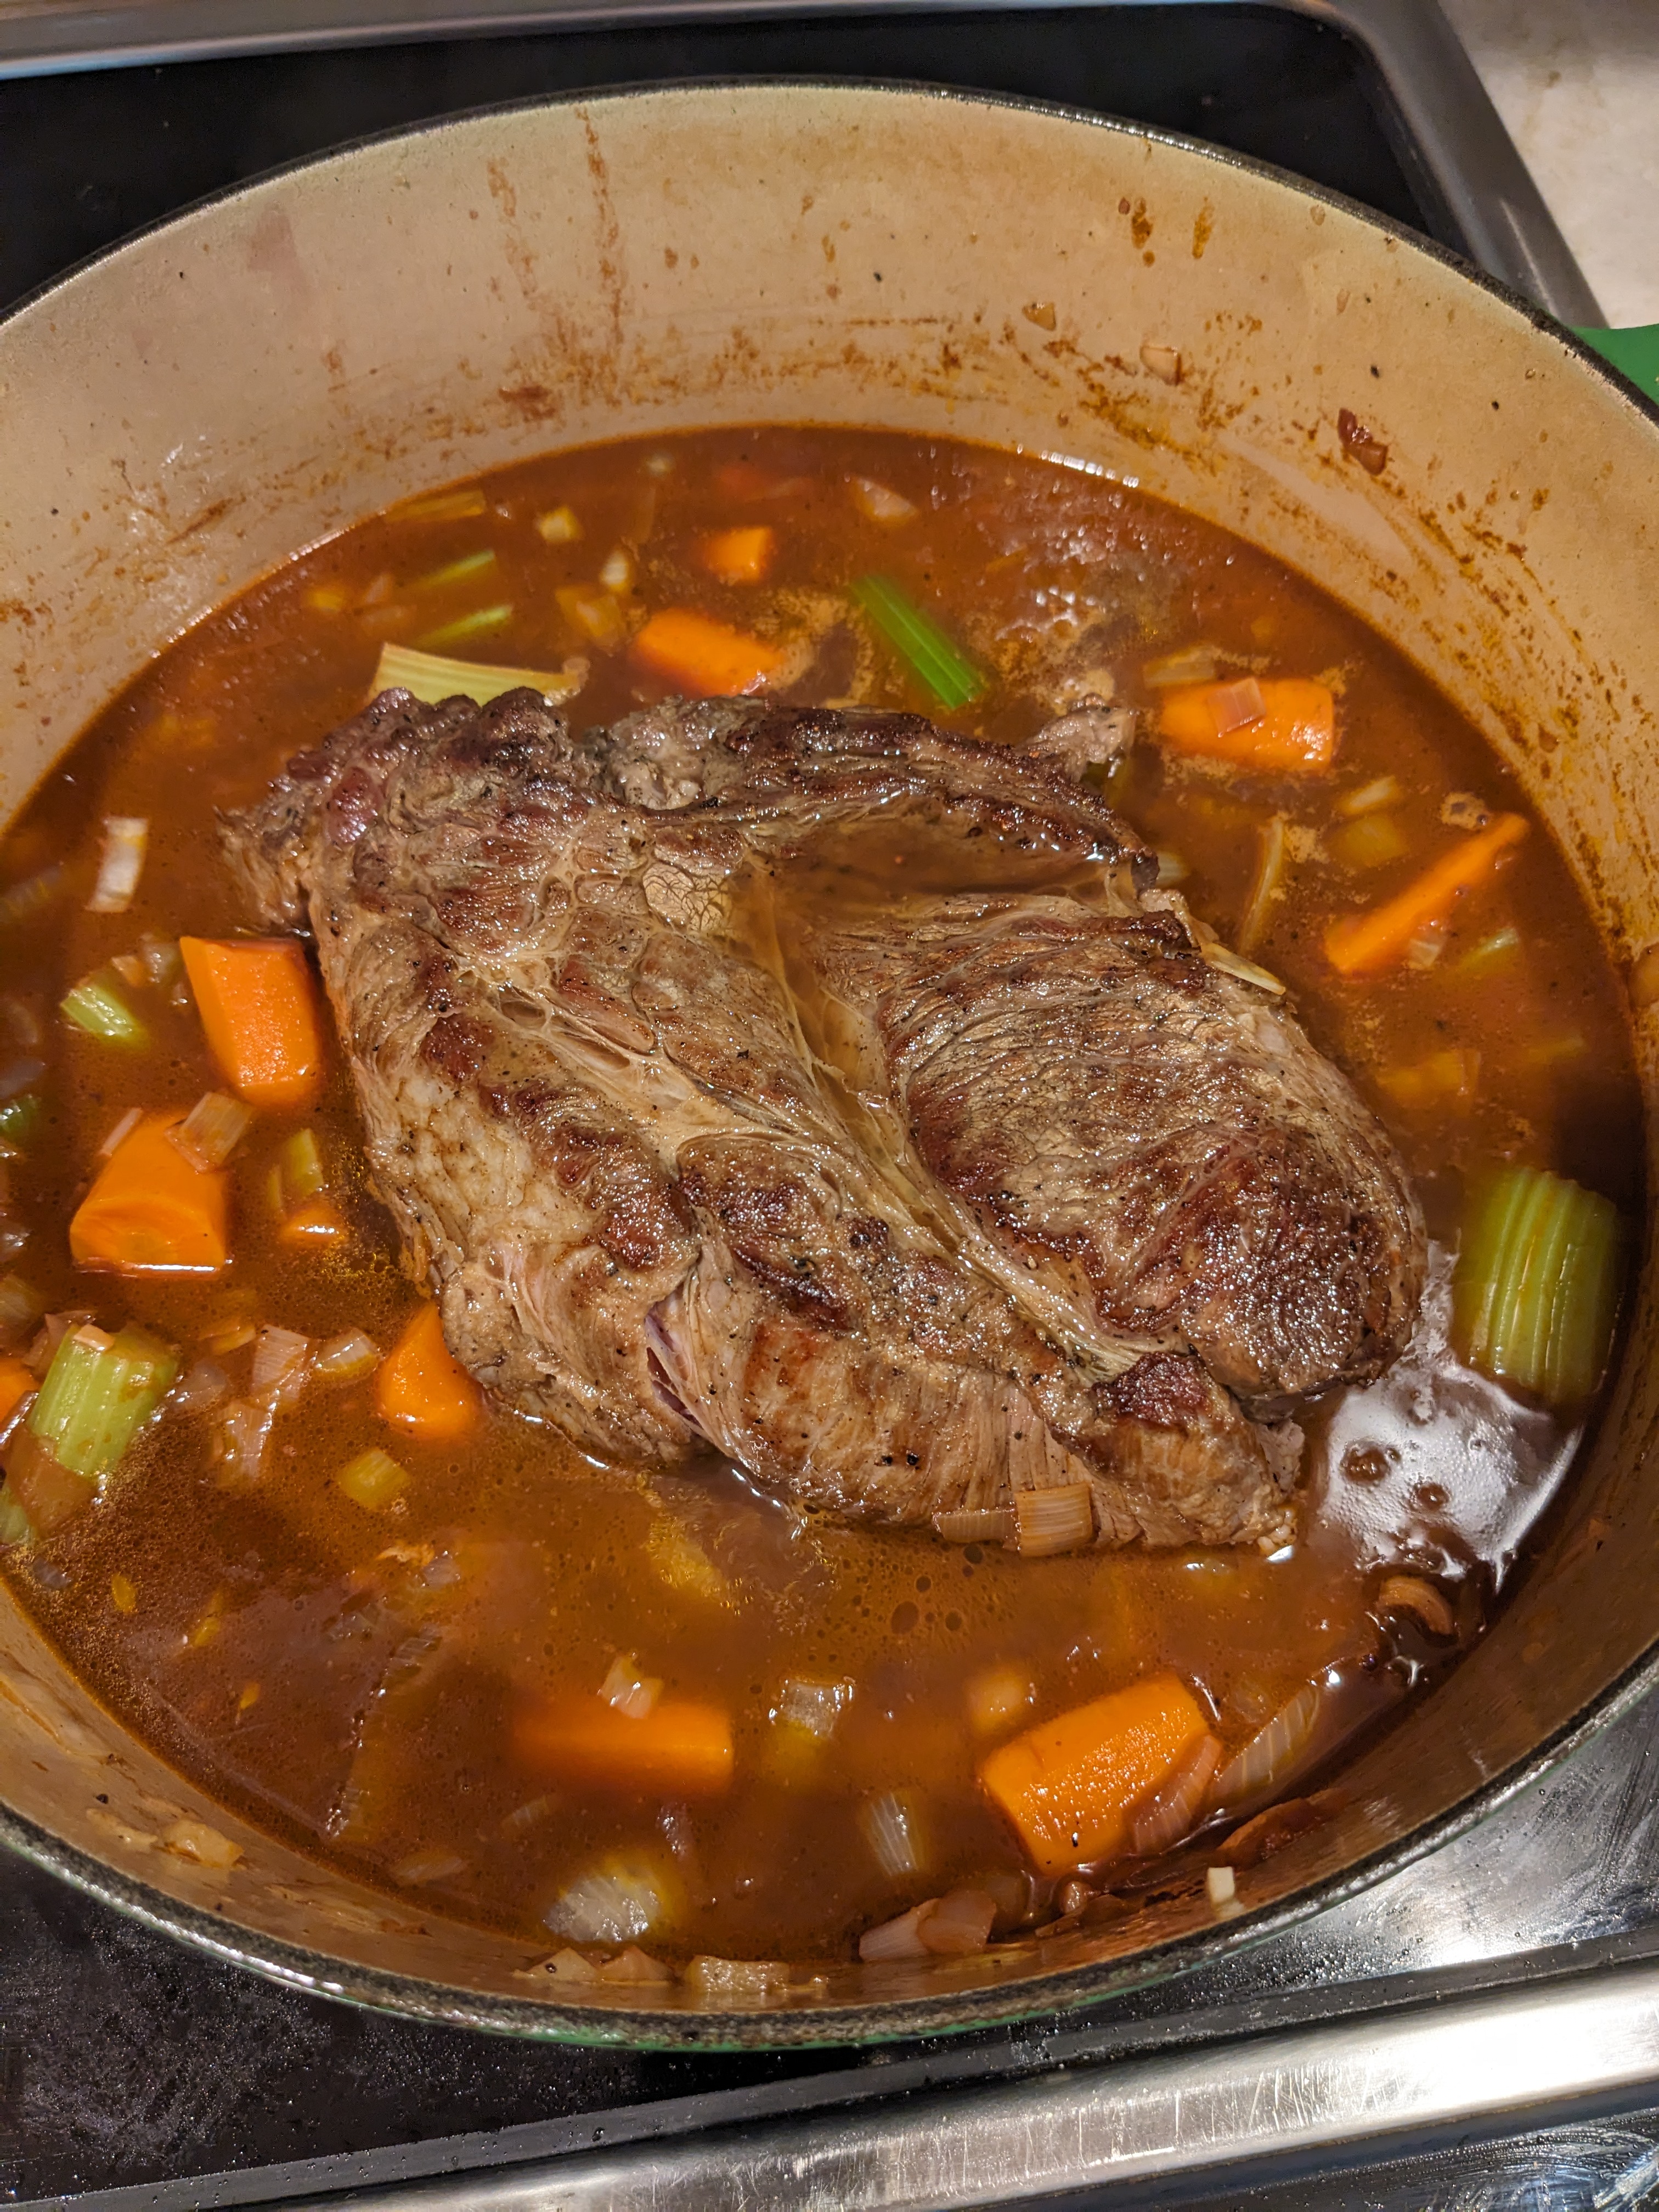
I had ordered a chuck roast from butcher box wo make something Lyn had found but it called for to many recipes so I just made a delicious pot roast. here is is.
Slight adaption of Art Smith’s recipe Simple Sunday Dinner
Ingredients
4 TBS olive oil
3-4 pound boneless beef pot roast (salt and pepper for seasoning meat)
1 large onion, coarsely chopped
1 large leek, white part only, coarsely chopped
3 medium carrots, cut in 1 inch pieces
3 celery ribs, cut into 1 inch pieces
2 cloves garlic, minced
1 cup hearty dry red wine
2 TBS tomato paste
3 cups beef broth
4 sprigs fresh thyme or ½ tsp dried
2 bay leaves
3 TBS unsalted butter
3 TBS flour
1 lbs small potatoes or I used cubed butternut squash
Cooking Directions
1. Position a rack in the center of the oven and preheat to 325F.
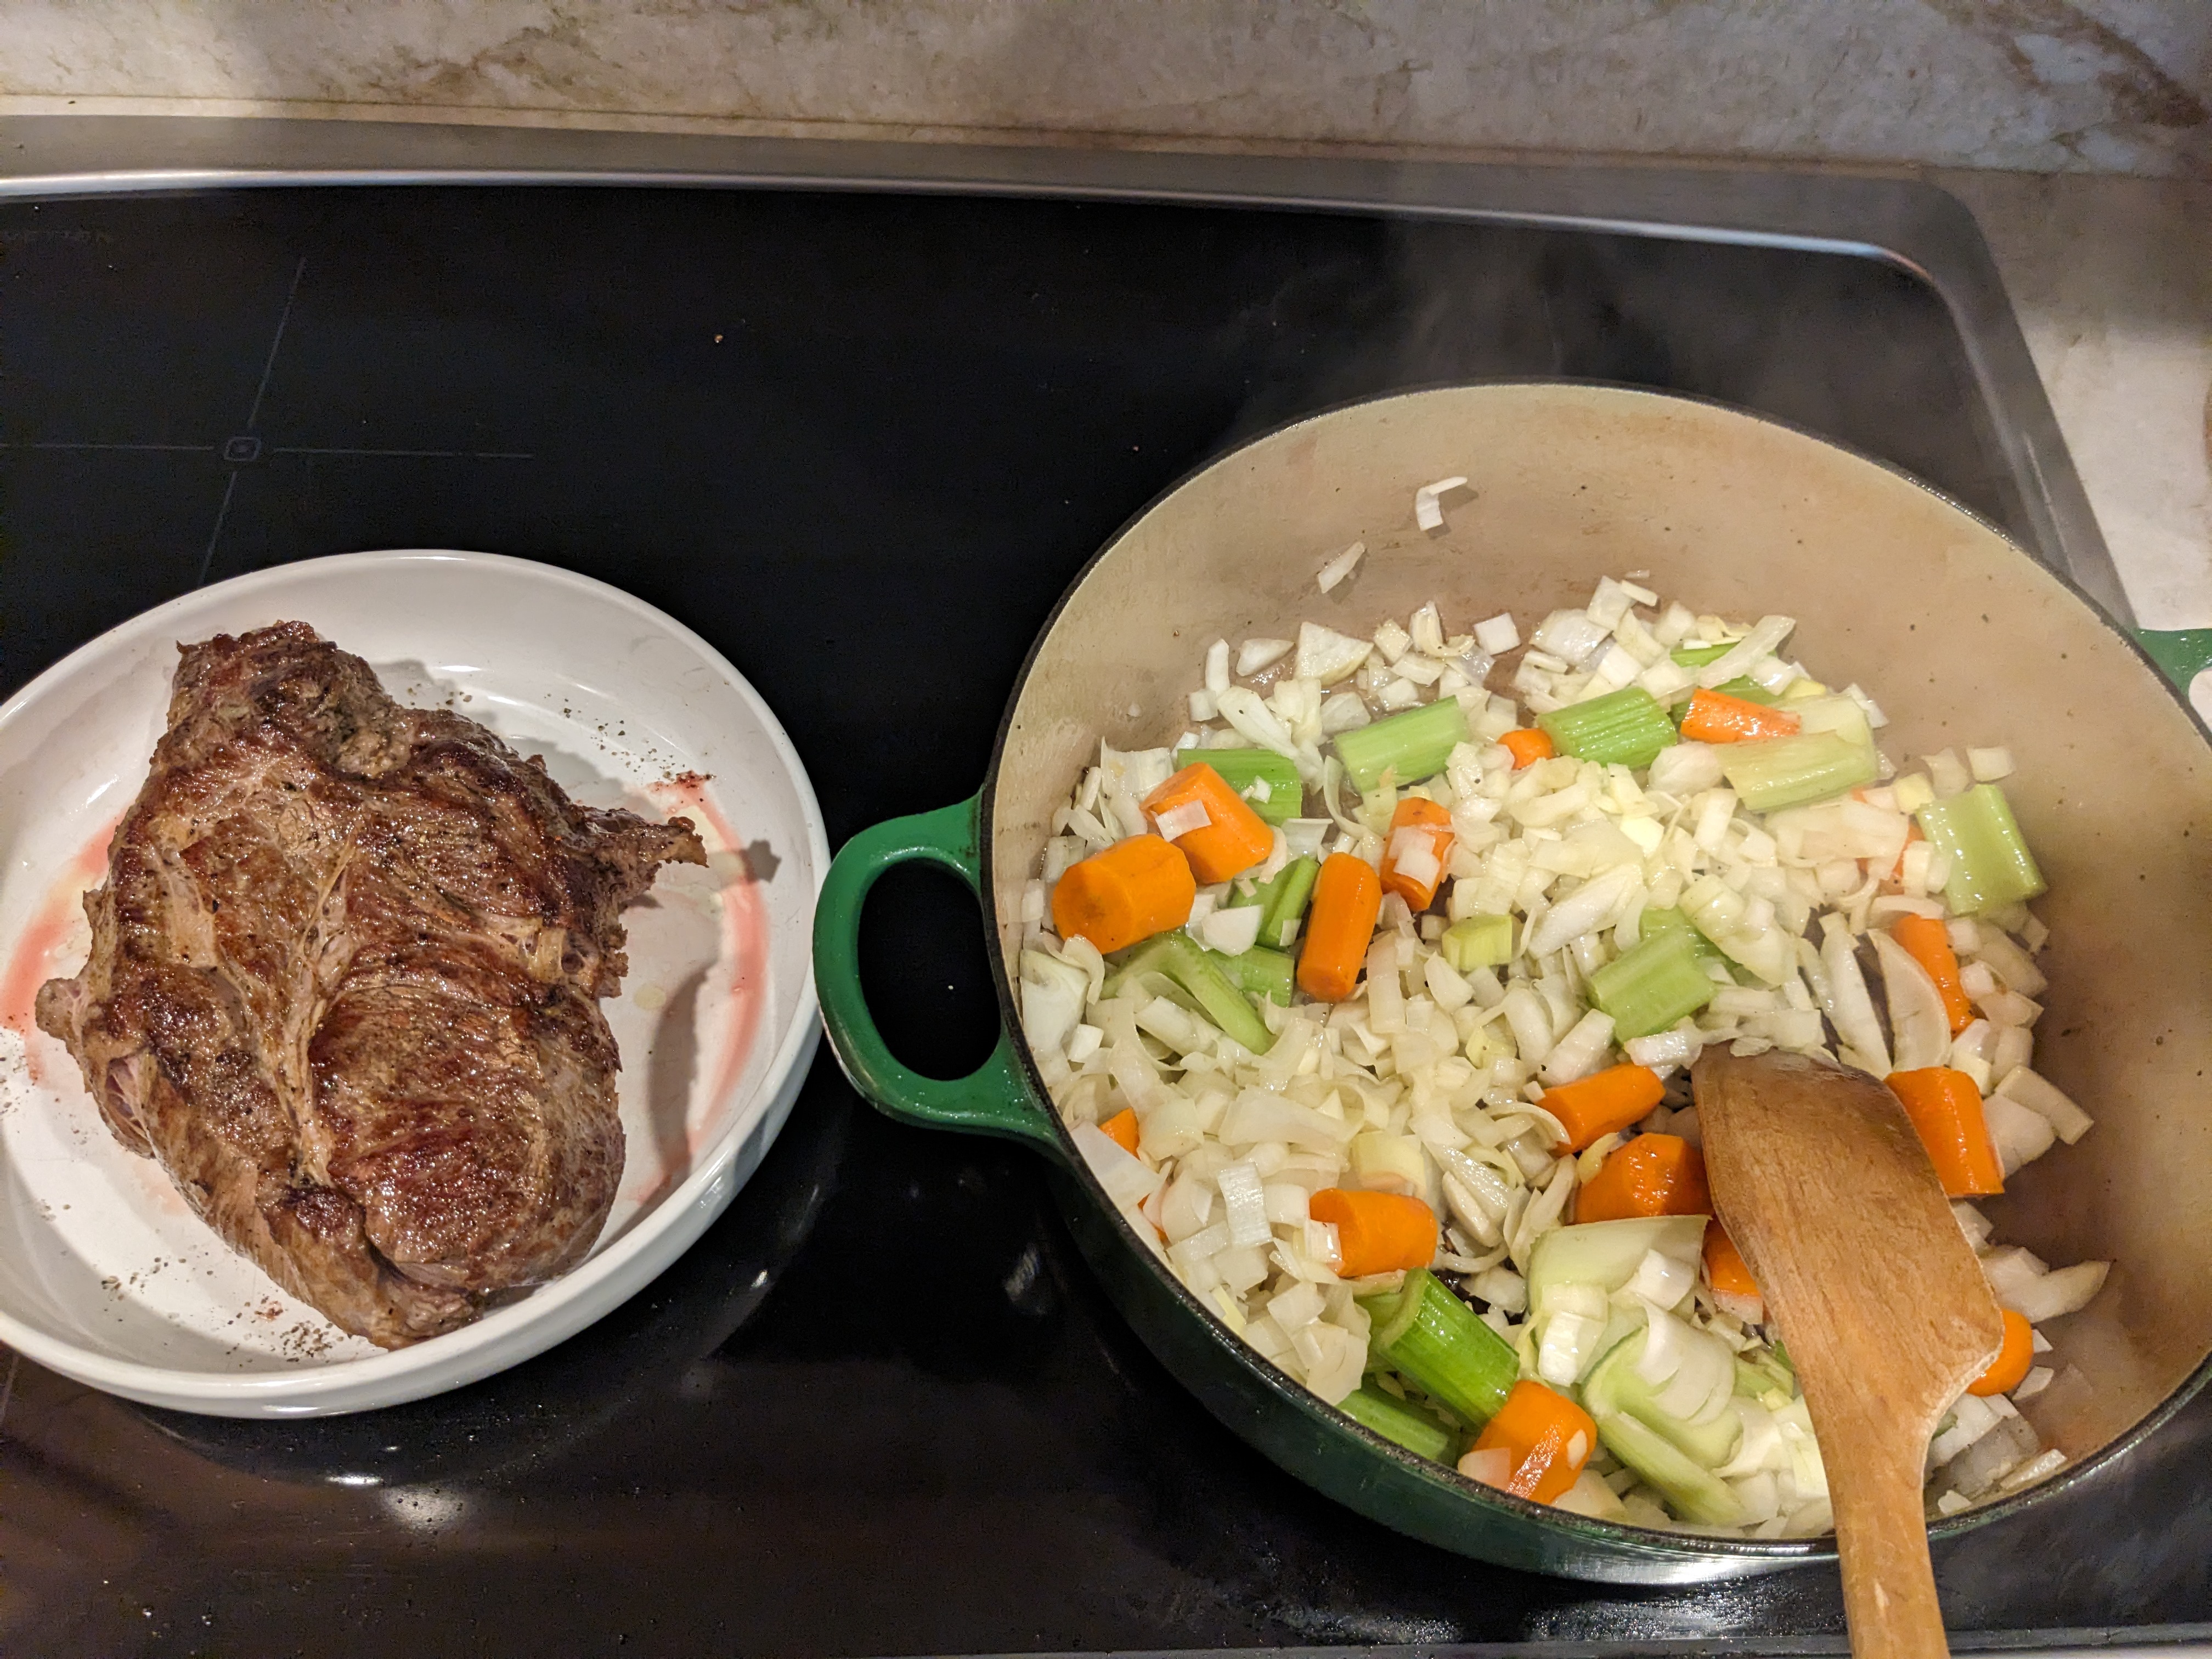
2. Heat 2 tablespoons of the oil in a Dutch oven over medium high heat. Season the beef with salt and pepper to taste. Cook in the pot, turning on all sides, until browned. Transfer to plate.
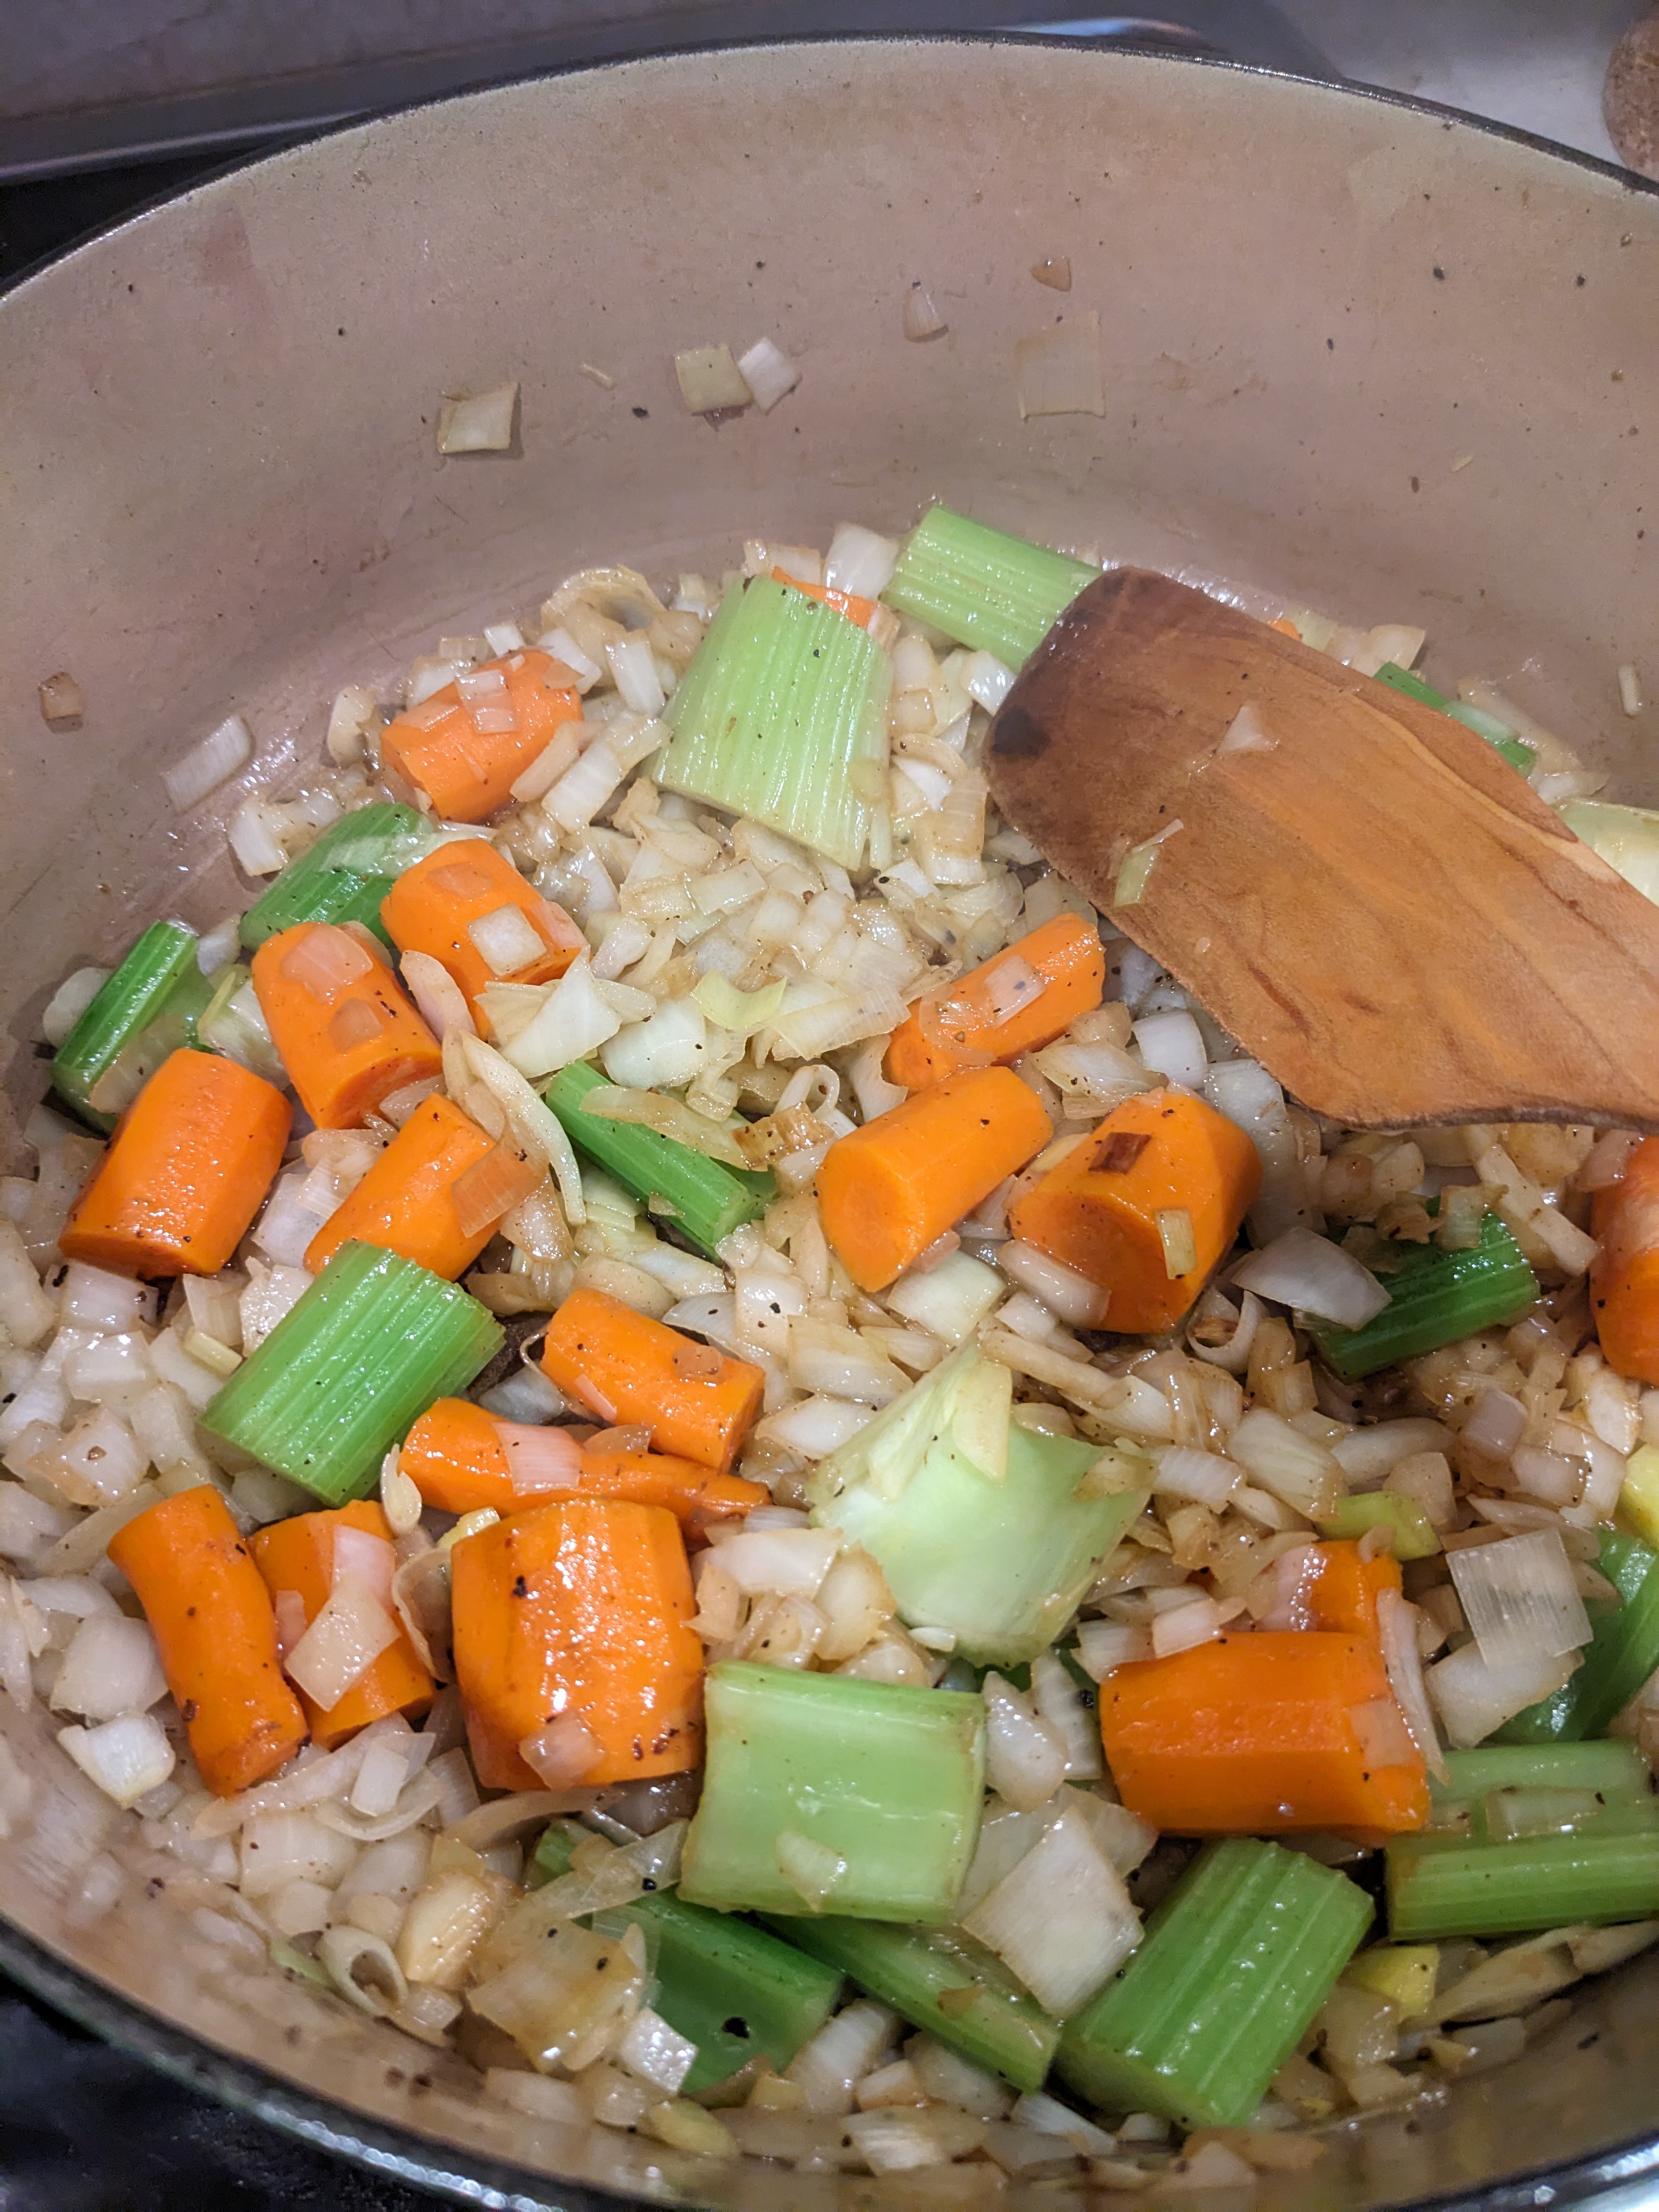
3. Add remaining olive oil to the pot and heat. Add the onion, carrots and celery and cook, until softened, about 5 minutes. Add the garlic and cook for 1 minute. Stir in the wine and tomato paste. Cook until reduced in half, about 3 minutes. Return the meat to the pot and add the broth. Bring to a boil. Add thyme and rosemary. I would add flipping the roast at this time.
4. Cover and bake until the meat is fork tender about 2 – 2 1/2 hours. Add squash, cover and cook about 30 minutes longer until fork tender
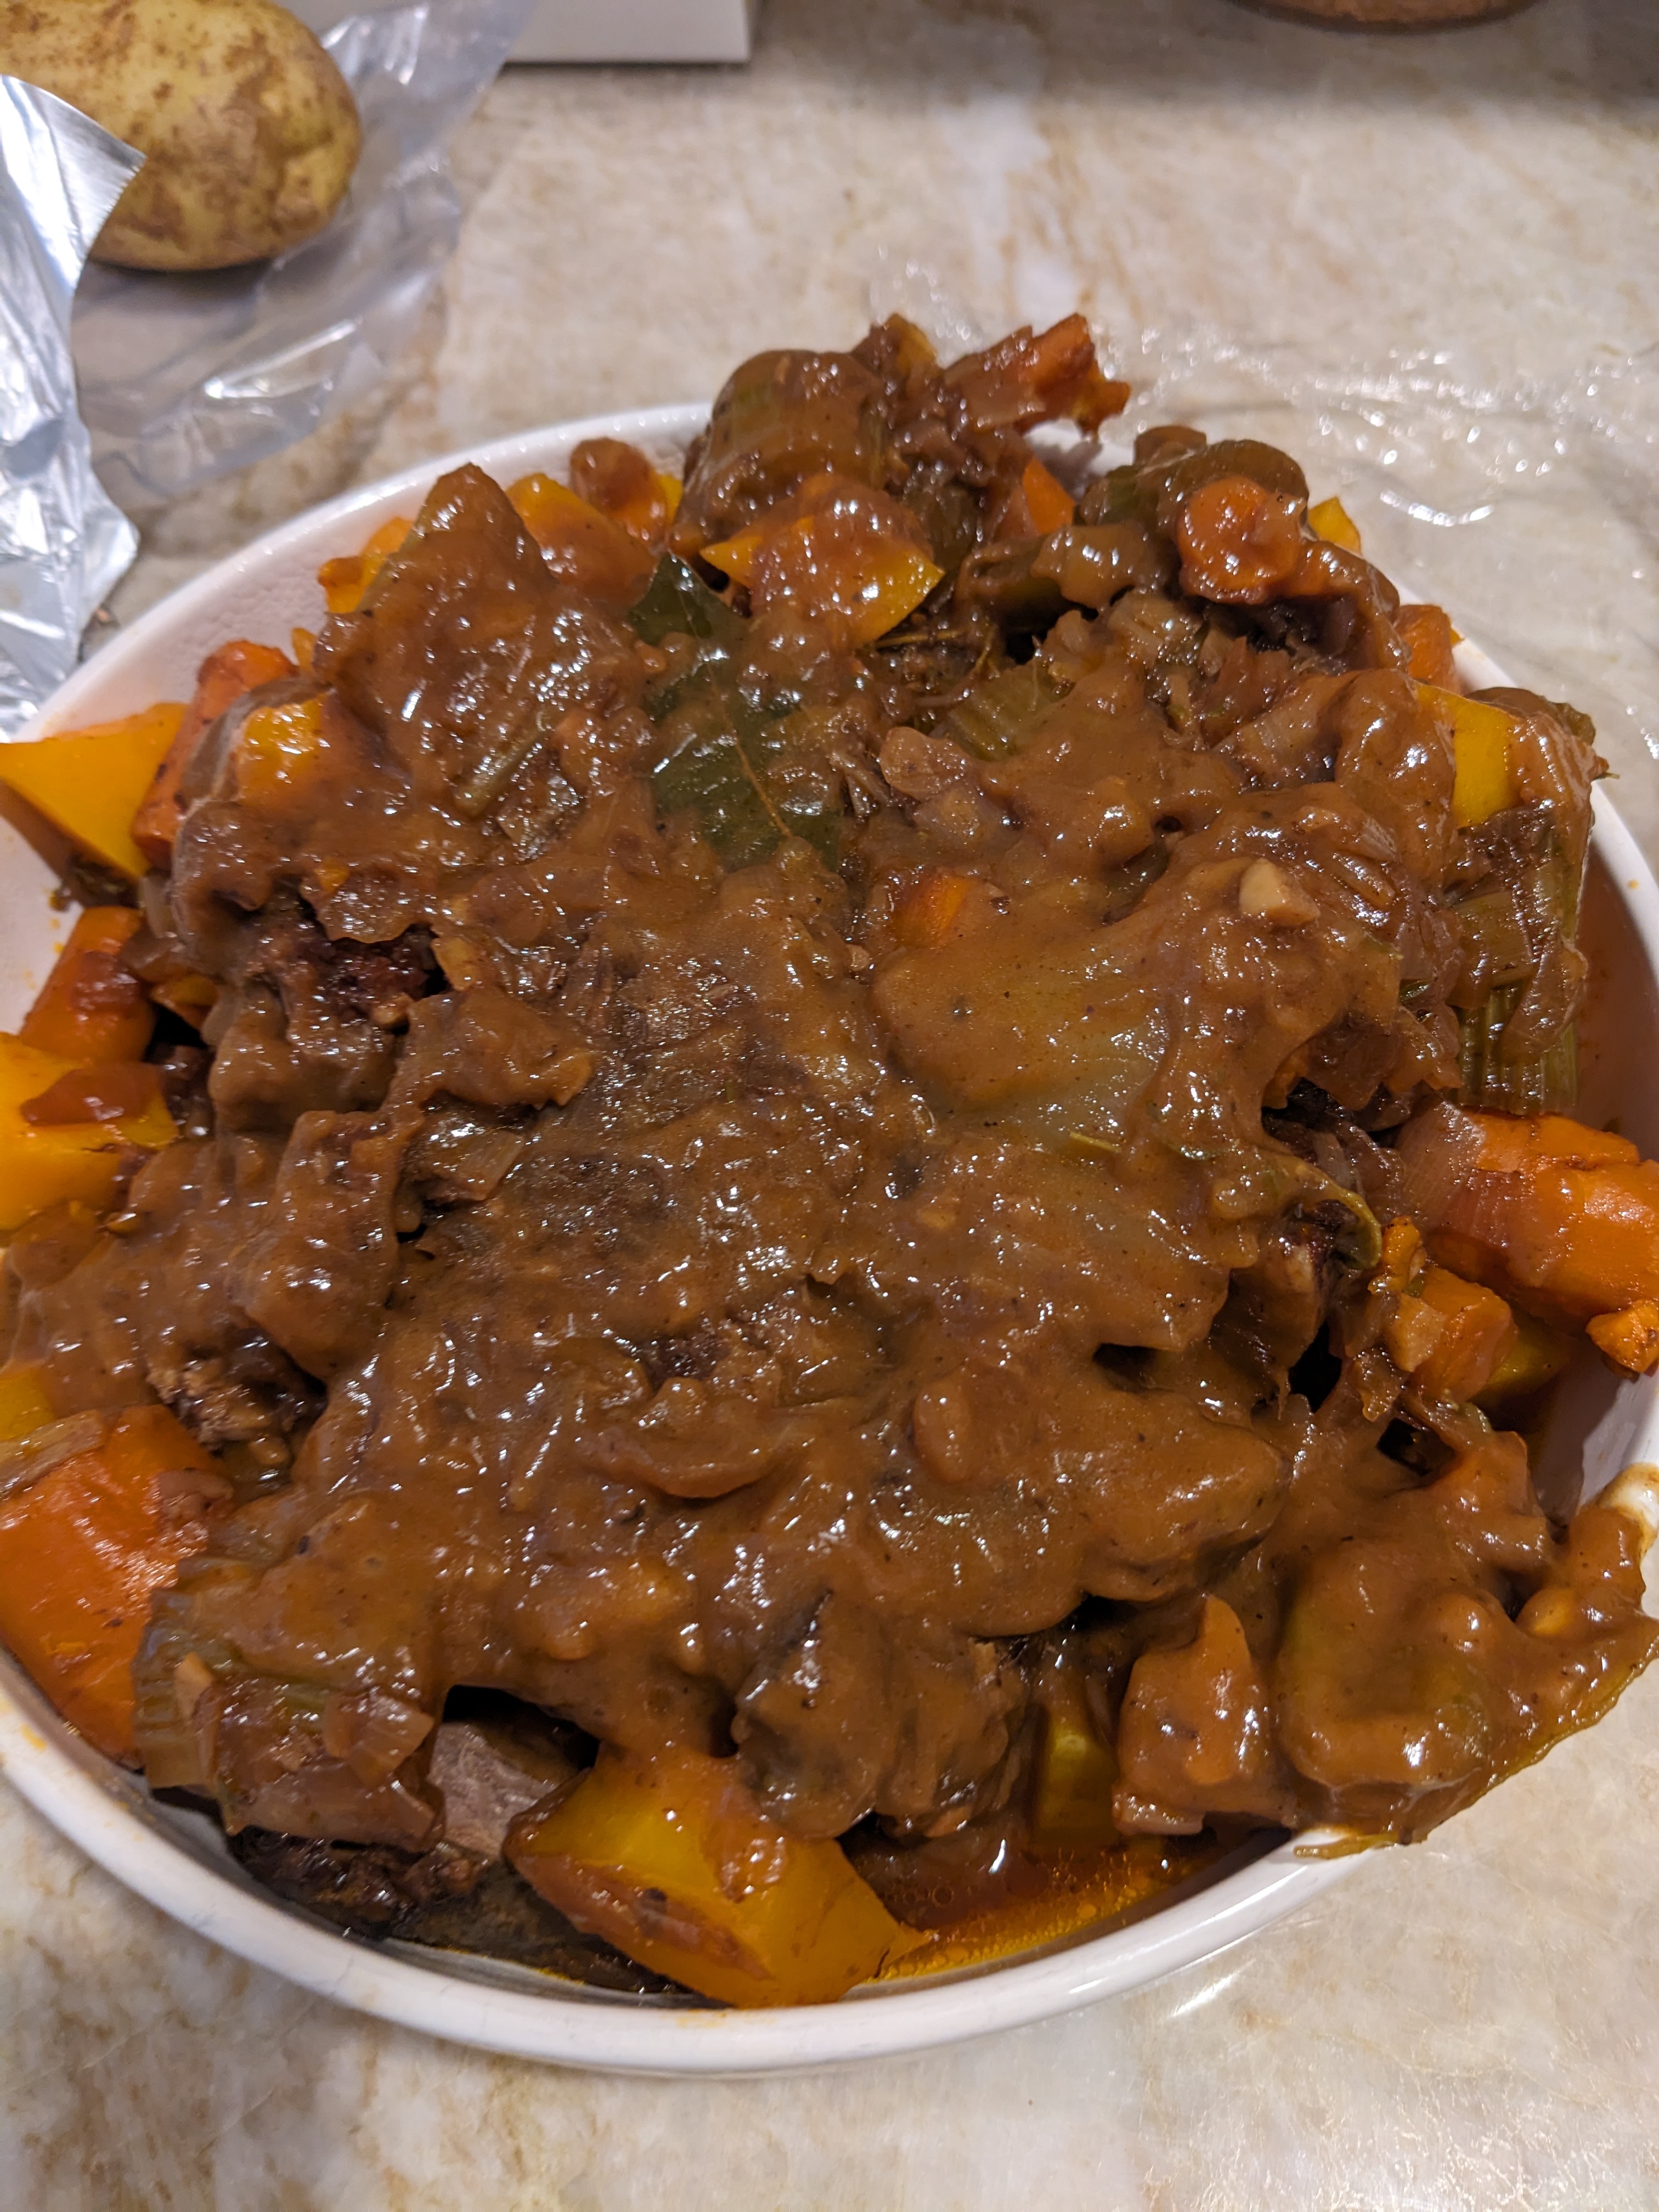
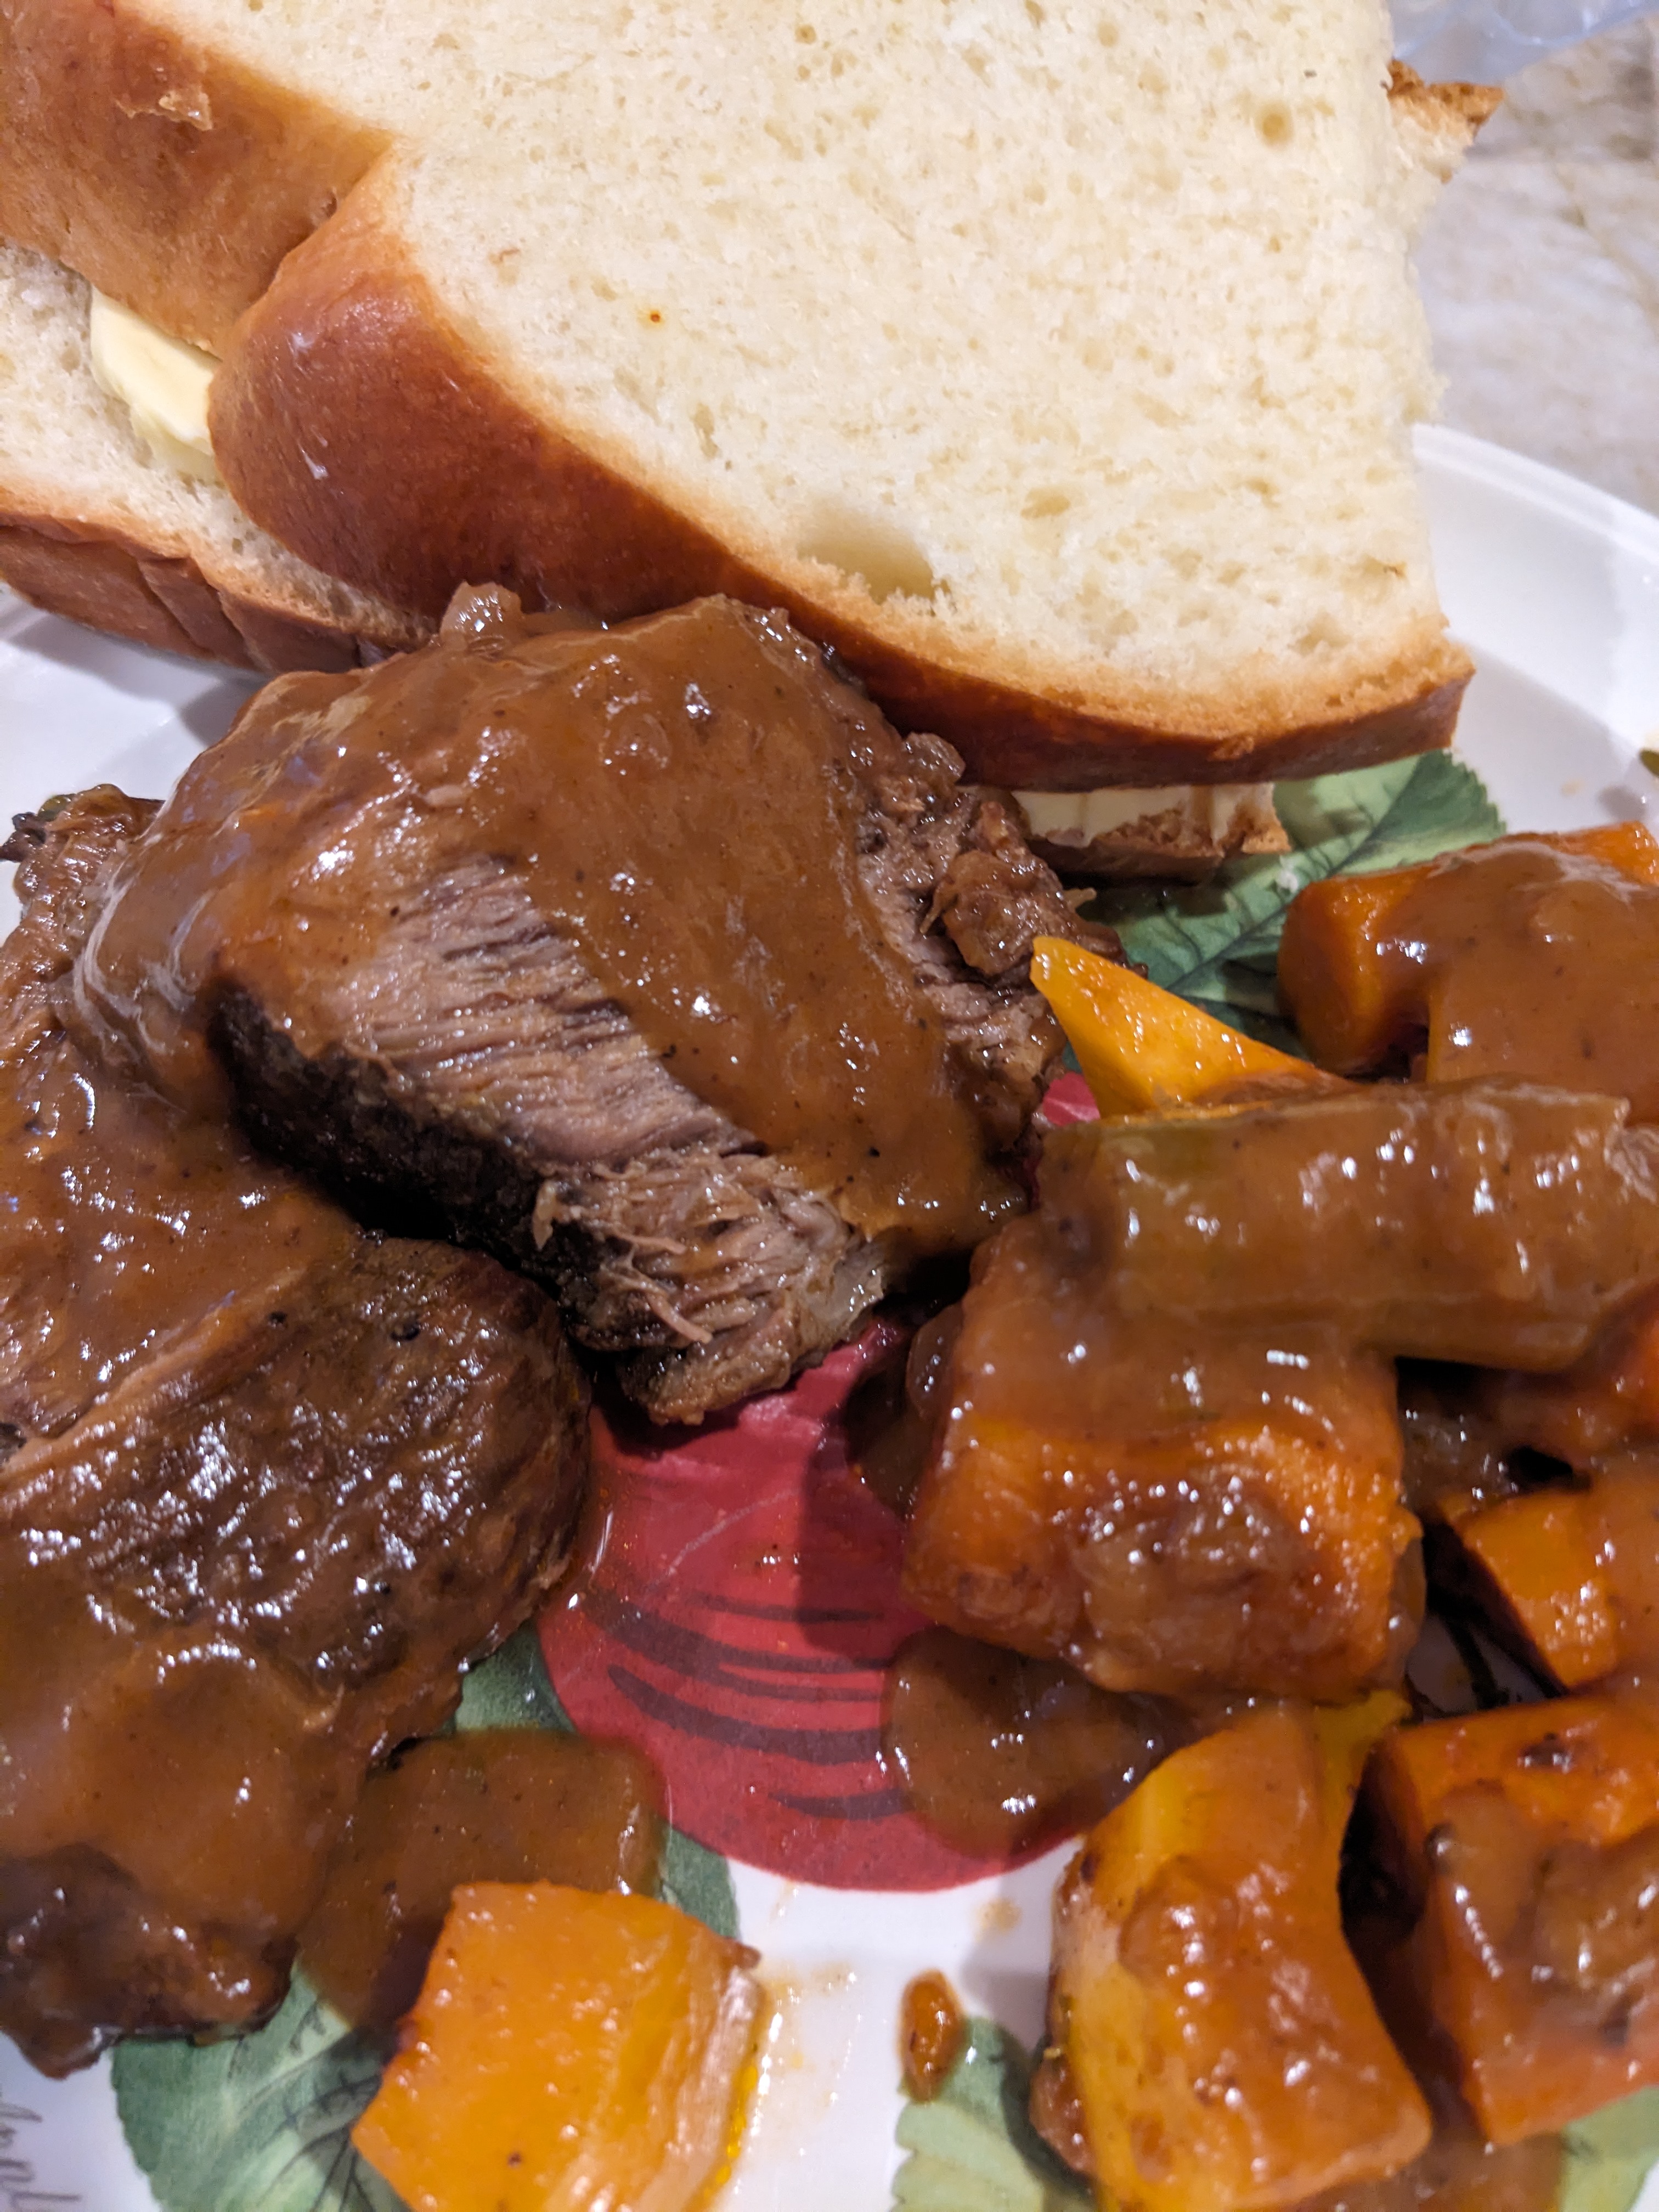
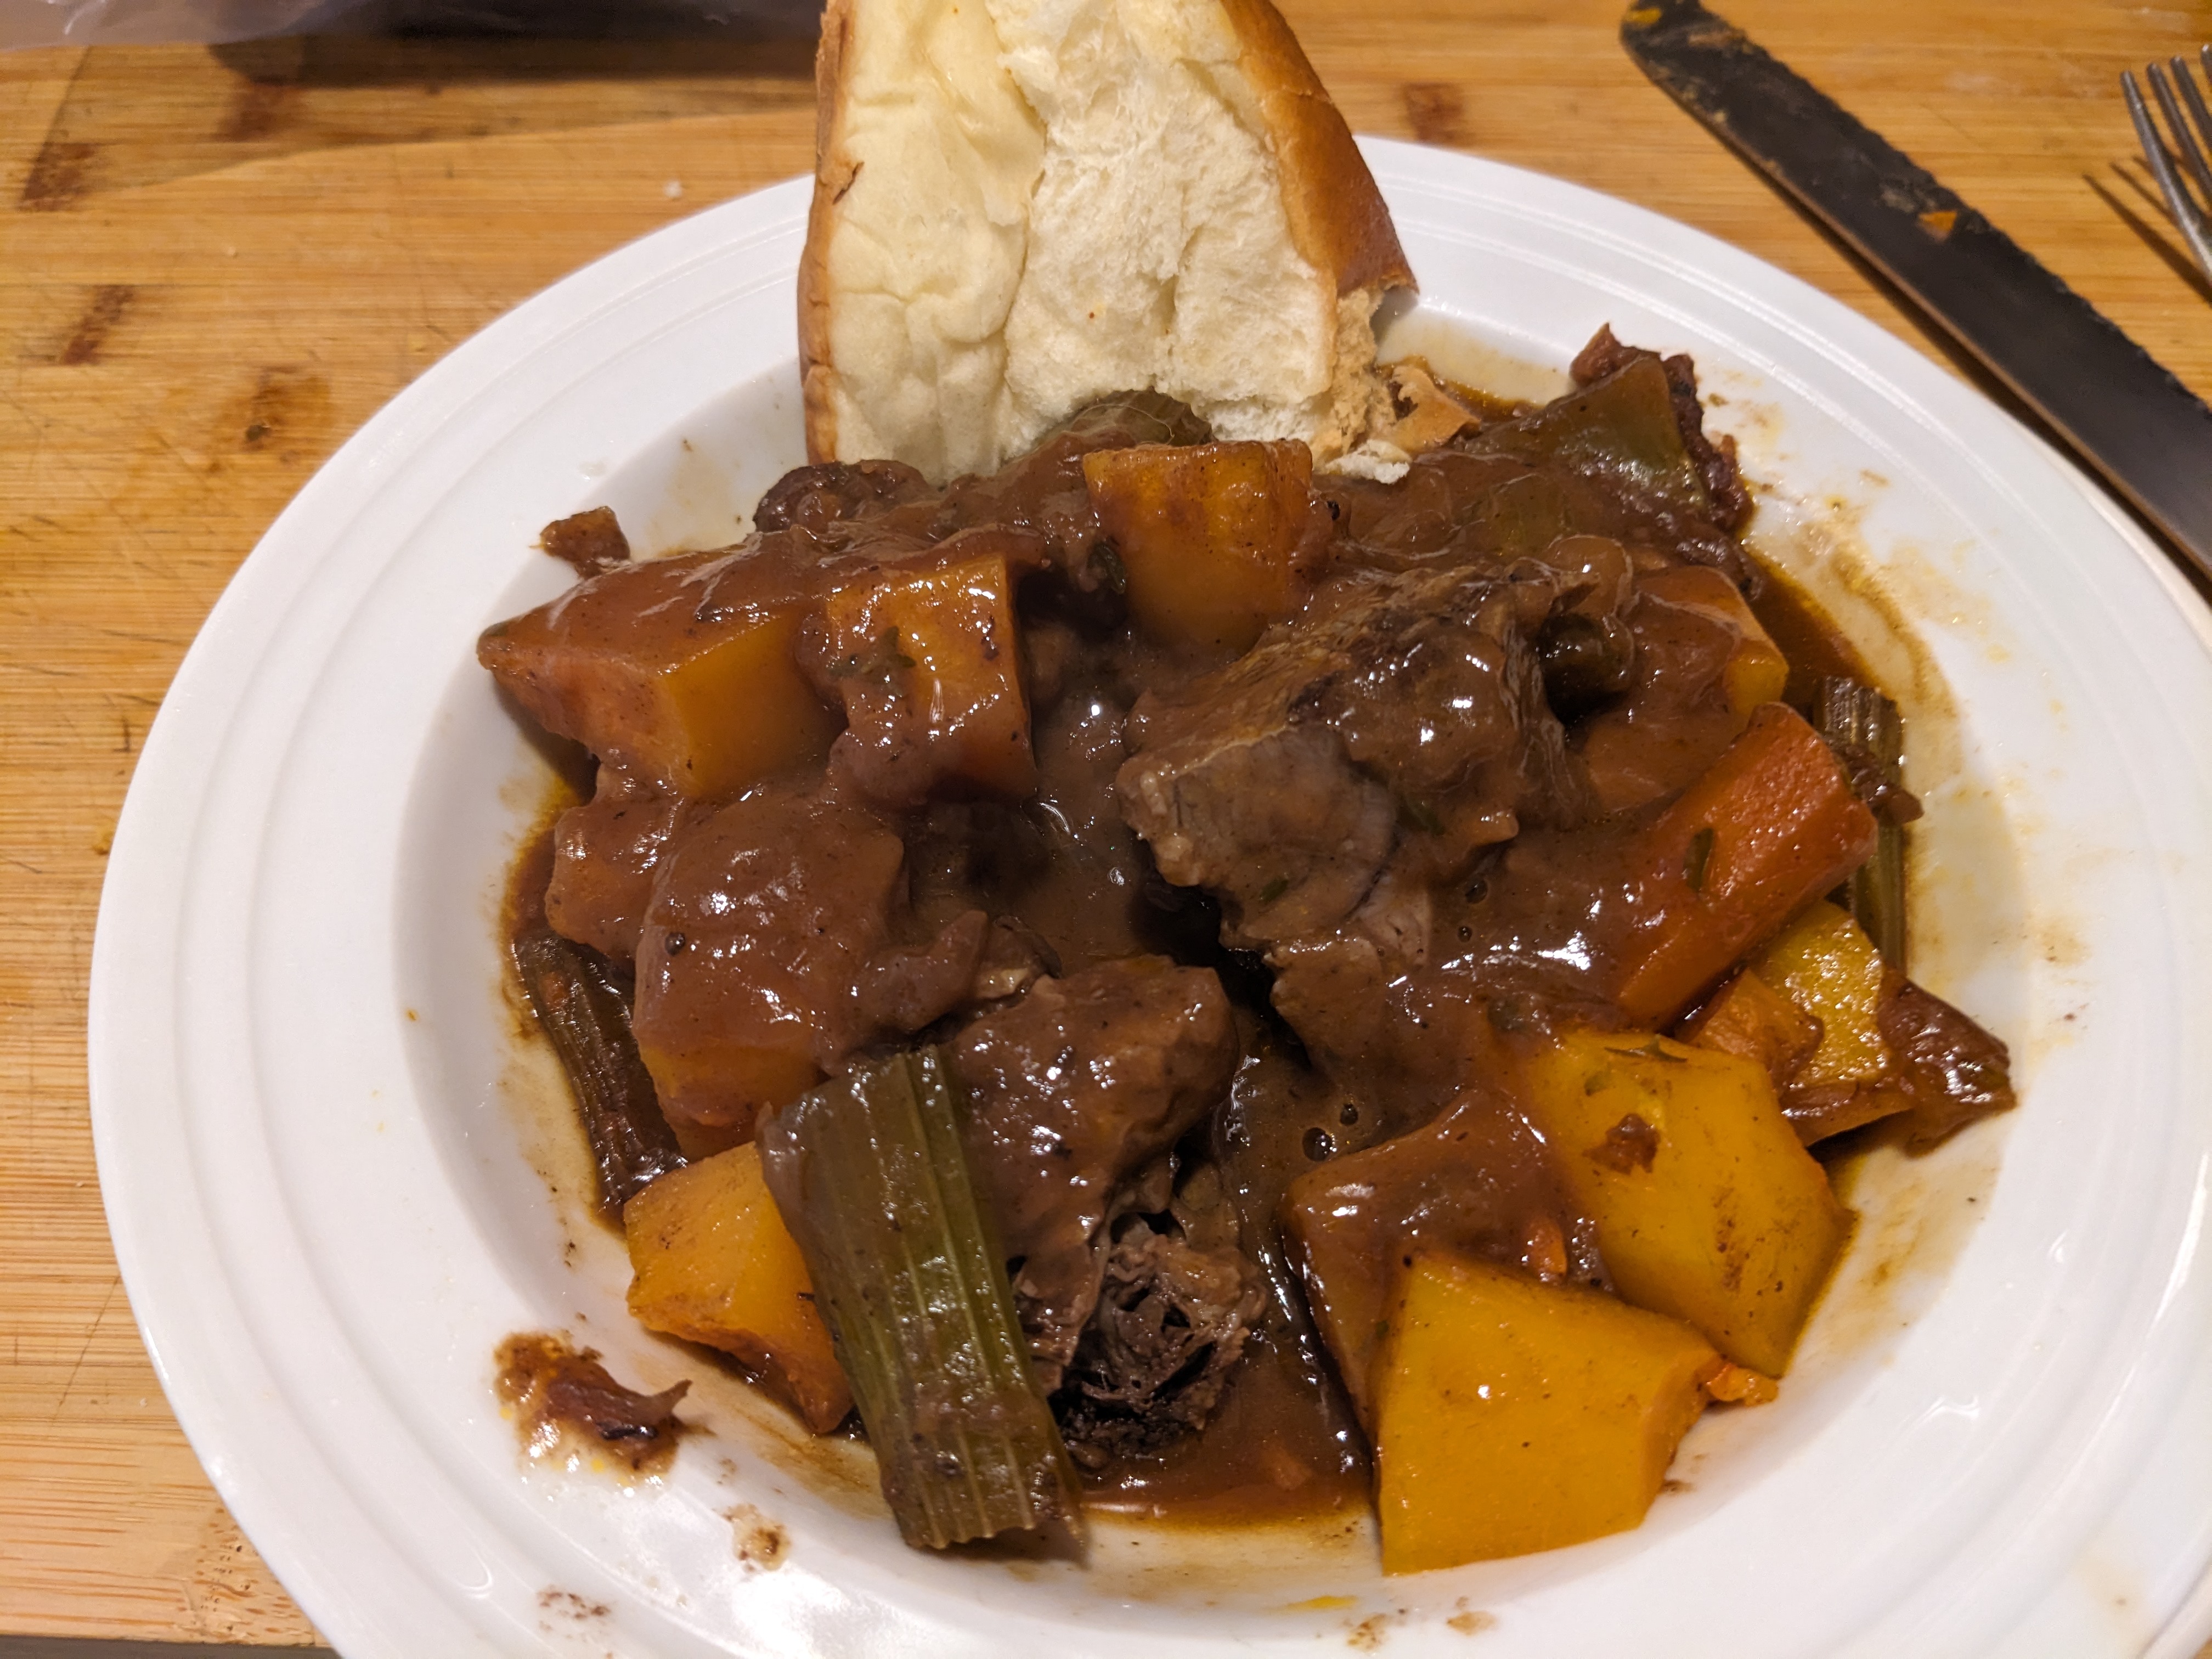
5. Transfer the meat to a deep platter, then use slotted spoon to remove the vegetables and place on platter.
6. Mix the flour and butter in a small bowl to form a paste. Add to a saucepan and gradually whisk in 1 cup of the cooking liquid in. Bring to a simmer over medium heat, stirring often, until thickened, about 5 minutes. Season to taste with salt and pepper.
7. Carve the meat and served with the vegetable, with the gravy passed on the side.
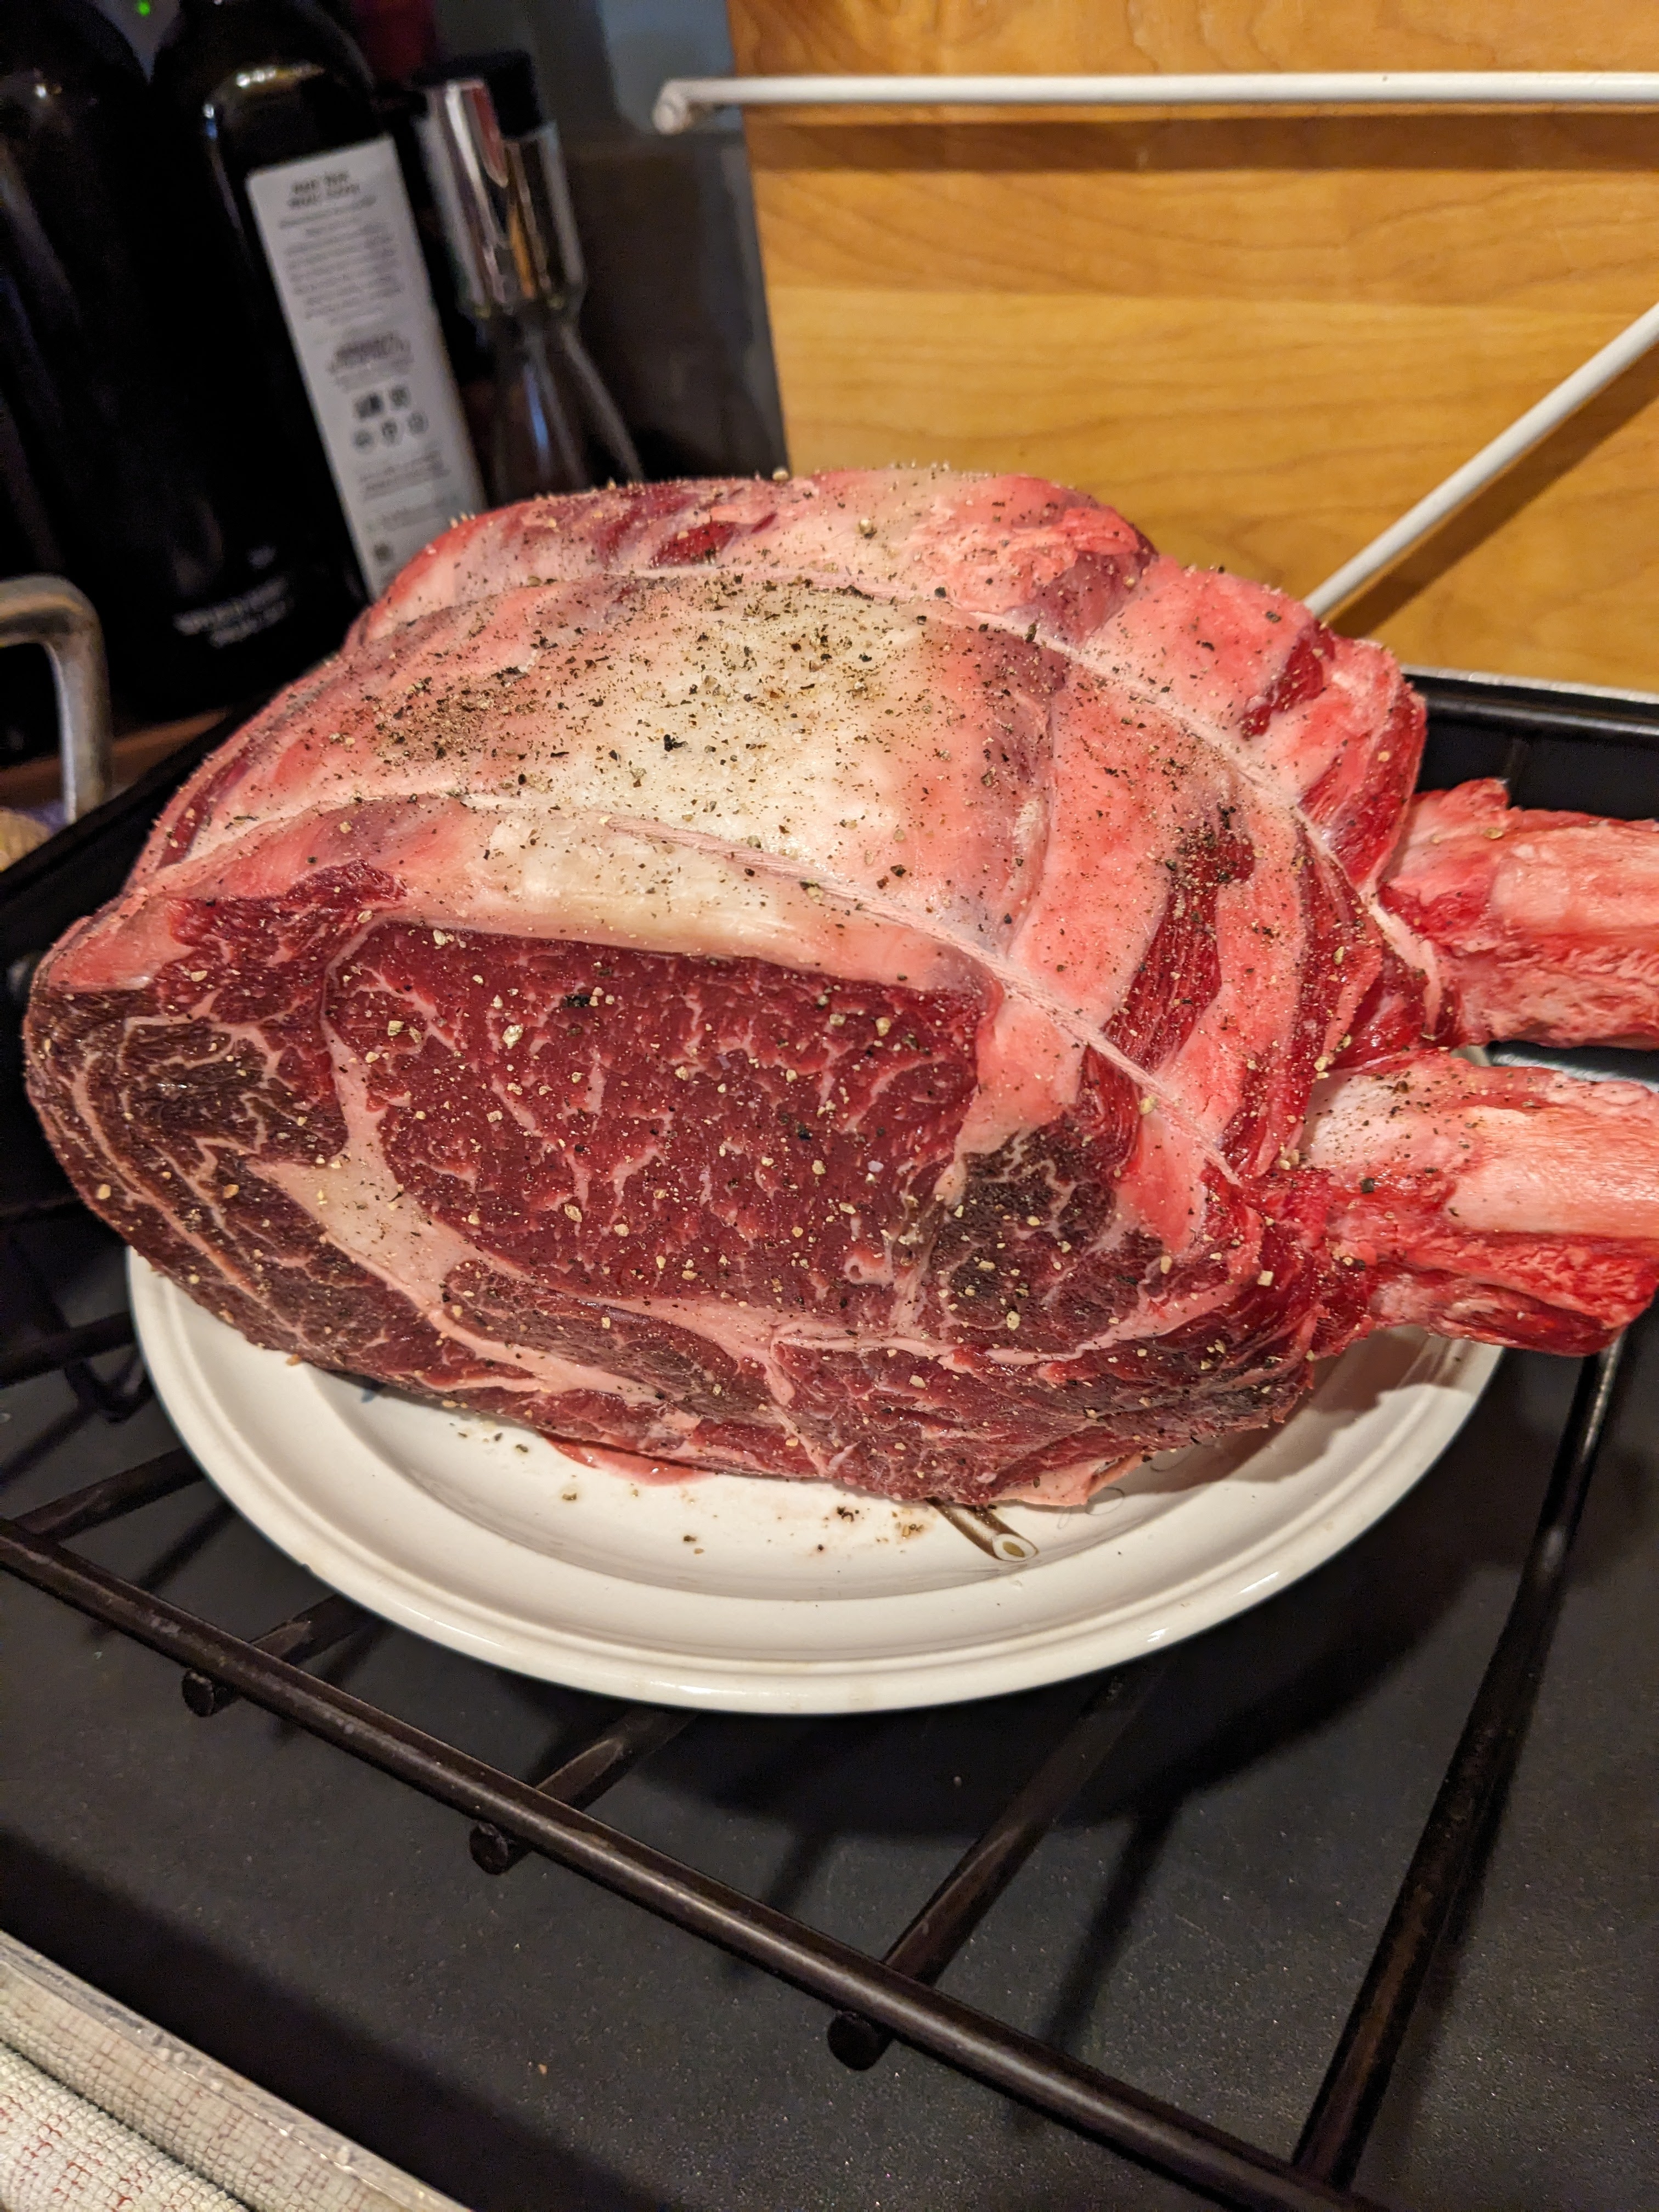
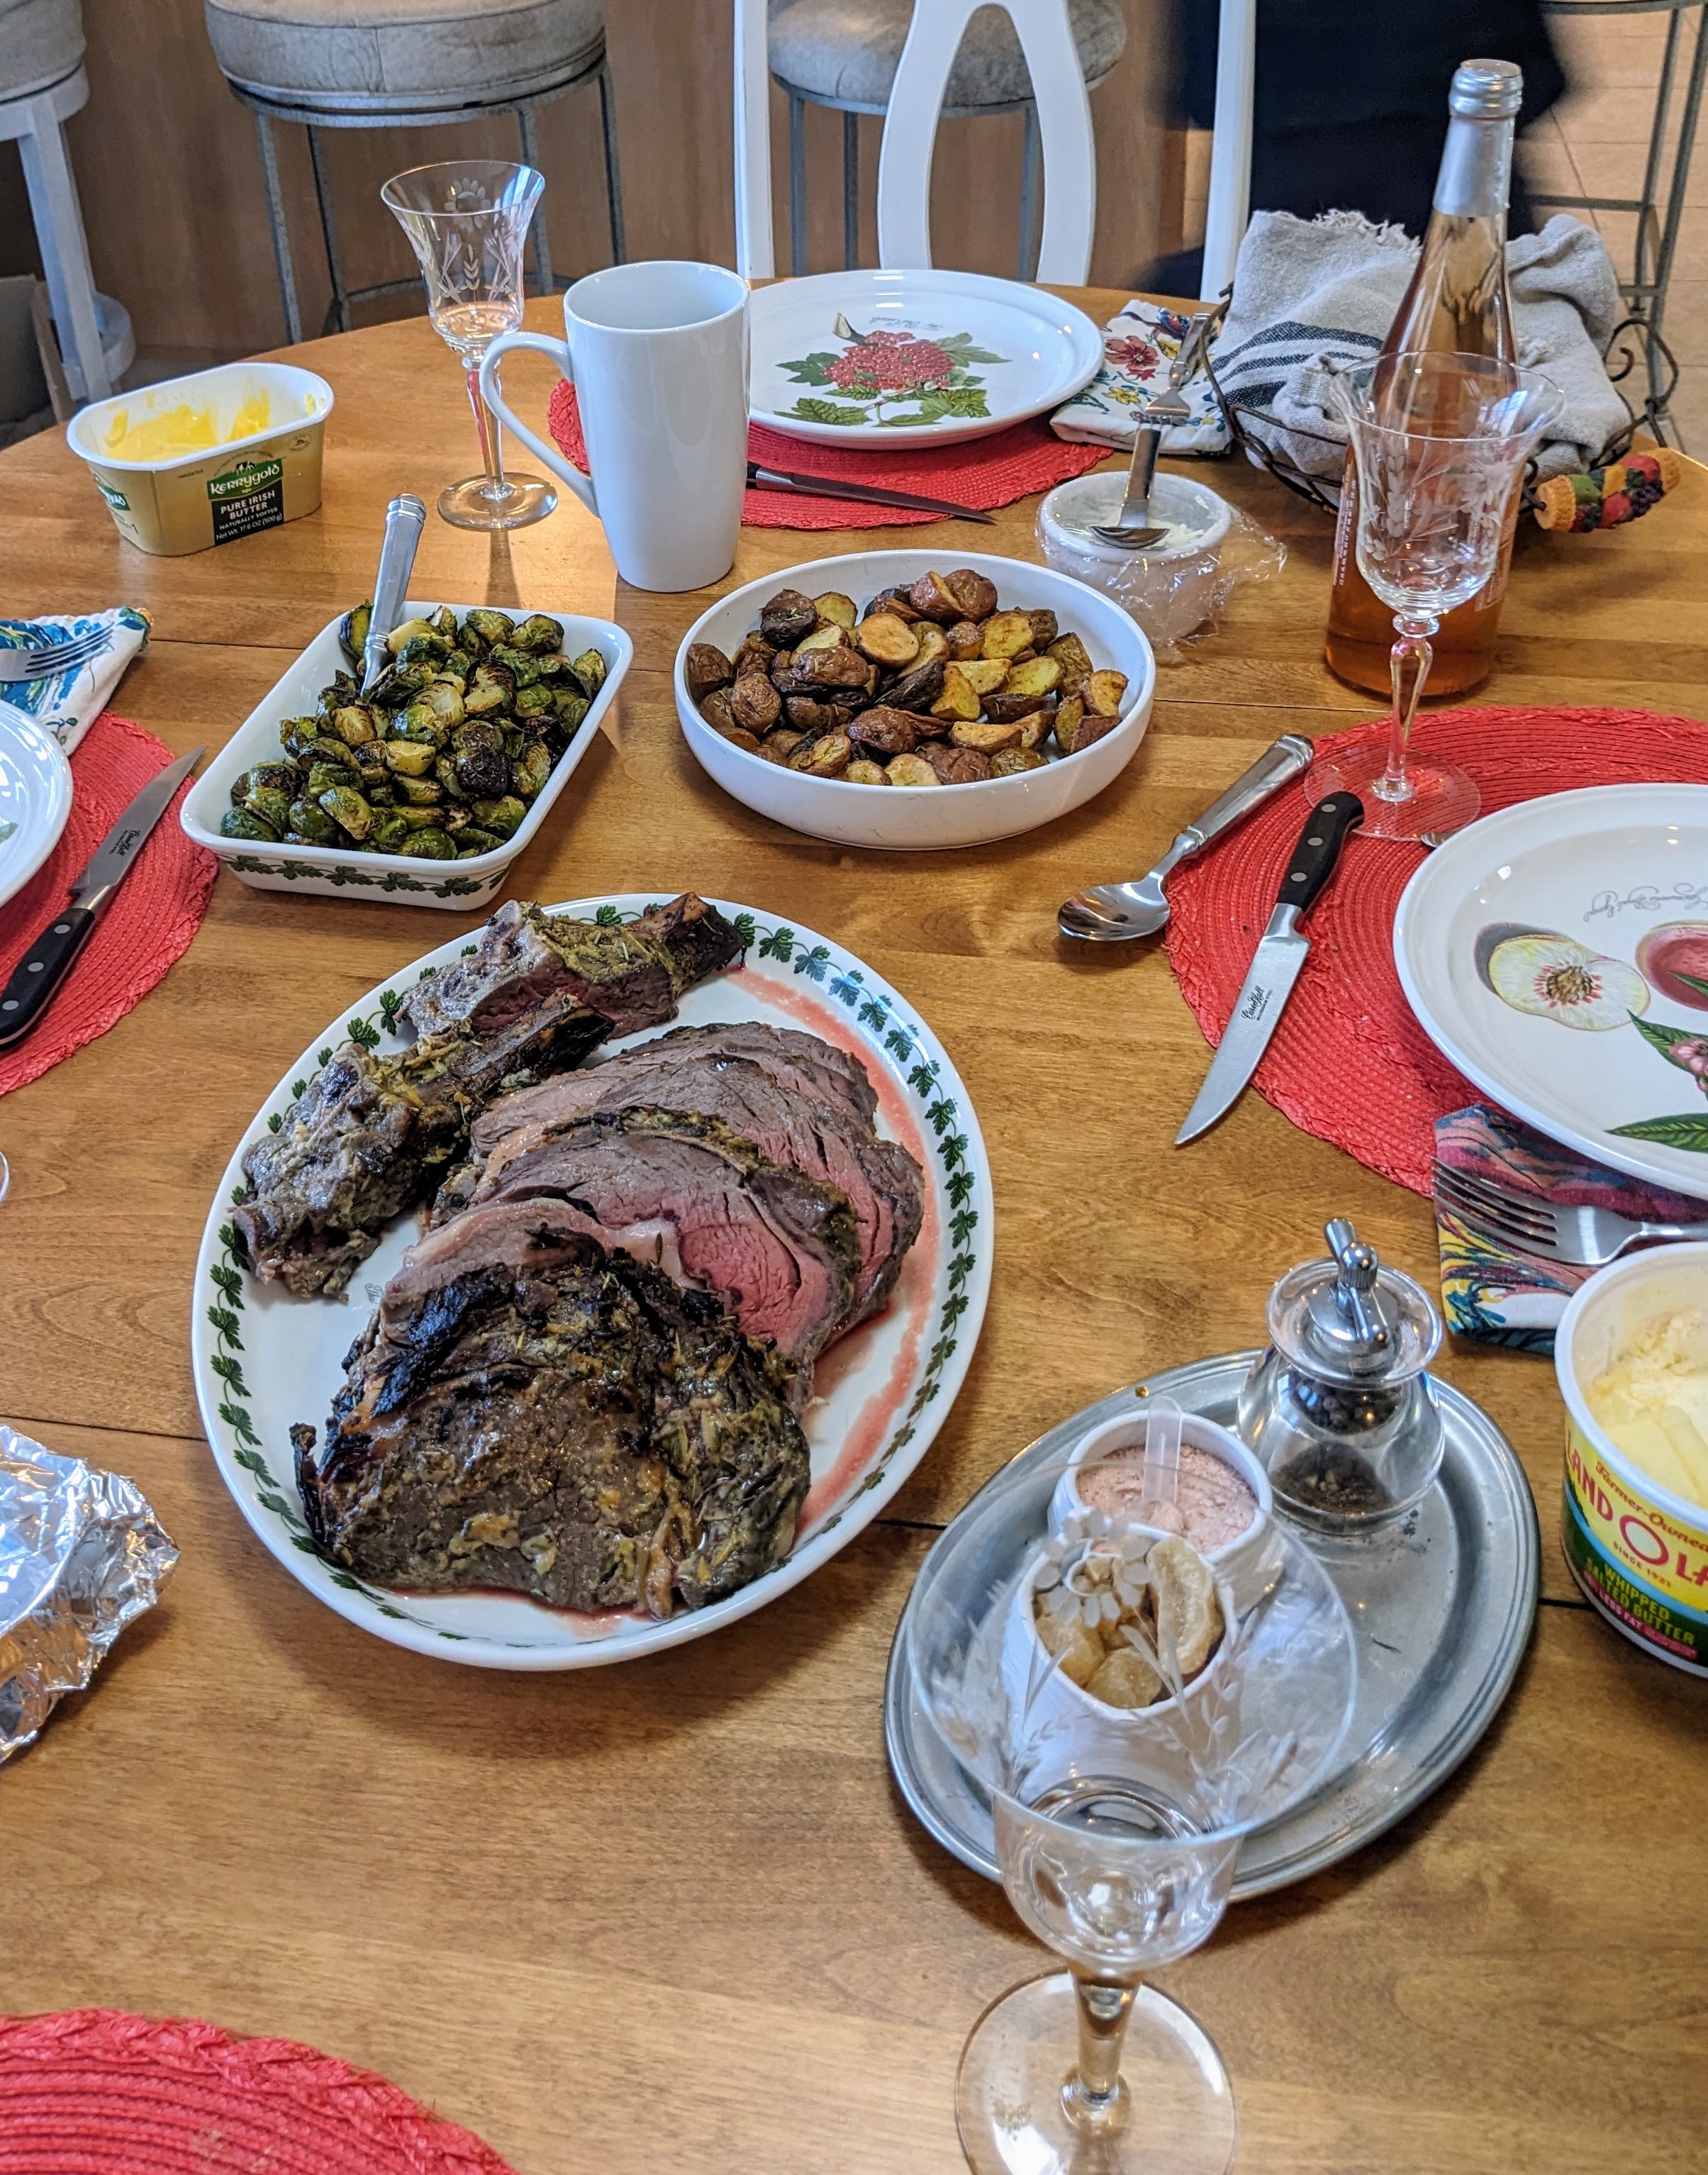
I never made a rib roast before and I always kid my wife that I want to make one. Kid because she knows as well as I do that it goes right through me. But I love it so tender and the taste of the crust out of this world. The last time I had one was the year I retired and on my goodbye tour to the Florida office I drove to my brothers over by Jacksonville. Didn’t realize that it would be a 4ish hour drive, but he and Nancy are worth it.
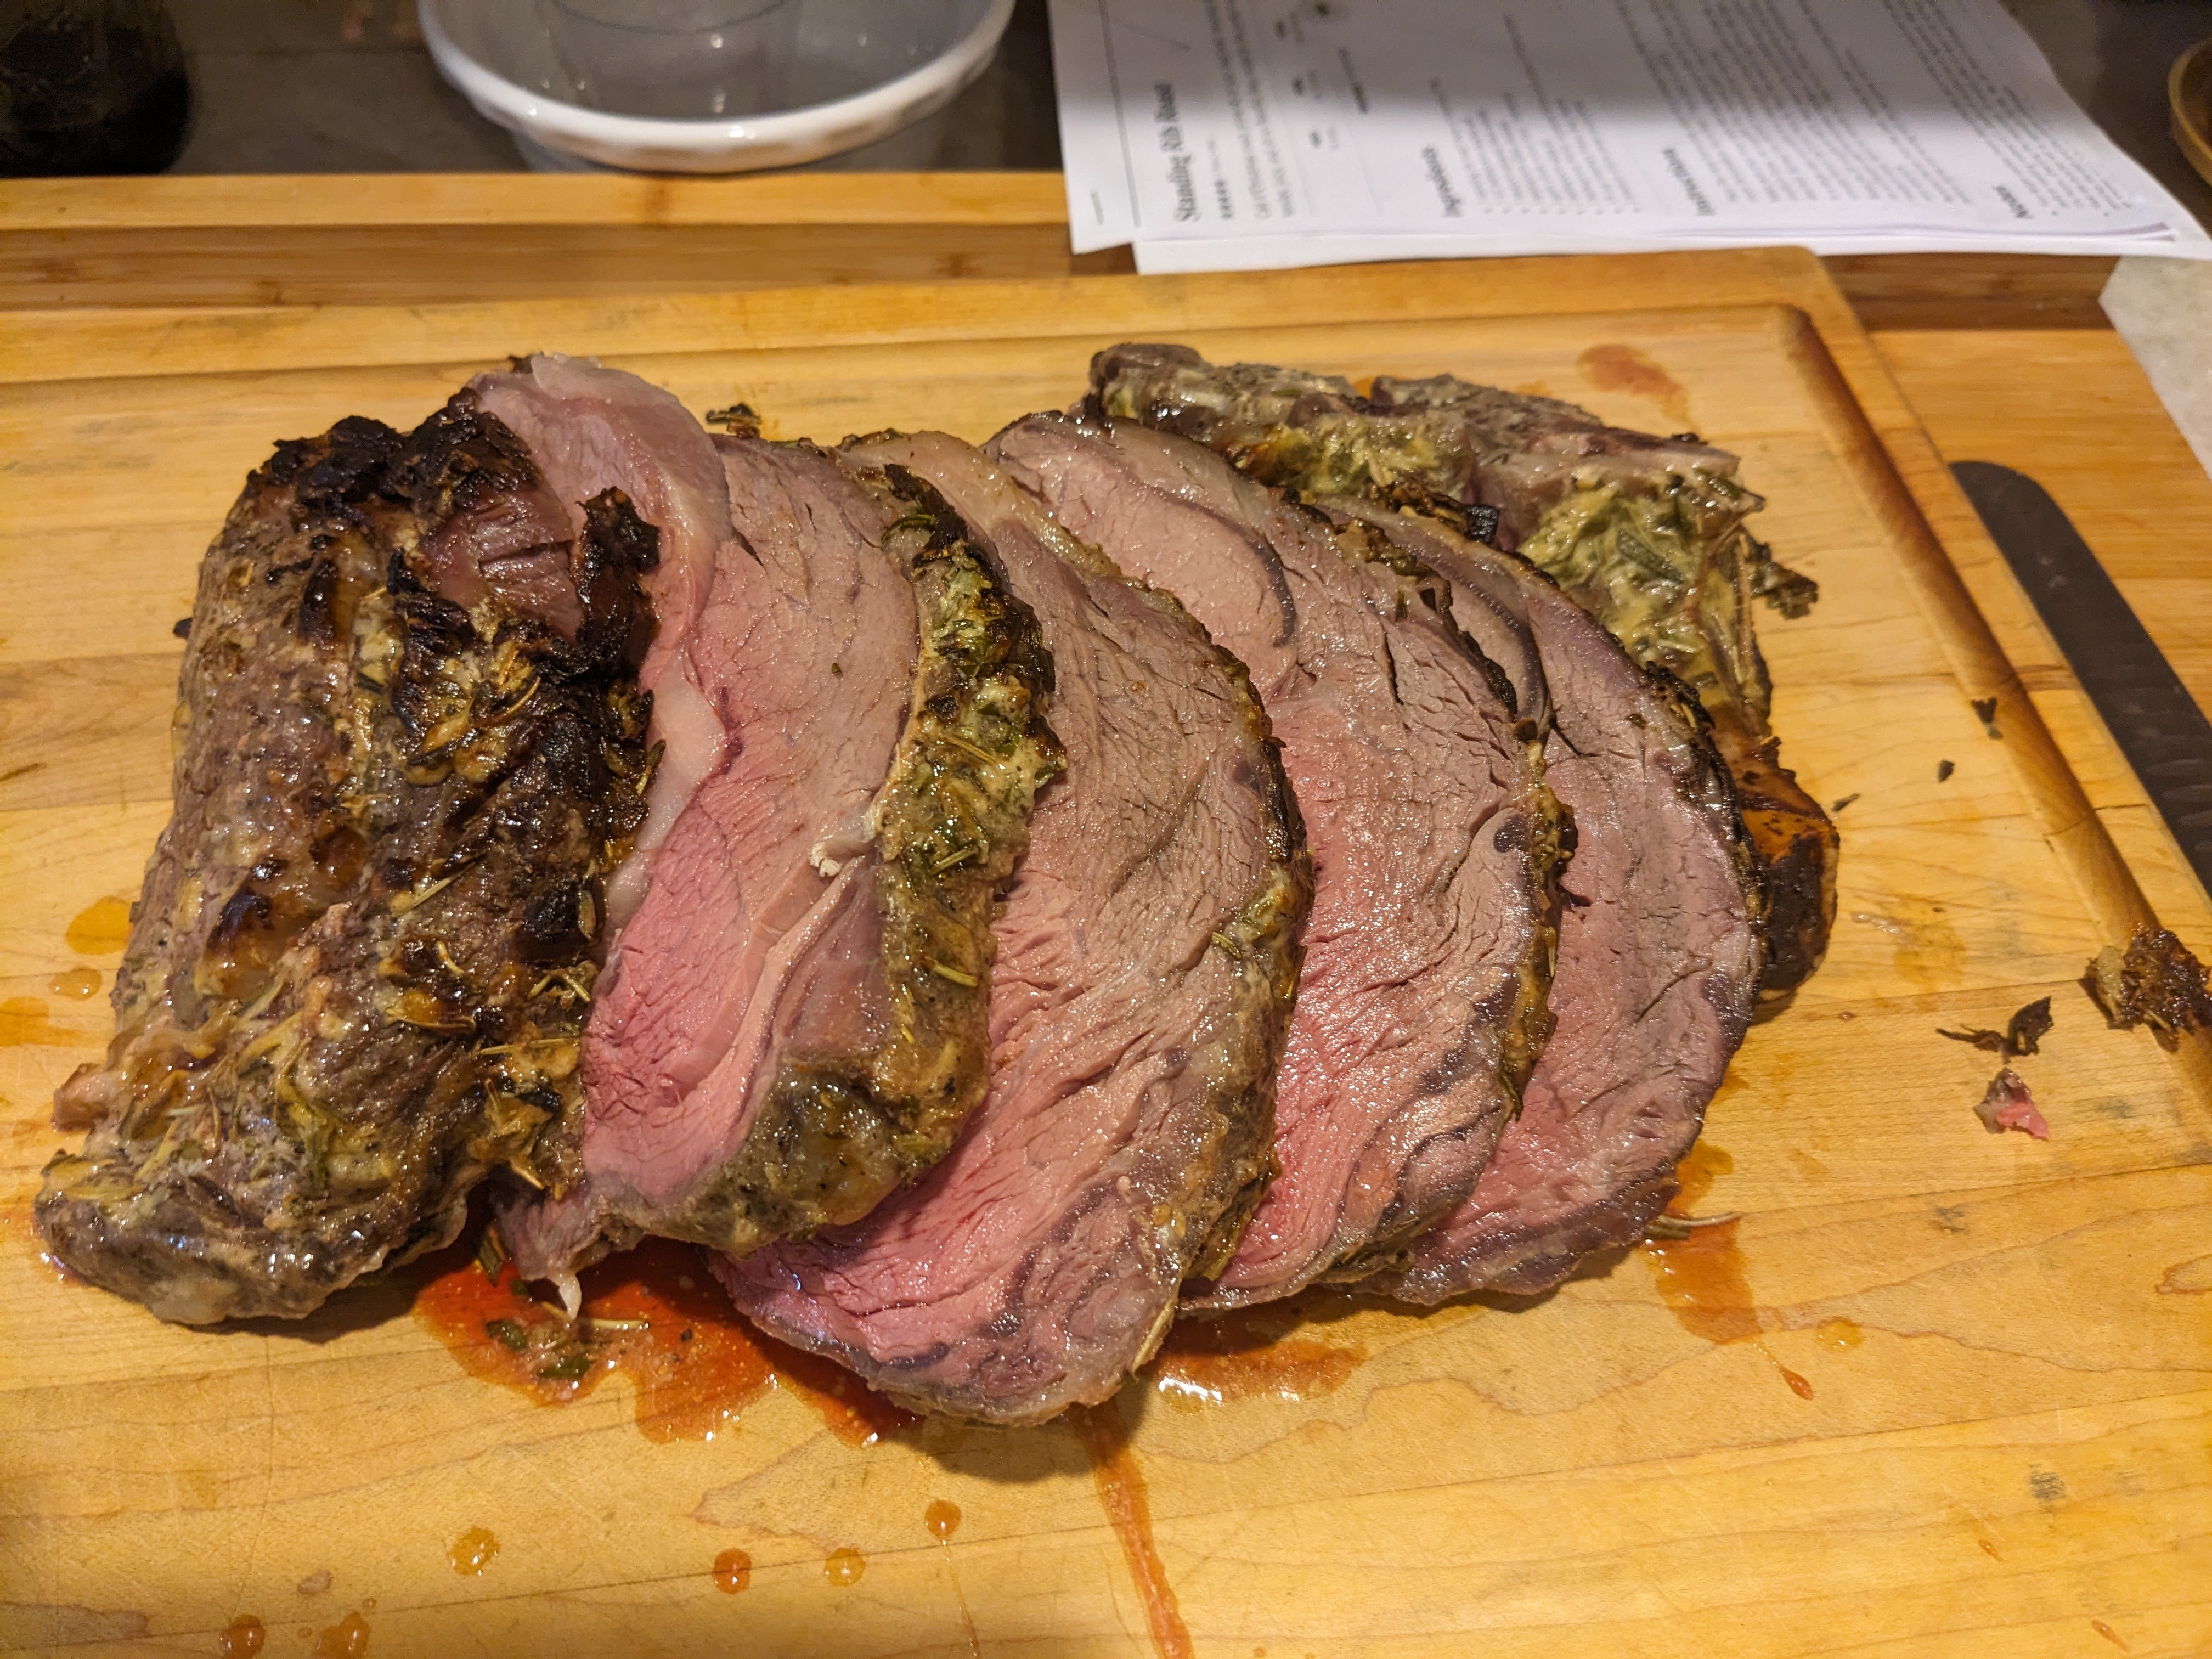
Anyway I was nostalgic this year and remembering we always had one for family holiday especially when Diane bought a 8 rib roast thinking that it was 1 rib per person not per couple. and I must have made a good enough argument because we had one this year for Xmas. And to answer your question yes it did live up to all expectations.
Whole foods was having a sale on their grass fed roast so I picked up a 4 lb. 2 rib.
Ingredients
1 standing rib roast* bone-in (4 pounds, 2 ribs)
1 1/2 tablespoons kosher salt
1 teaspoon ground black pepper
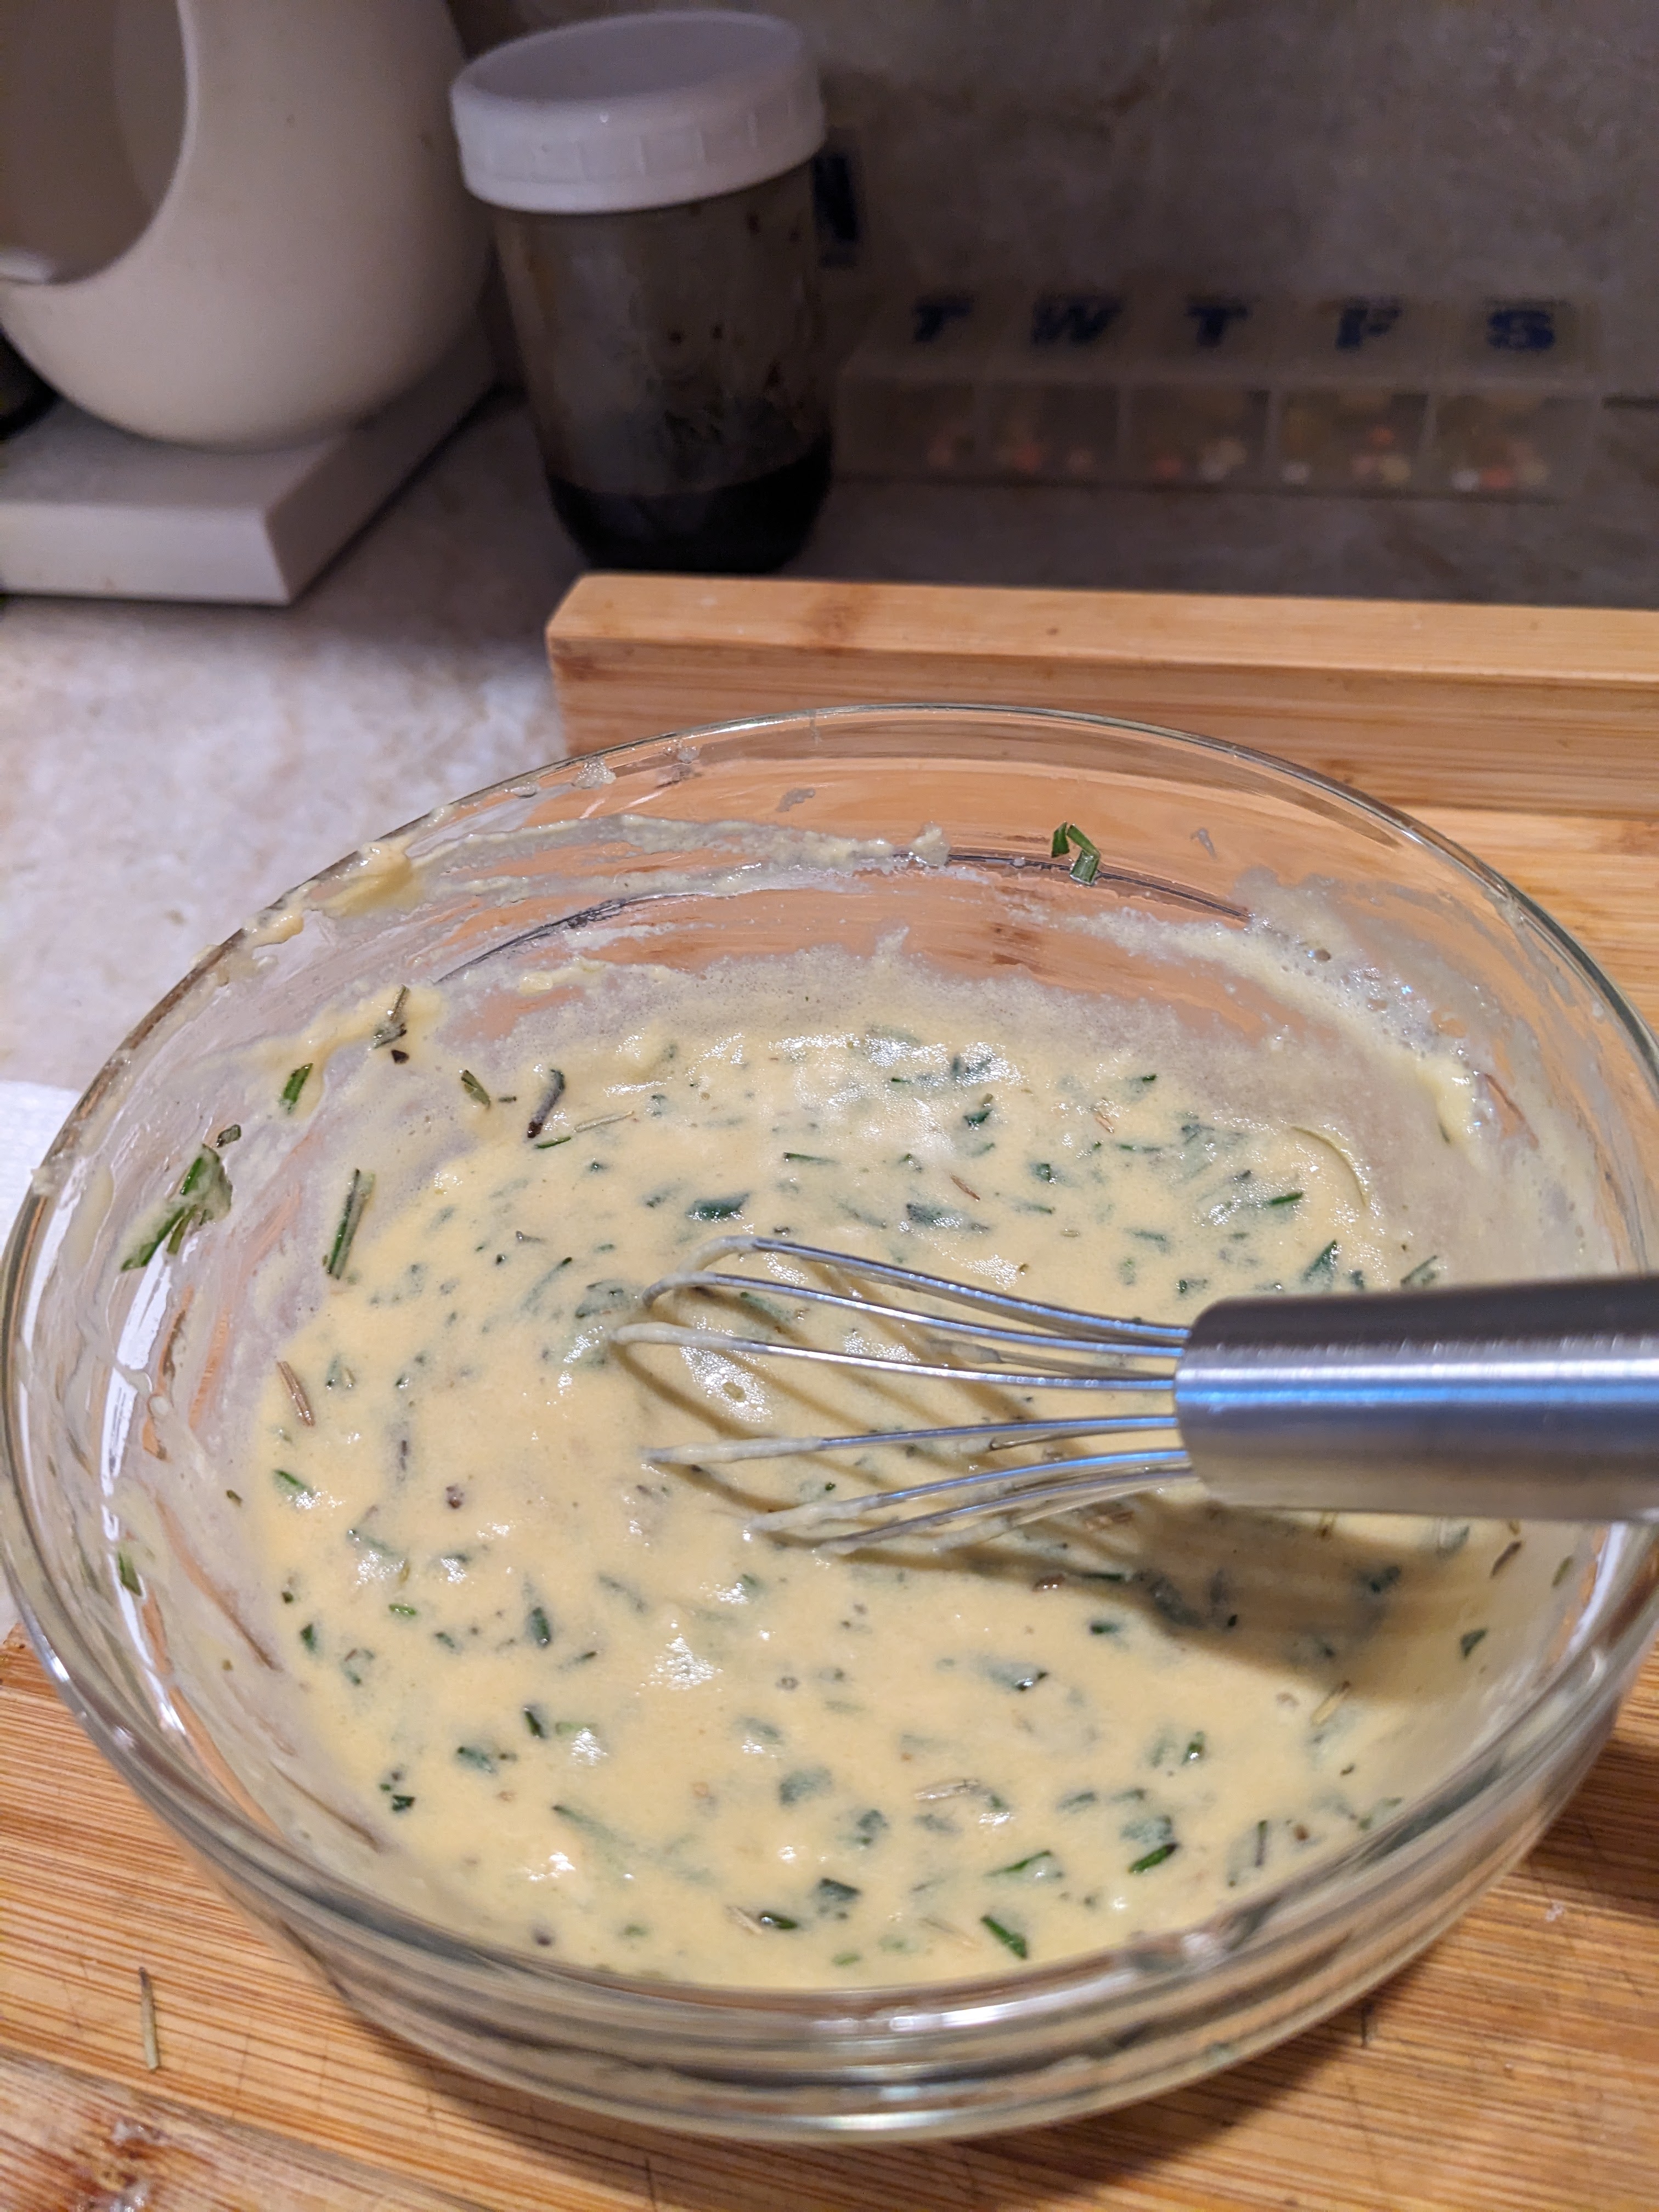
3 tablespoons Dijon mustard
3 garlic cloves minced (about 1 tablespoon)
2 tablespoons olive oil
2 tablespoons freshly squeezed lemon juice about 1/2 medium lemon
1/4 cup rosemary leaves finely chopped
How
For at least an hour but I did day before salt and pepper generously about 3/4 tsp per pound, pepper to taste about 1/2 for mine. mix together in small bowl and rub into all sides
Place the meat bone side down on a rimmed baking sheet and sprinkle on all sides with the salt and pepper. Let stand at room temperature for at least 1 hour prior to cooking
Note: I did something I’ve been playing with for meats and saw many did in other recipe, the day before I did the salt and pepper and stored in refrigerator uncovered. I also allowed 4-5 hours to get to room temperature.
Make sure your oven racks are positioned such that the rib roast can fit comfortably. Preheat the oven to 450°F. In a medium bowl, stir together the mustard, garlic, olive oil, lemon juice, and rosemary. Spread the mustard mixture all over the meat. Sorry forgot to take picture of this
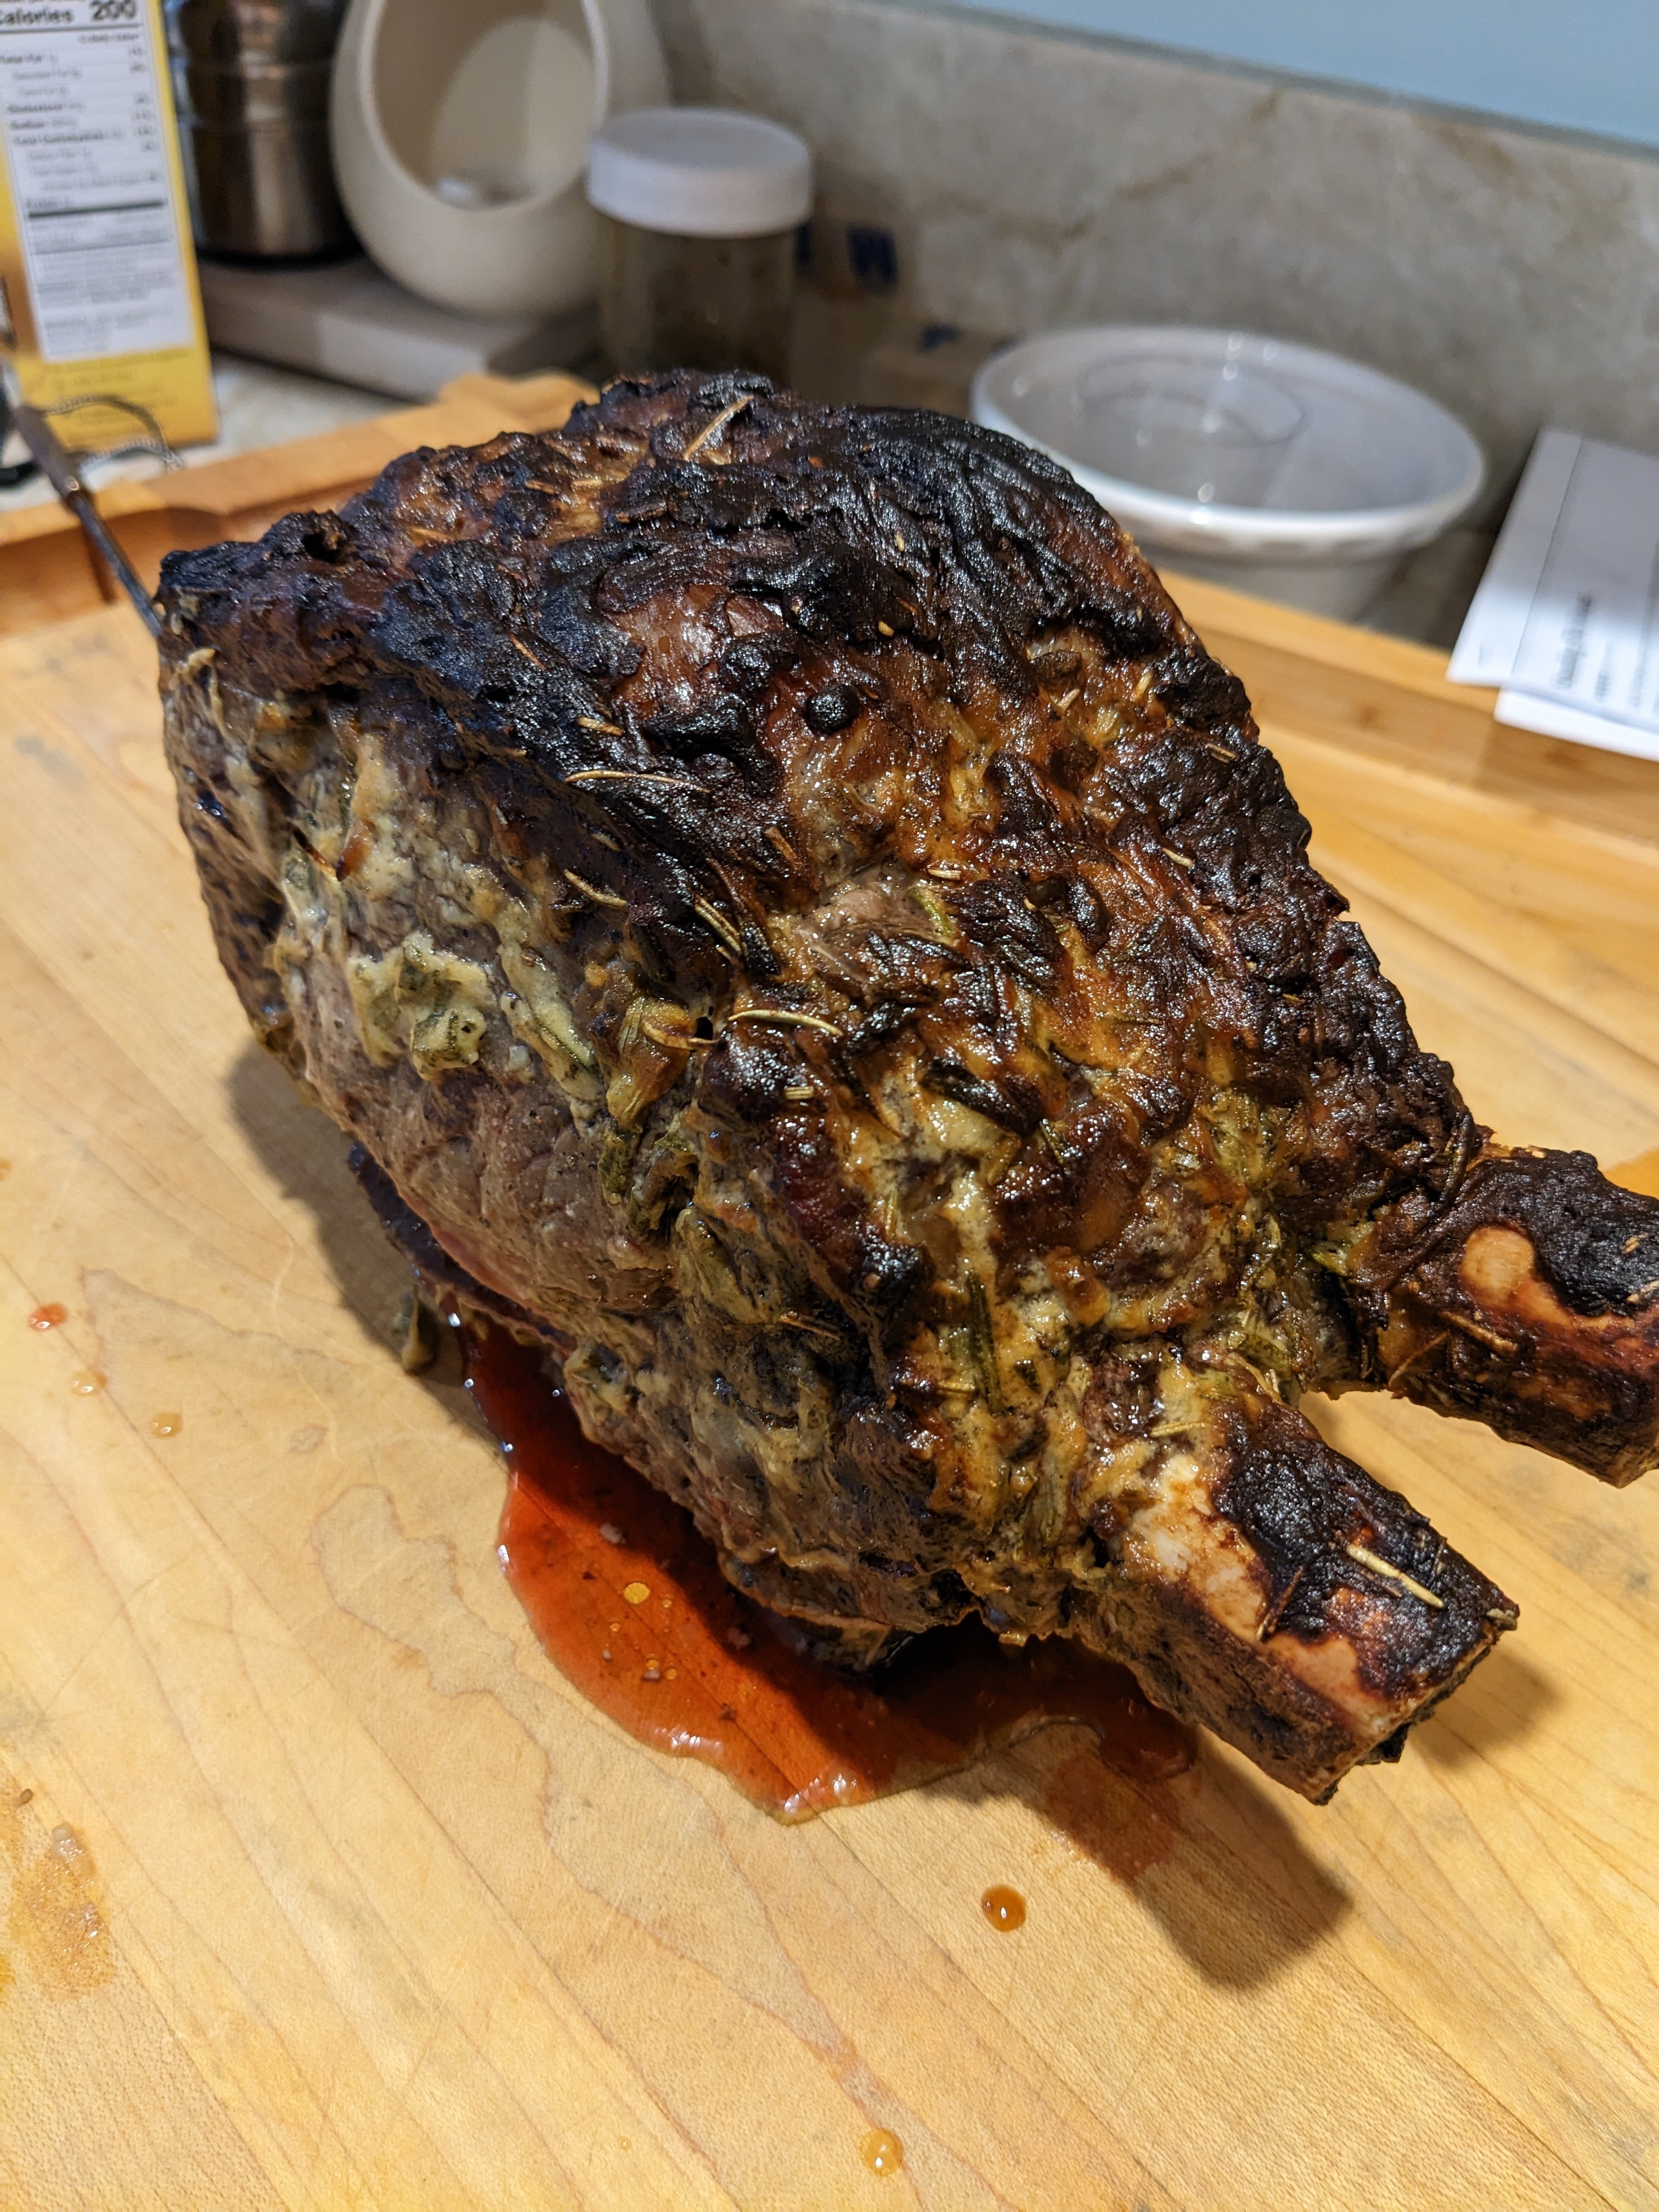
Roast for 20 minutes at 450°F, then reduce the oven temperature to 350°F. Continue roasting until the meat registers 115°F on an instant-read thermometer inserted as close as possible to the center of the meat without touching bone (or 125°F for medium-rare), about 45 minutes to 1 hour more. Prime rib can overcook quickly, so check early and often. You want it to be nice and pink.
This depends a lot on your oven i was looking for more medium rare to medium and when the thermometer registered 134°F I took it out and covered loosely.
Remove the pan from the oven. Transfer the meat to a cutting board, tent with foil, and let rest for at least 20 minutes before slicing and serving
I was looking for a variation of how I usually cook porkchops and found this it was really good. From inspired taste
Pork chops are a quick, healthy and simple dinner. Our method ensures juicy, tender, and flavorful pork chops with little fuss. Check the notes section for our tips on which pork chops are best.
You Will Need
4 pork chops, about 1-inch thick and 6 to 7 ounces each, see notes
1. Take the pork chops out of the refrigerator and season on both sides with salt — we use just less than 1/4 teaspoon of salt per pork chop. Set the chops aside to rest for 30 minutes.
2. Meanwhile, make the spice rub. Mix the flour, chili powder, garlic powder, onion powder, smoked paprika, and 1/2 teaspoon of black pepper in a small bowl.
3. After 30 minutes, use a paper towel to dry the pork chops, then rub both sides of the chops with the spice rub.
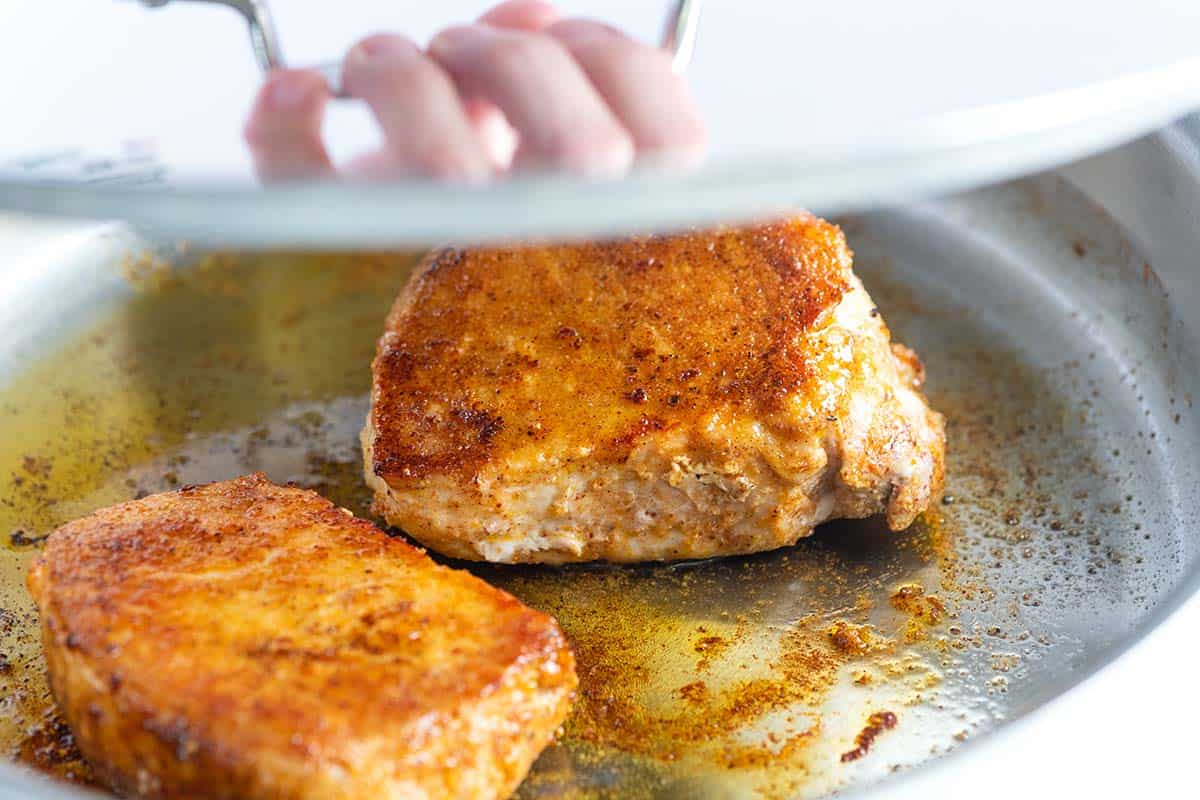
4. Heat the oil in a skillet (with a lid) over medium-high heat. When the oil is hot and looks shimmery, add the pork. Cook until golden, 2 to 3 minutes.
5. Flip the pork so that the seared side is facing up. If there is a fattier side of the pork, use kitchen tongs to hold the chops fat-side-down until it sizzles and browns slightly, about 30 seconds.
6. Reduce the heat to low, then cover the skillet with a lid. Cook for 6 to 12 minutes or until an instant-read thermometer reads 145° F when inserted into the thickest part of the chop. Cook time depends on the thickness of the chops, so check for doneness at 5 minutes, then go from there, checking every 2 minutes after that. If you do not have a thermometer, you will know they are done, if, when cutting into the chops, the juices run clear.
7. Transfer pork chops to a plate, then cover loosely with aluminum foil. Let the pork rest for 5 minutes.
MAKE PAN SAUCE
While the chops rest off of the heat, add chicken stock, a little bit of apple cider vinegar and sliced apples to the skillet.
Bring everything to a simmer, and then reduce by about half. When it has reduced, slide the pan away from the heat and swirl in some butter.
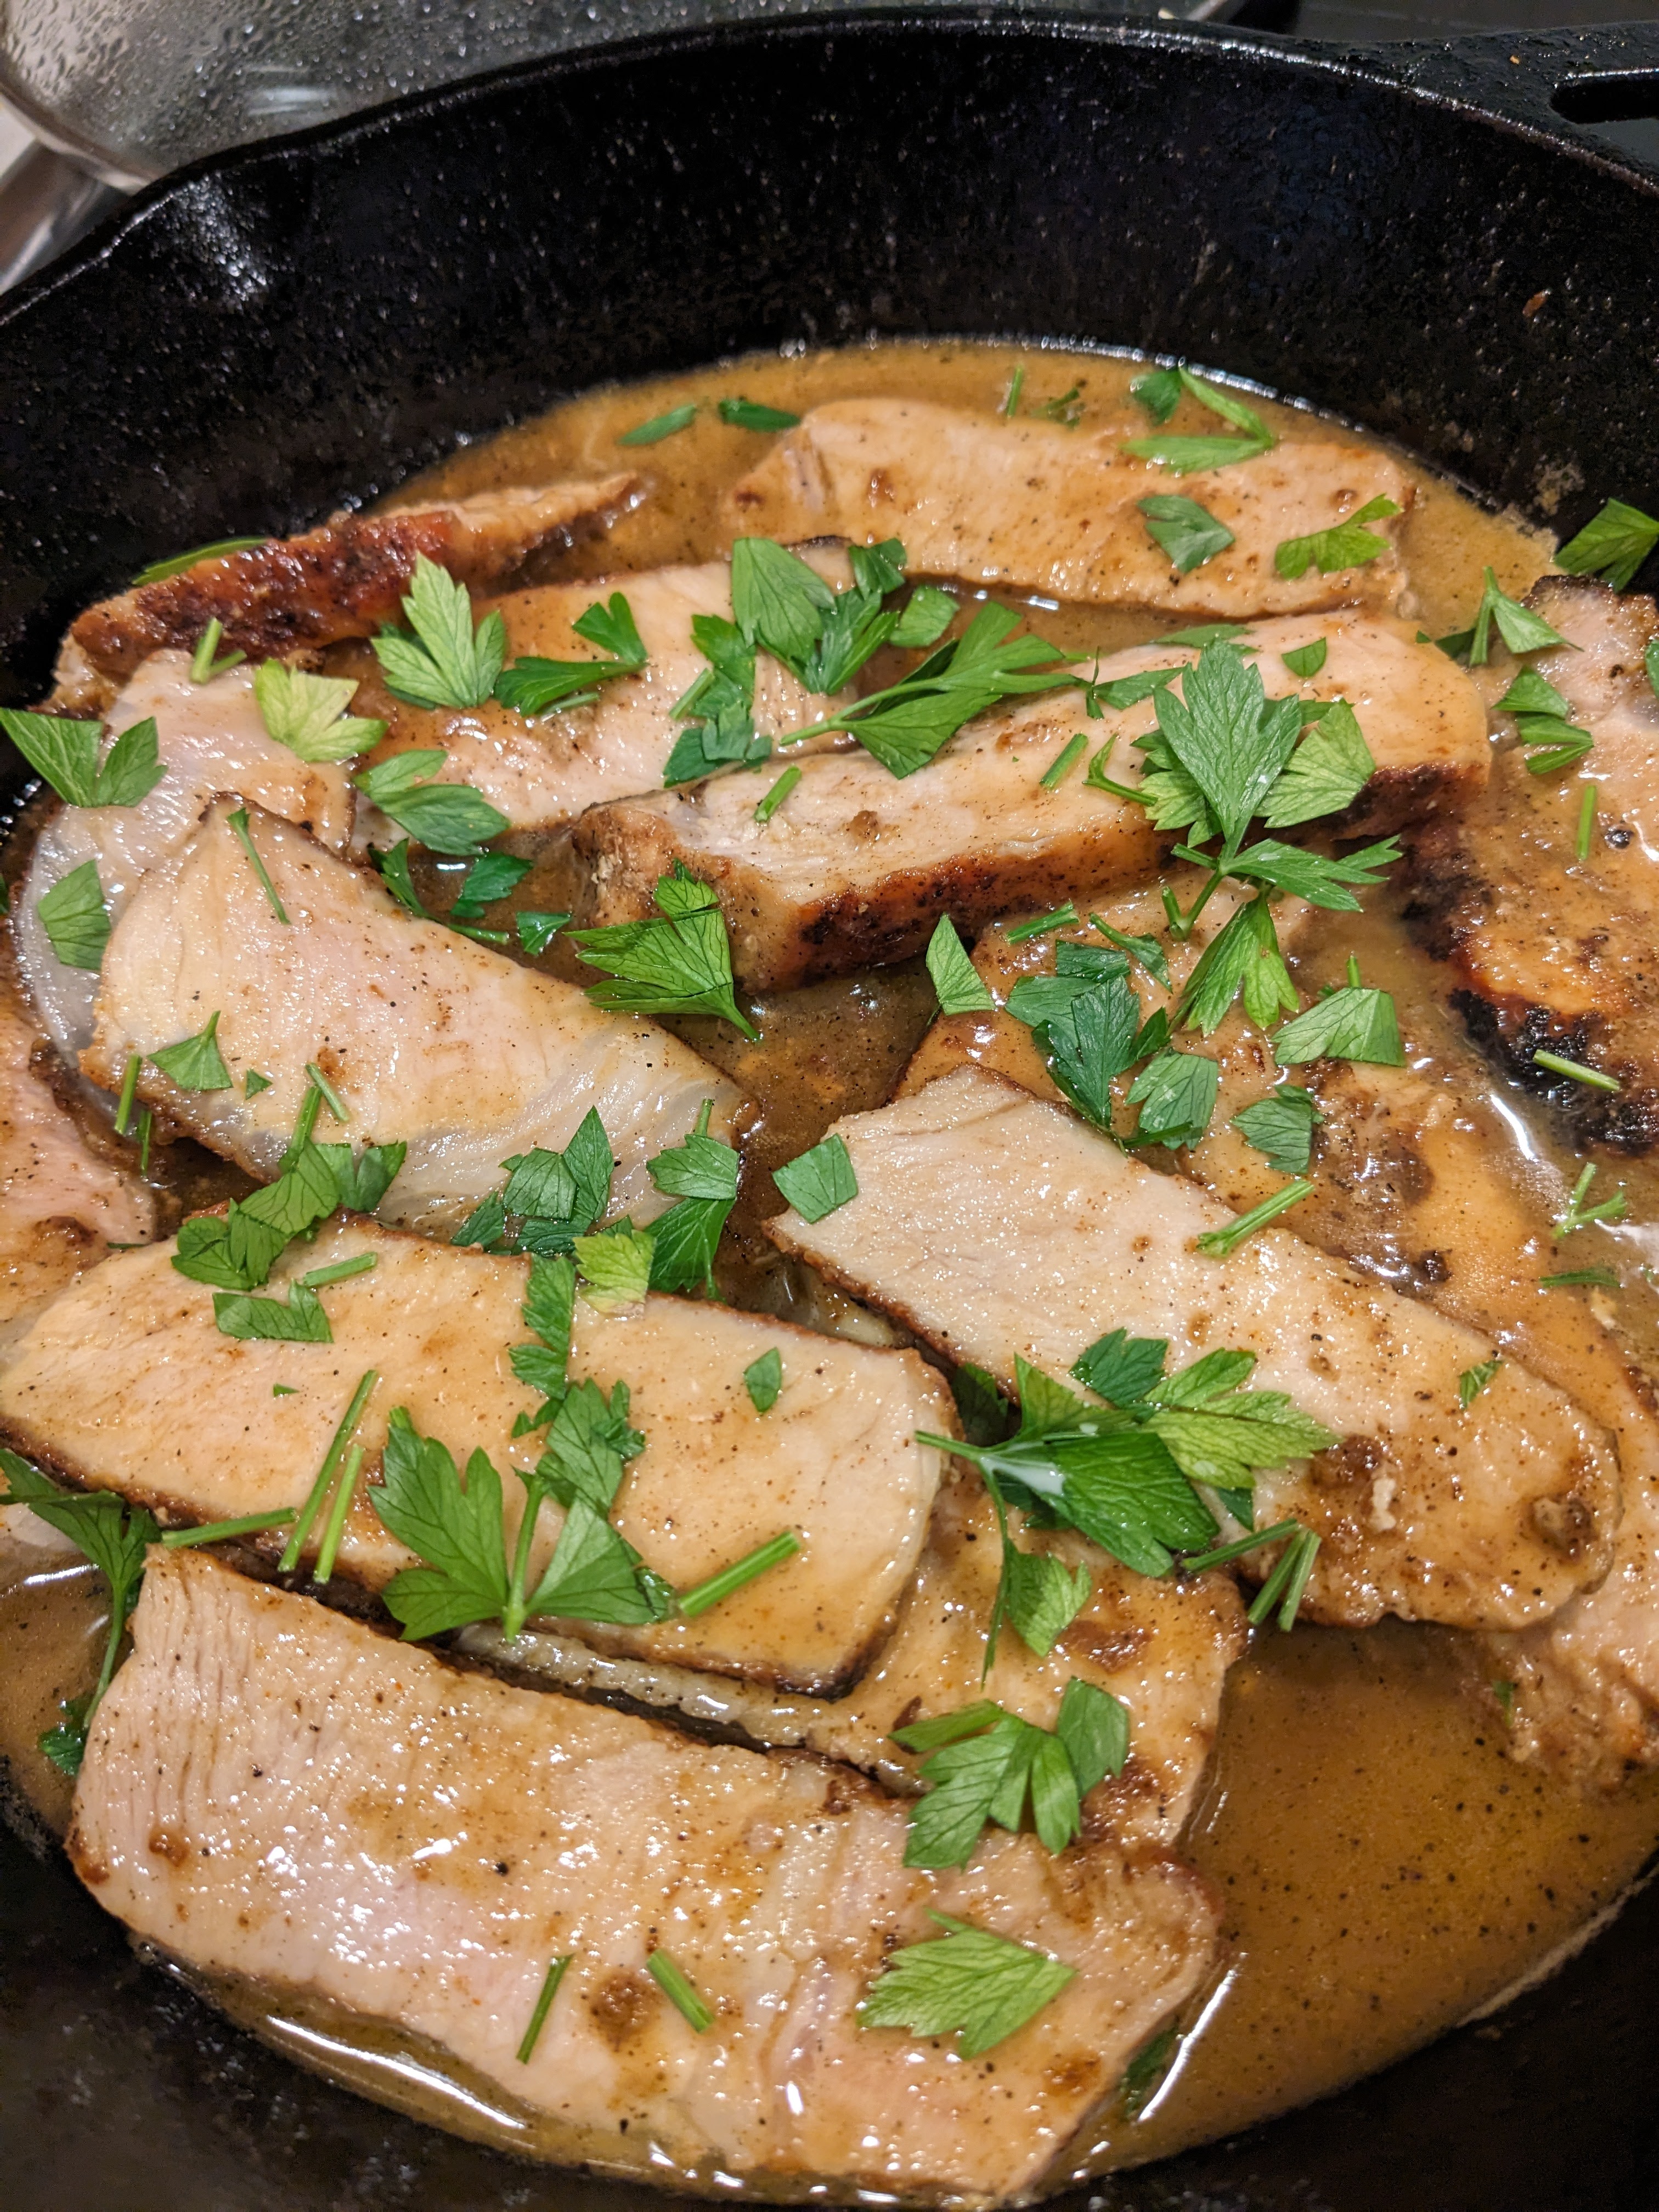
Grab your chops and place them back into the skillet. You can add them whole or sliced. We love adding them sliced since the pan sauce gets all over the meat.
And that’s it, our no-fail method for cooking juicy and tender pork chops.
Adam and Joanne’s Tips
What pork chops to use: We call for 1-inch thick chops in the recipe, but you can use thinner or thicker chops as a substitute. Keep in mind that thinner chops will cook much quicker, so keep your thermometer close by. Bone-in chops are an excellent option, too. The bone will add a minute or two of extra cook time.
Can I use my favorite spice rub? Yes, absolutely. Just make sure the spice rub is salt-free.
Gluten-free: If you don’t want to use the flour, it’s okay. The crust won’t be as even, but skipping the flour and just rubbing the spices over the pork will still taste great.
Make an onion-apple pan sauce: After removing the cooked pork chops from the skillet, add sliced onions, apples and a bit of fresh thyme. Cook until sweet and softened then pour in the stock, vinegar, and honey.
Nutrition facts: The nutrition facts provided below are estimates. We have used the USDA database to calculate approximate values.
Steve Note: Mine chops from Butcherbox about 2″ thick so it took a little longer and I chose their suggestion slicing and then adding into pan. I prefer thicker so added a little corn starch to thicken the sauce. Served with roosted Honey nut squash
NUTRITION PER SERVING Serving Size 1 pork chop / Calories 369 / Total Fat 14.3g / Saturated Fat 5.1g / Cholesterol 138.8mg / Sodium 767mg / Total Carbohydrate 11.6g / Dietary Fiber 1.4g / Total Sugars 4.4g / Protein 46.1g
AUTHOR: Adam and Joanne Gallagher
How to cook pork chops so that they are juicy and tender
Tip #1:Don’t cook chops straight from the refrigerator. Thirty minutes before you cook, take the chops out of the fridge. The time out of the refrigerator lets you bring the meat to room temperature, which helps the pork cook more evenly throughout. Use this trick for other cuts of meat like pork tenderloin or steak.
Tip #2: Season the chops with salt half an hour before cooking. This way, the salt has a chance to improve the flavor and texture of the meat. Pork chops are lean, so seasoning with salt before cooking is essential for making the most flavorful chops.
Tip #3: Rub the chops with spices and some flour. Here’s where your favorite spice rub can come in. Alternatively, you can use our spice blend suggested in the recipe below or try this cajun seasoning. Whichever you choose, add a little flour to it. Rubbing a small amount of flour over the chops helps to add a flavorful crust. We use this trick a lot. When cooking scallops, we add a little flour to the outside so that they brown evenly.
Tip #4: Sear on one side, flip, and then cover with a lid. We use this trick a lot — it’s how we cook chicken breasts so they are juicy, and we use the same concept when grilling meat. First, we sear one side of the chops until browned, flip them, turn the heat to low, and cover the skillet with a lid. The second side will slowly turn golden brown, and since we added the lid, the heat from the pan will gently cook the middle. By gently cooking the chops this way, they stay juicy and become tender
Tip #5:Let the cooked chops rest. When they are cooked, transfer them to a clean plate and cover with foil. After 5 minutes, all the juices inside the chops will have distributed around the meat.
How to tell when pork chops are done
Pork is done when an internal thermometer reads 145° F. Depending on how thick the chops are, you might need to subtract or add a few minutes from the suggested cook times in our recipe below.
If you look closely, the pork chop in the back of the pan (pictured above) is thicker than the one in the front. When we were cooking them, we removed the thinner chop first since it reached 145° F a few minutes before the thicker chop. So if your chops aren’t all the same thickness or size, it’s best to check the temperature of each chop and remove them as they finish cooking.
Lyn and I took a vacation in Booth Bay area Maine back in 2020, we rented a small cabin in a cluster. There were about 6 scattered through the property. Looking out over the harbor and eating a great meal. I had pork chop which was prepared in a Juniper berry based brined. I was so impressed that I asked the chef how he created. He quickly rattled off the ingredients and I tried to duplicate. Came close but never hit it on the nose. I tried many variations of my recipe Pan Fried Pork Chops With Juniper and Rosemary.
Anyway I became a fan of juniper berry and while searching for some Ideas I came up with this we both liked this and will ad my tweaks to our rotation. I’ll add notes as to some changes I made.
Note: First only had two thick ButcherBox pork chops so i sort of cut ingredients in halve below is the full recipe.
Ingredients
4 cloves garlic divided
2 cups water
1 cup kosher salt
1 cup white sugar
2 teaspoons juniper berries Steve Note: I did not cut this in half
2 teaspoons whole black peppercorns
2 sprigs fresh thyme, divided Steve Note: I did not cut this in half
5 cups ice Steve Note: did not use Ice
4 (1-inch thick) bone-in pork chops Steve Note: Only had 2 chops
3 tablespoons vegetable oil
4 tablespoons unsalted butter
sea salt to taste
Directions
Peel garlic cloves. Leave 2 cloves whole and set aside for basting. Halve the remaining 2 cloves crosswise.
Bring water to a boil in a medium saucepan. Add halved garlic cloves, salt, sugar, juniper berries, peppercorns, and 1 sprig of thyme. Stir to dissolve salt and sugar. Transfer to a large bowl and add ice. Stir until brine is cool. Steve Note: I had errand to run so I left on the stove t cool skipped the ice then refrigerated until ready to brine the chops. The next morning I added pork chops in plastic bag, sealed, and chilled in the refrigerator for 8 to 12 hours.
Remove chops from the brine and pat dry. Discard brine.
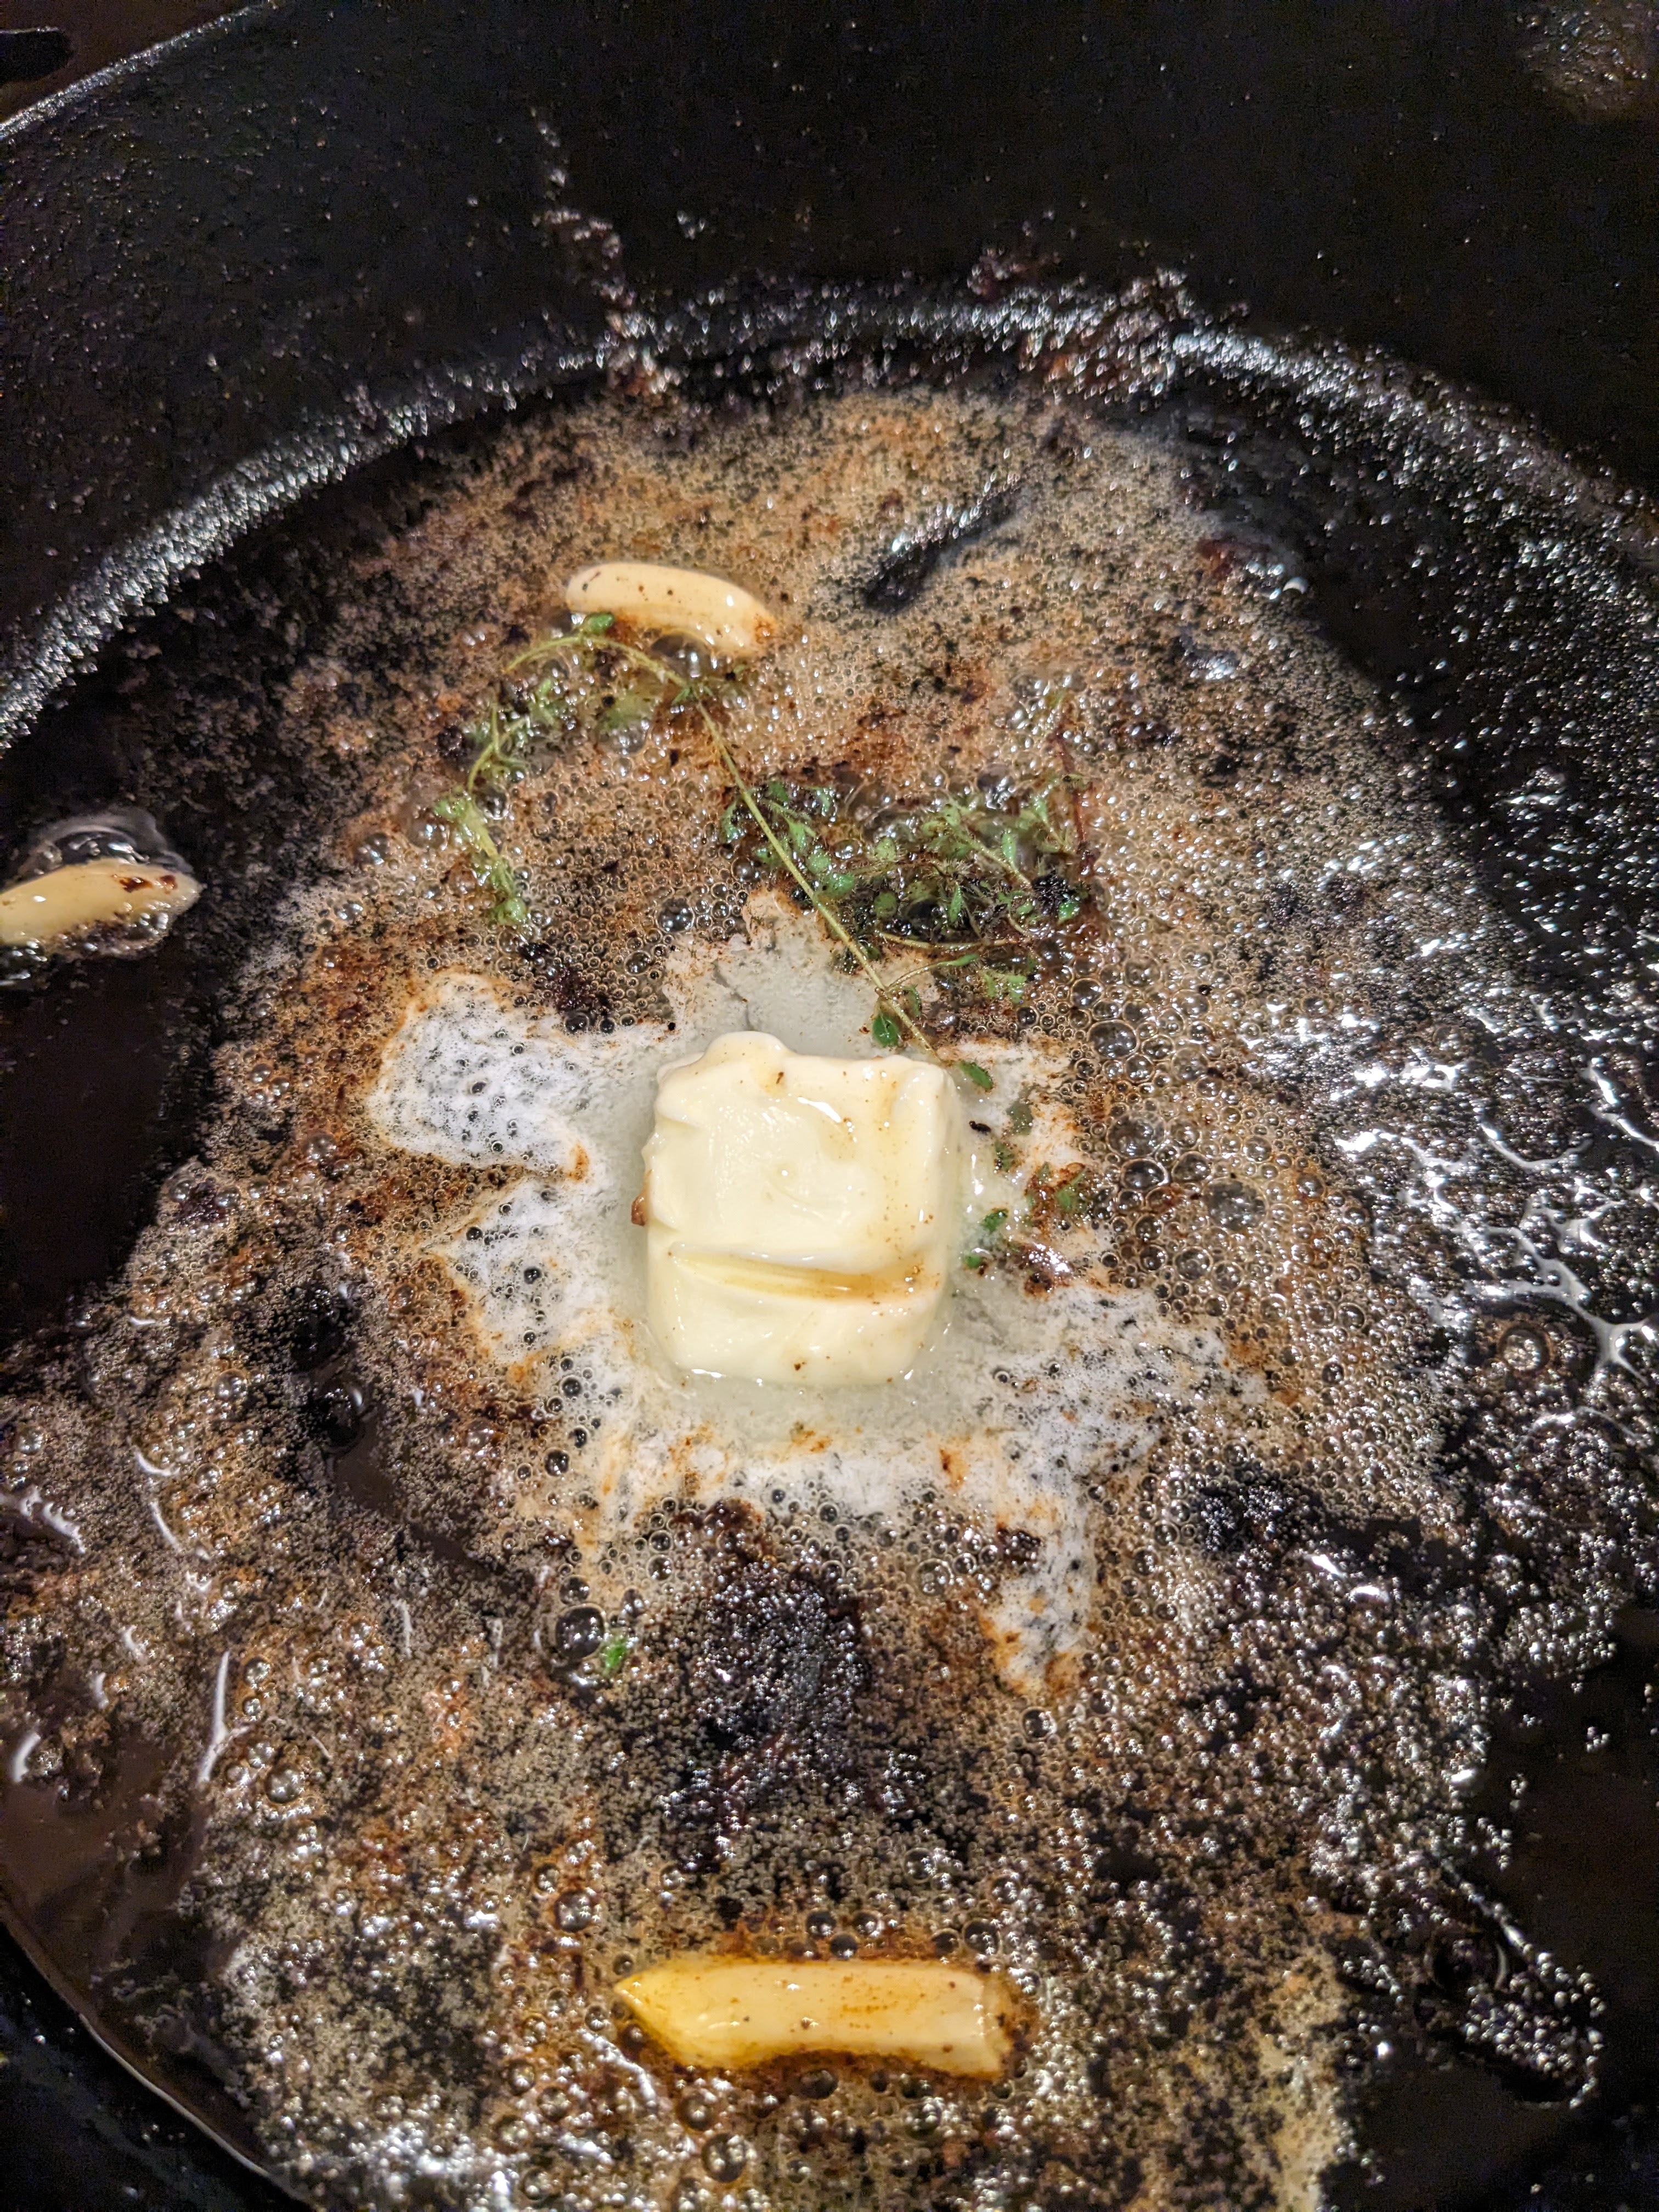
Preheat the oven to 450 degrees F (230 degrees C). Set a wire rack inside a rimmed baking sheet. Steve Note: just used my cast iron pan.
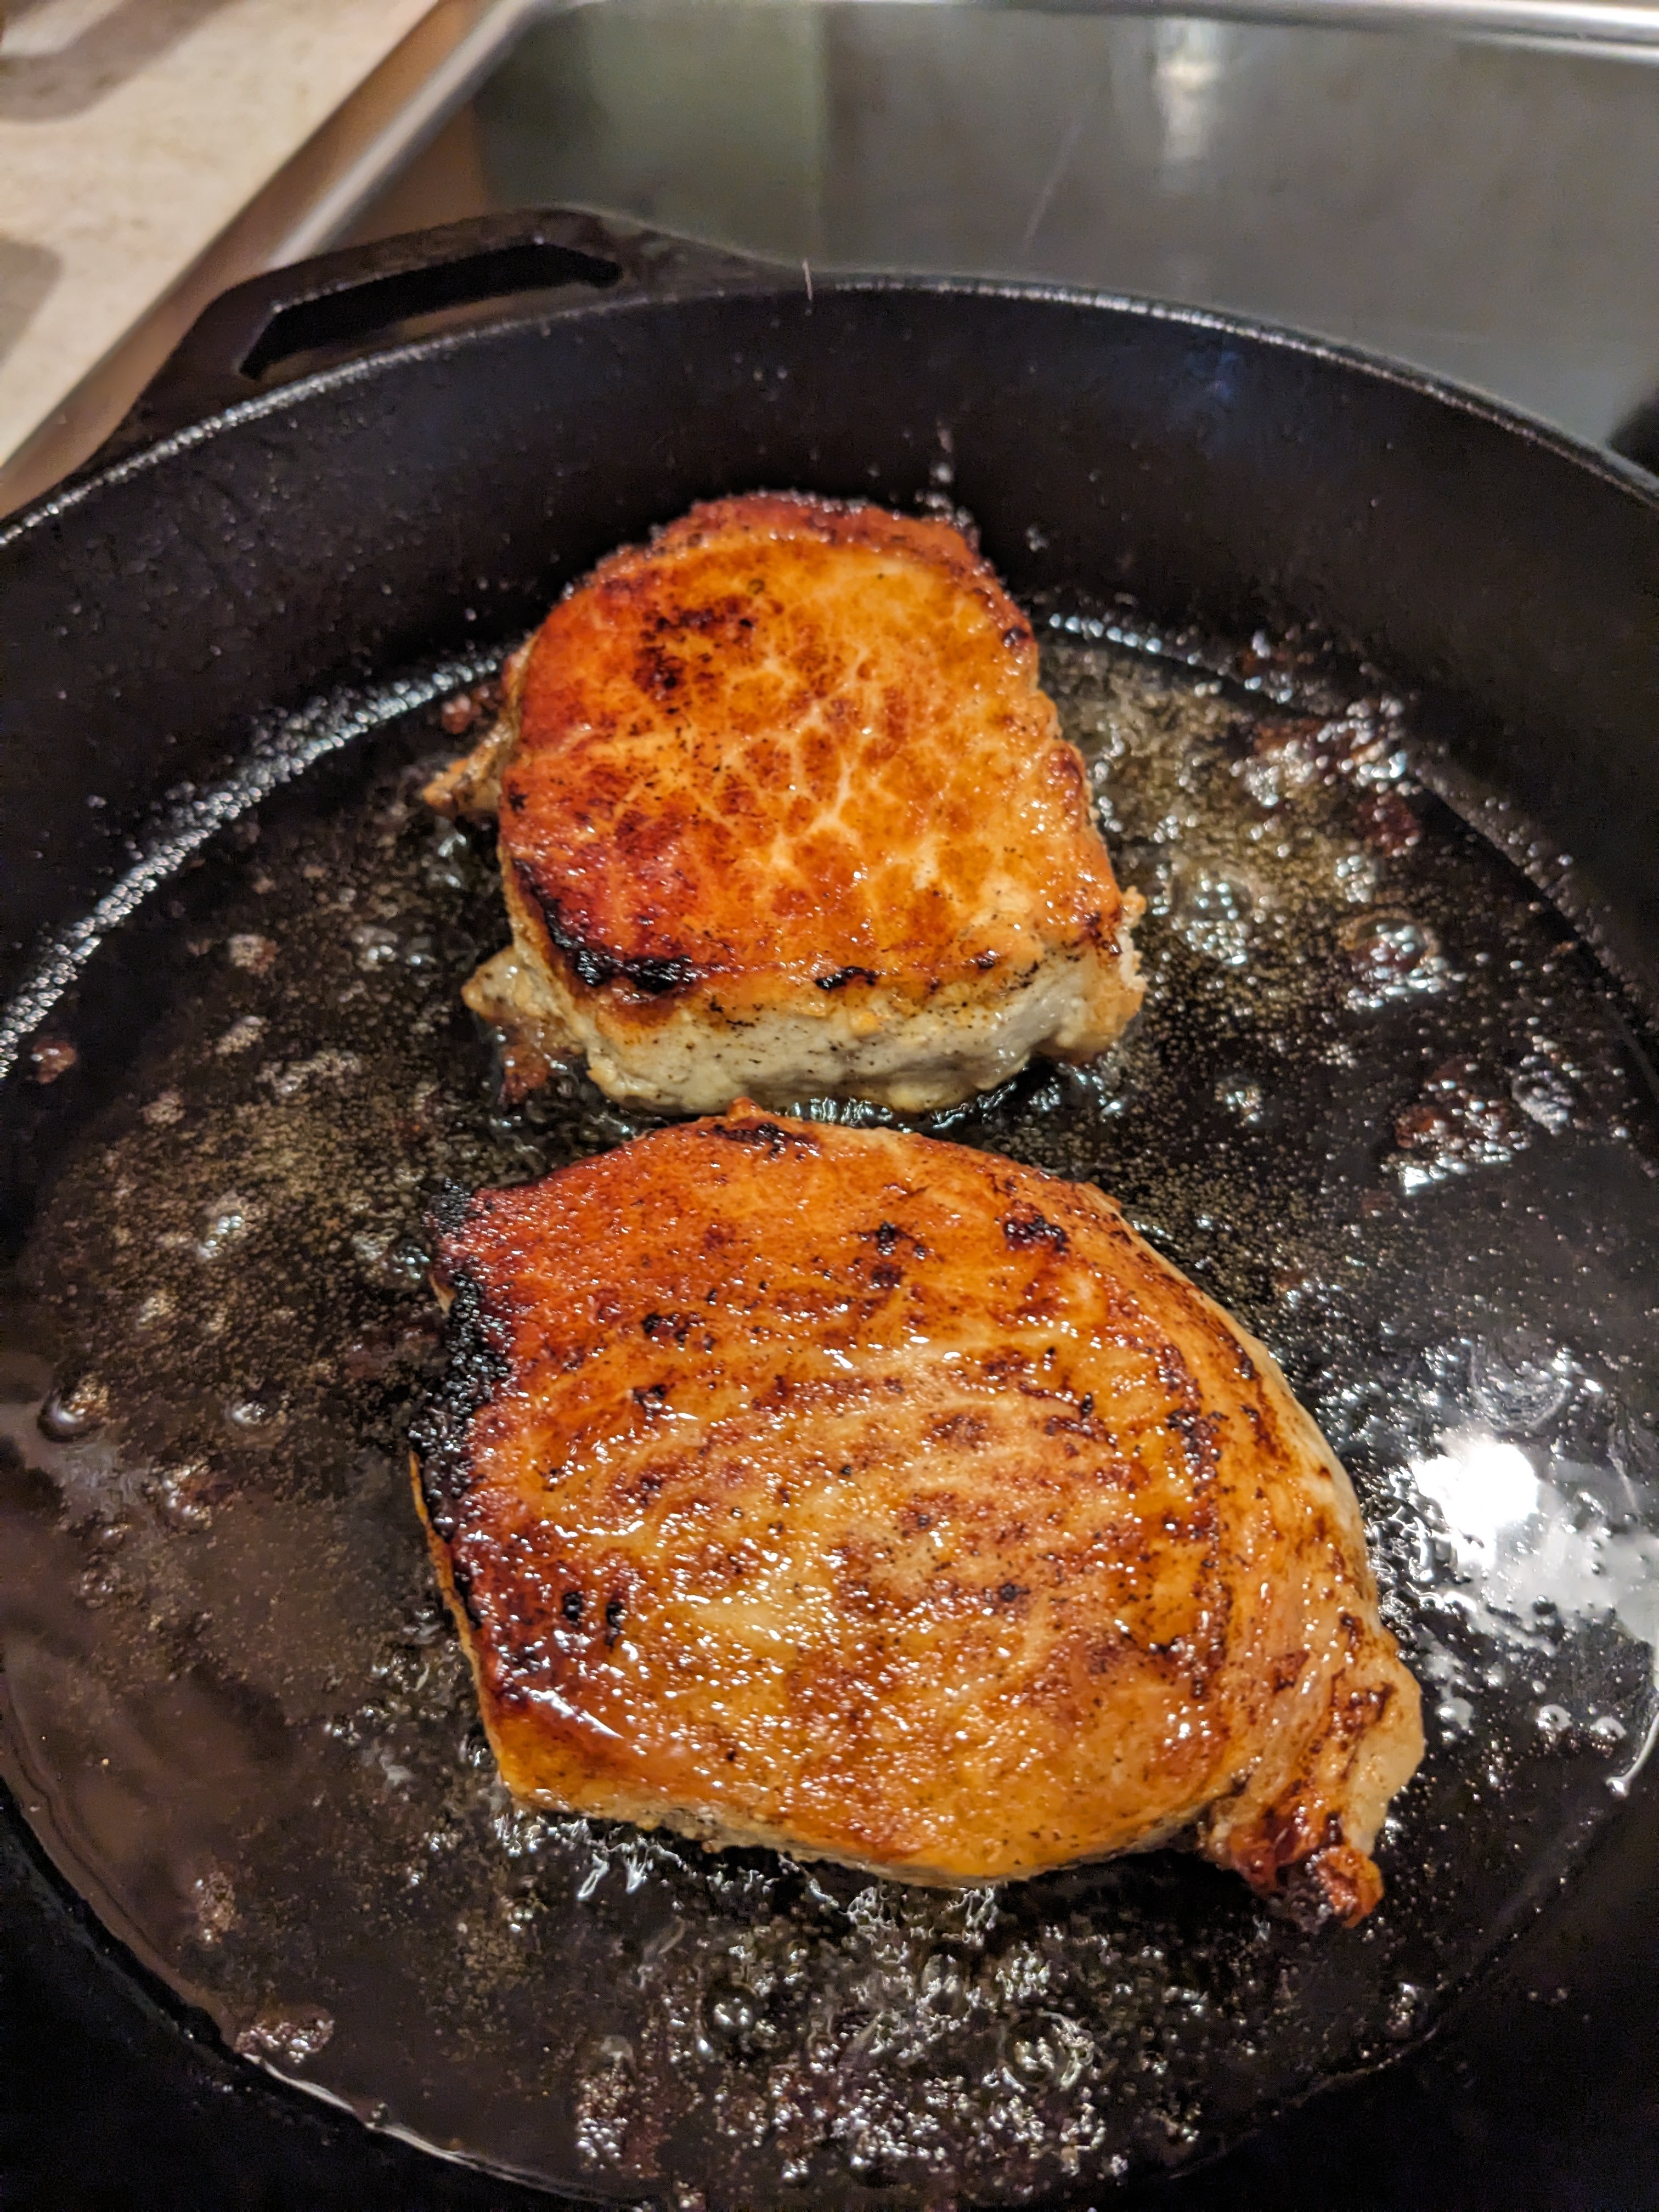
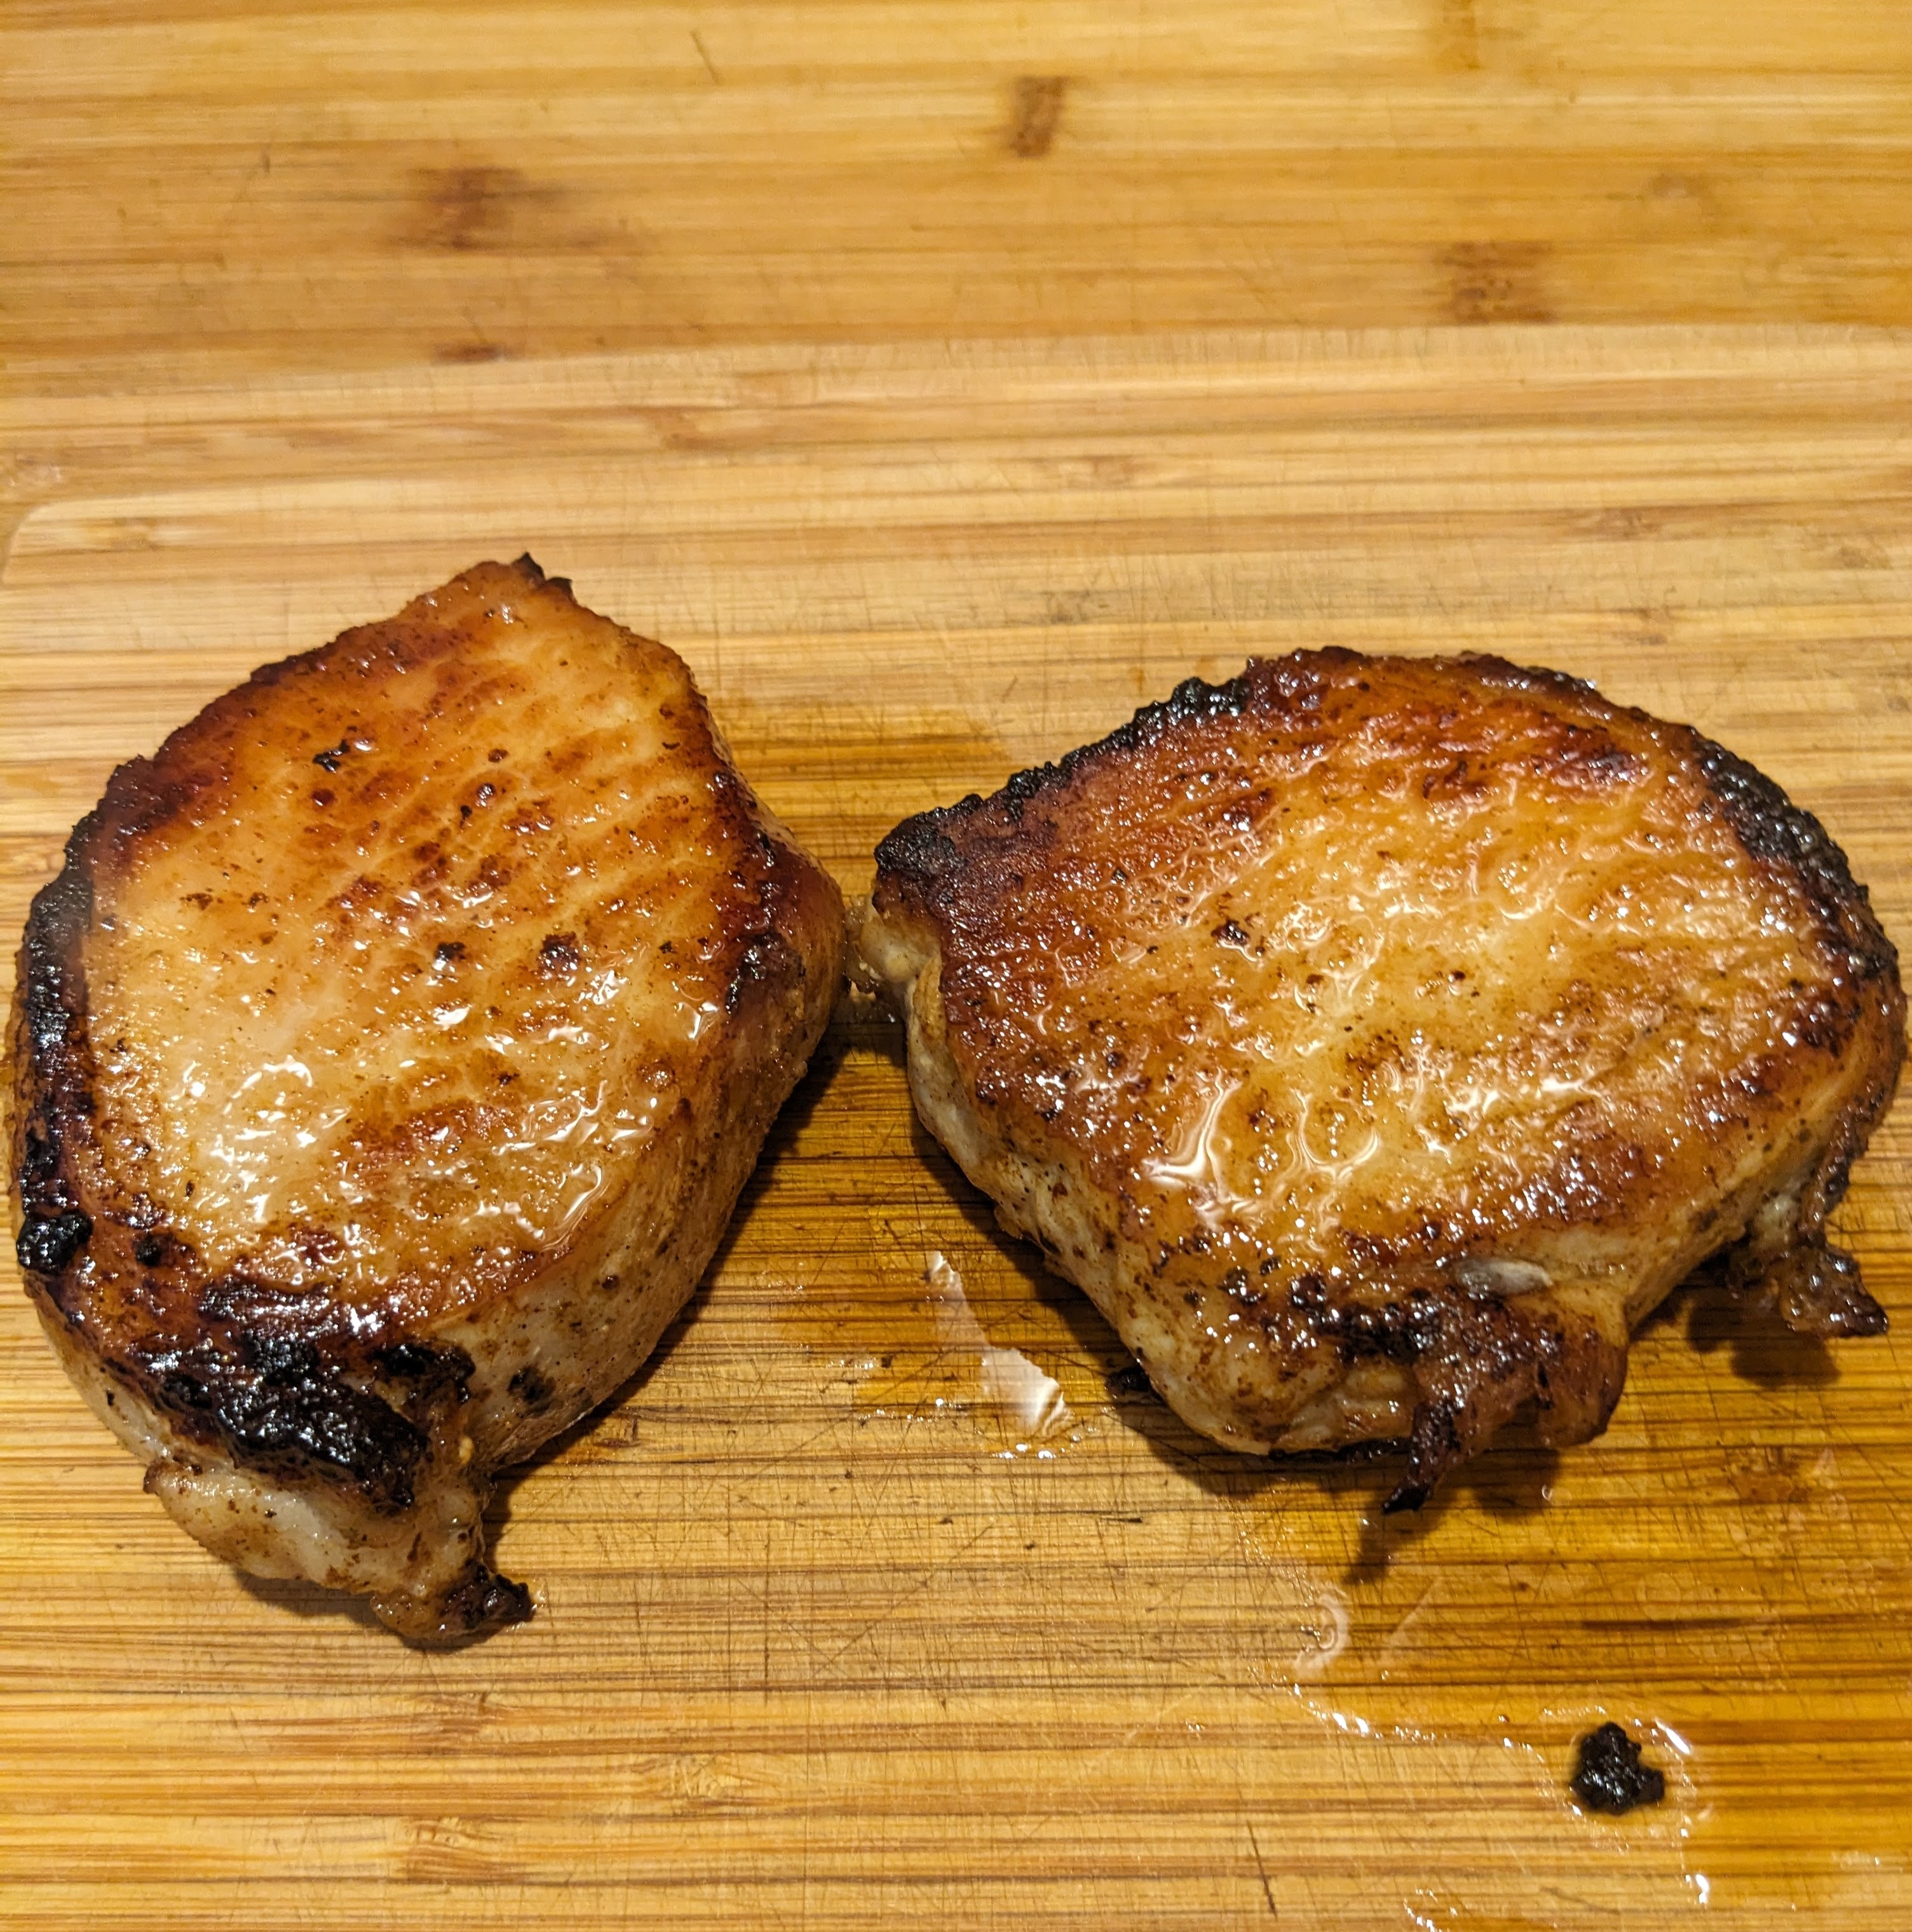
Heat oil in a large, oven-proof skillet over medium-high heat. Add chops and cook without turning until they begin to brown, 3 to 4 minutes. Turn and cook until beginning to brown on the other sides, about 2 minutes. Continue cooking, turning every 2 minutes, until both sides are golden brown, 5 to 7 more minutes.
Transfer the skillet to the preheated oven and roast, turning chops every 2 minutes, for 14 minutes.
Remove skillet from the oven and drain fat. Place on the stovetop over medium heat. Add butter, reserved 2 garlic cloves, and remaining sprig of thyme; cook until butter is foamy, 3 to 5 minutes. Tip the skillet slightly and use a large spoon to baste the chops until butter is brown and smells nutty, 2 to 3 minutes.
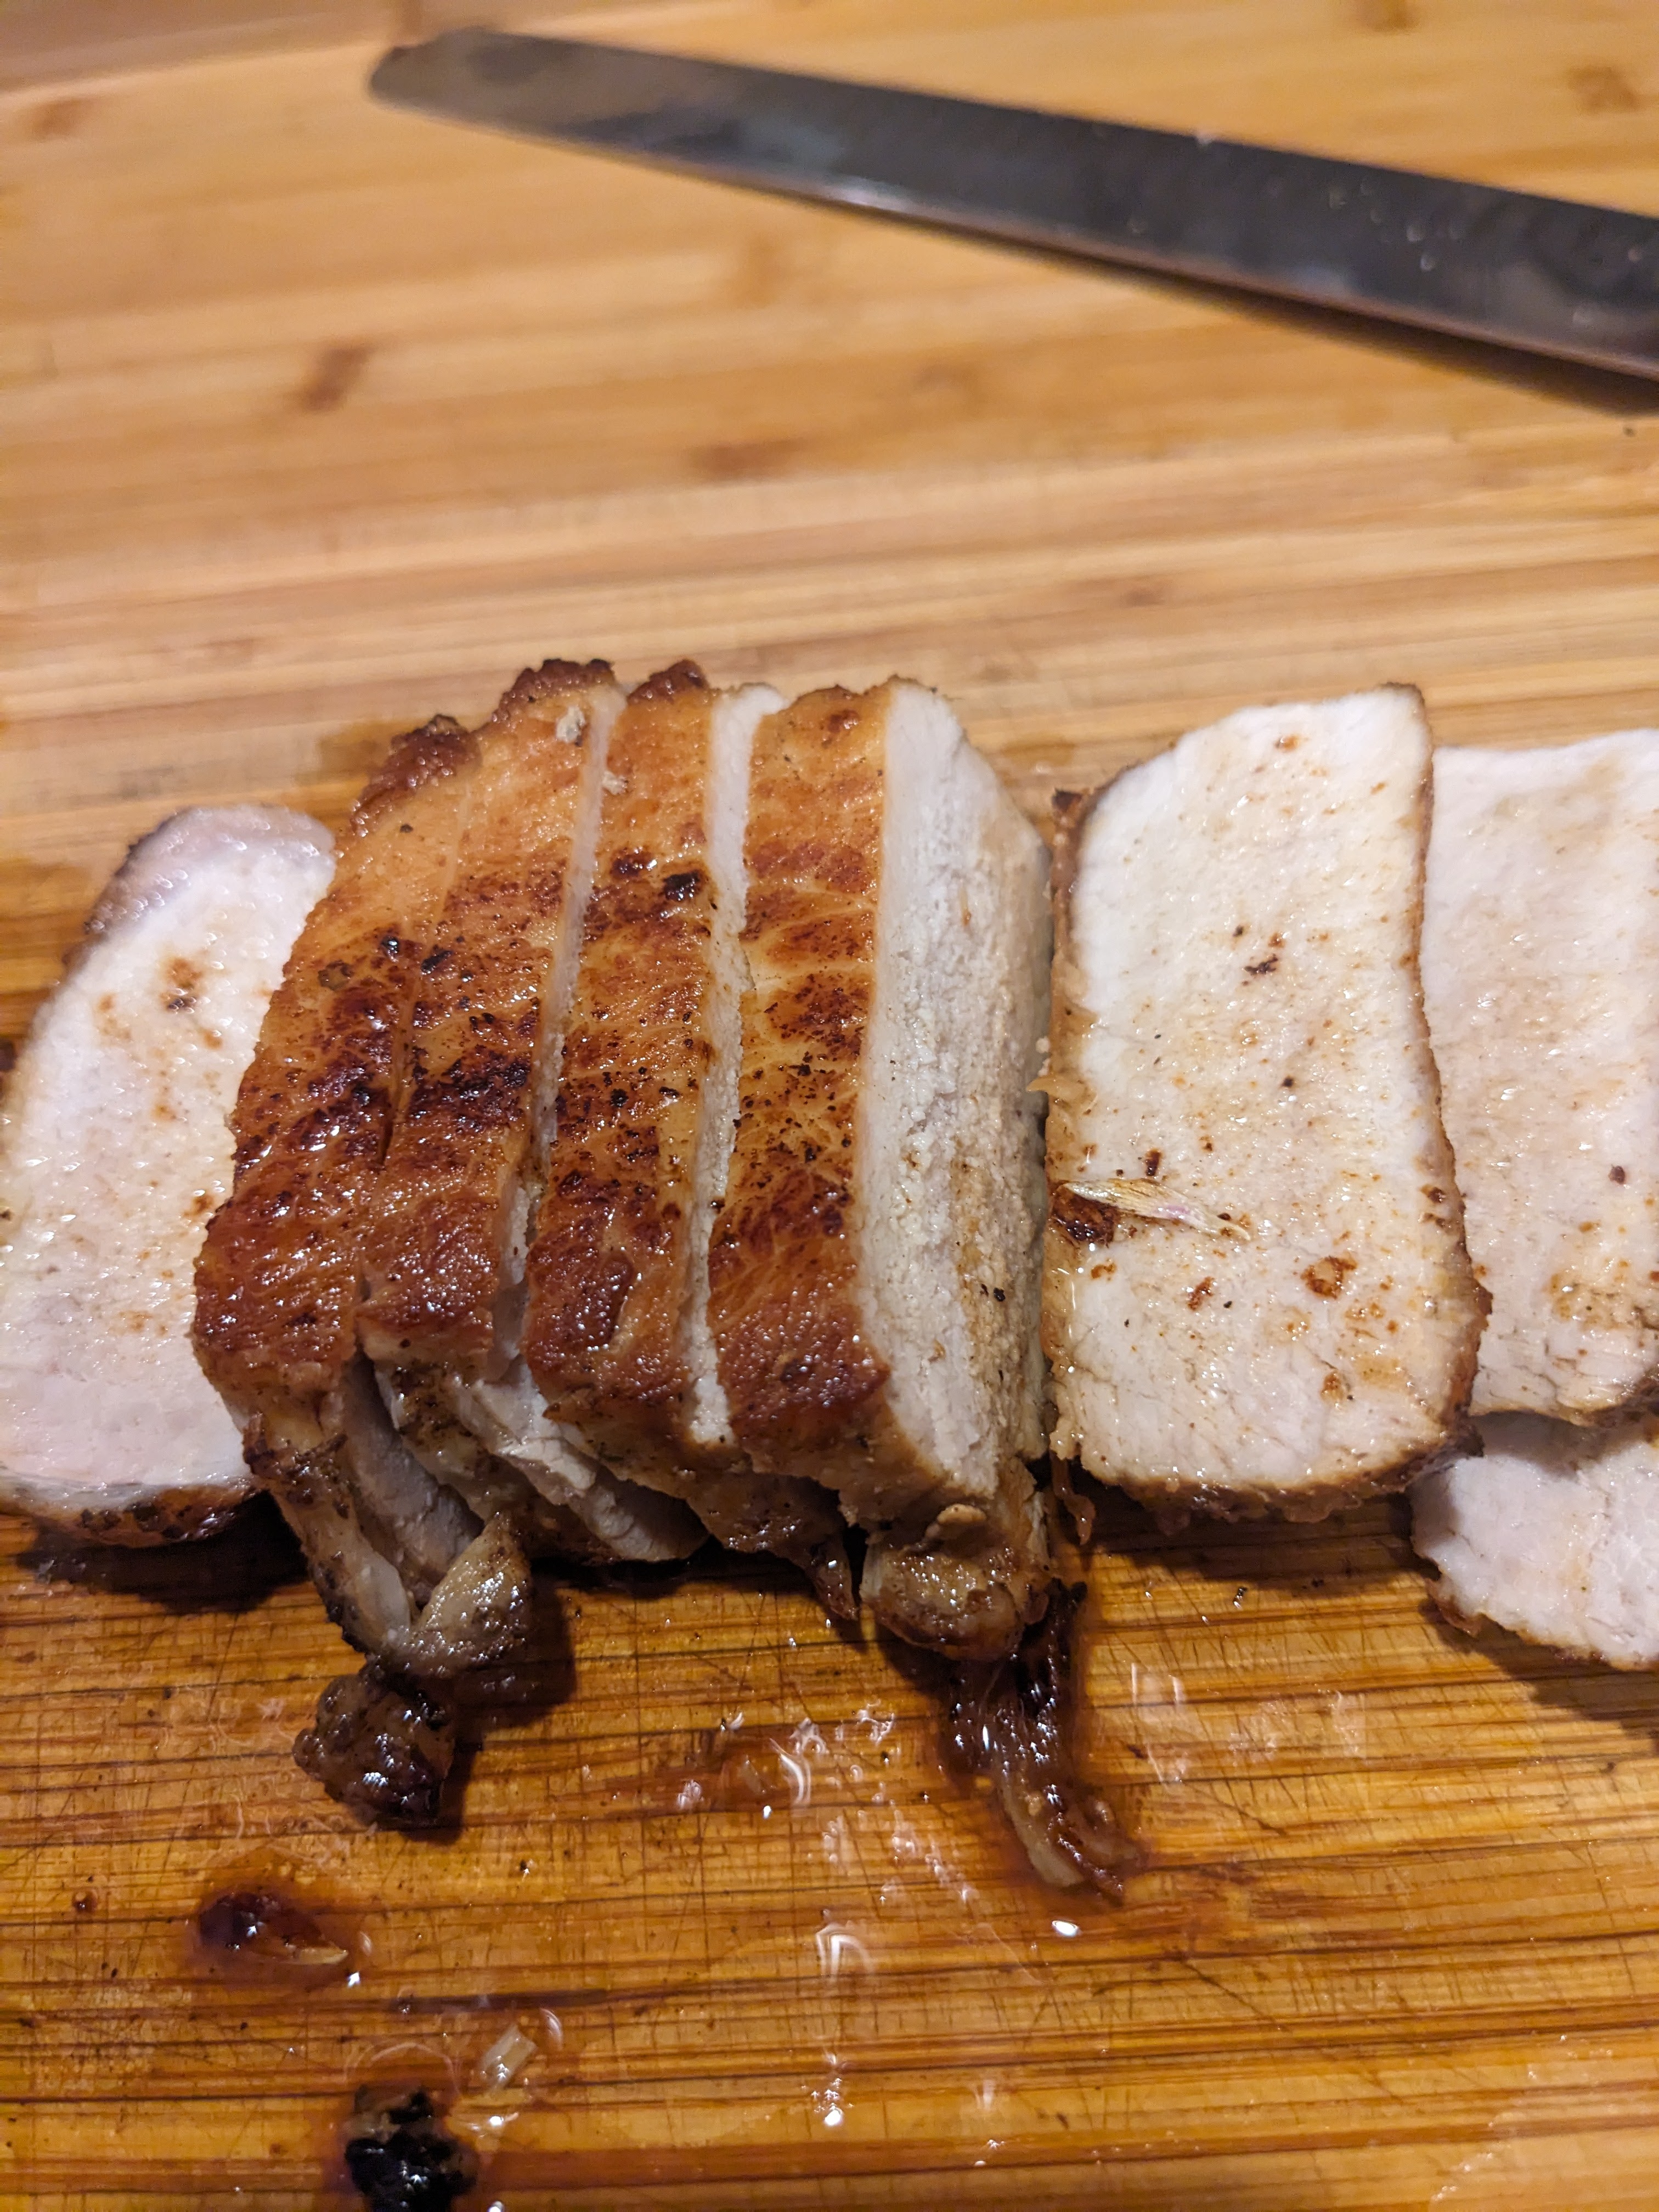
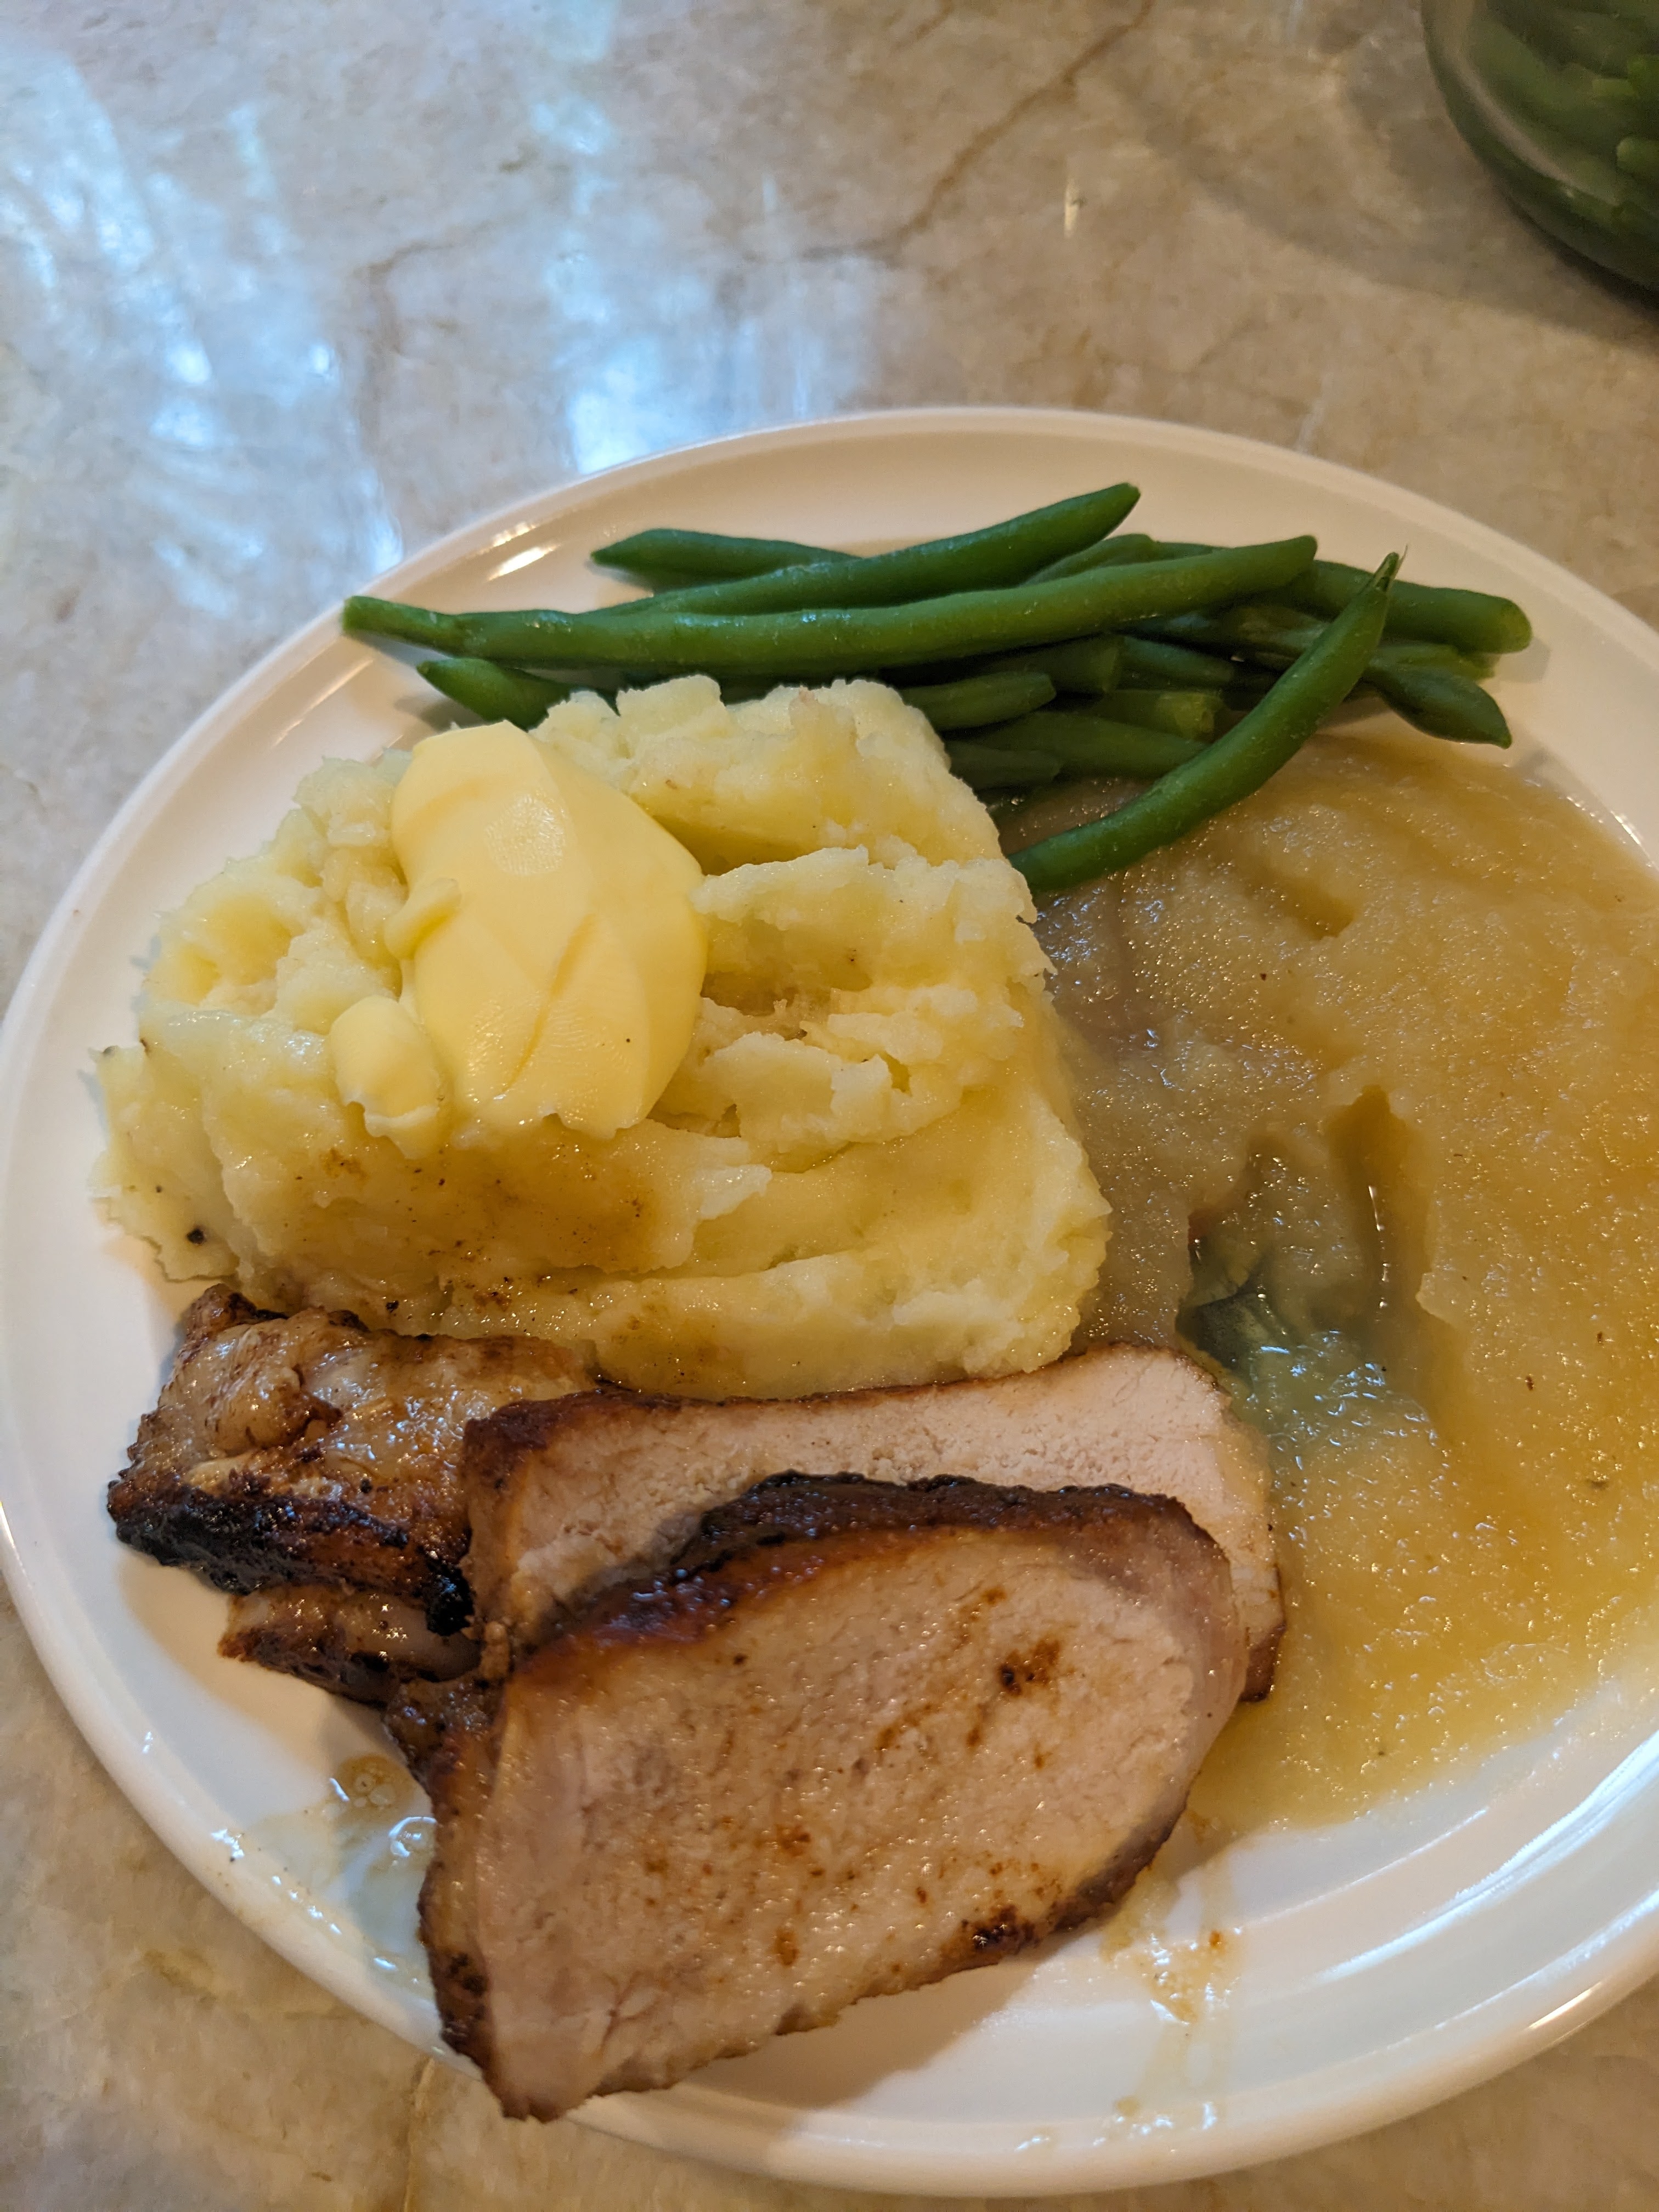
Transfer chops to the prepared rack and let rest, turning often to ensure juices are evenly distributed, about 15 minutes. Finish with a light sprinkle of sea salt.
Next time I’ll try crunching the juniper berries bringing out more of the flavor.
Juicy honey garlic pork chops with caramelized edges ready and on your table in less than 15 minutes! smothered in the best 4-ingredient sauce!
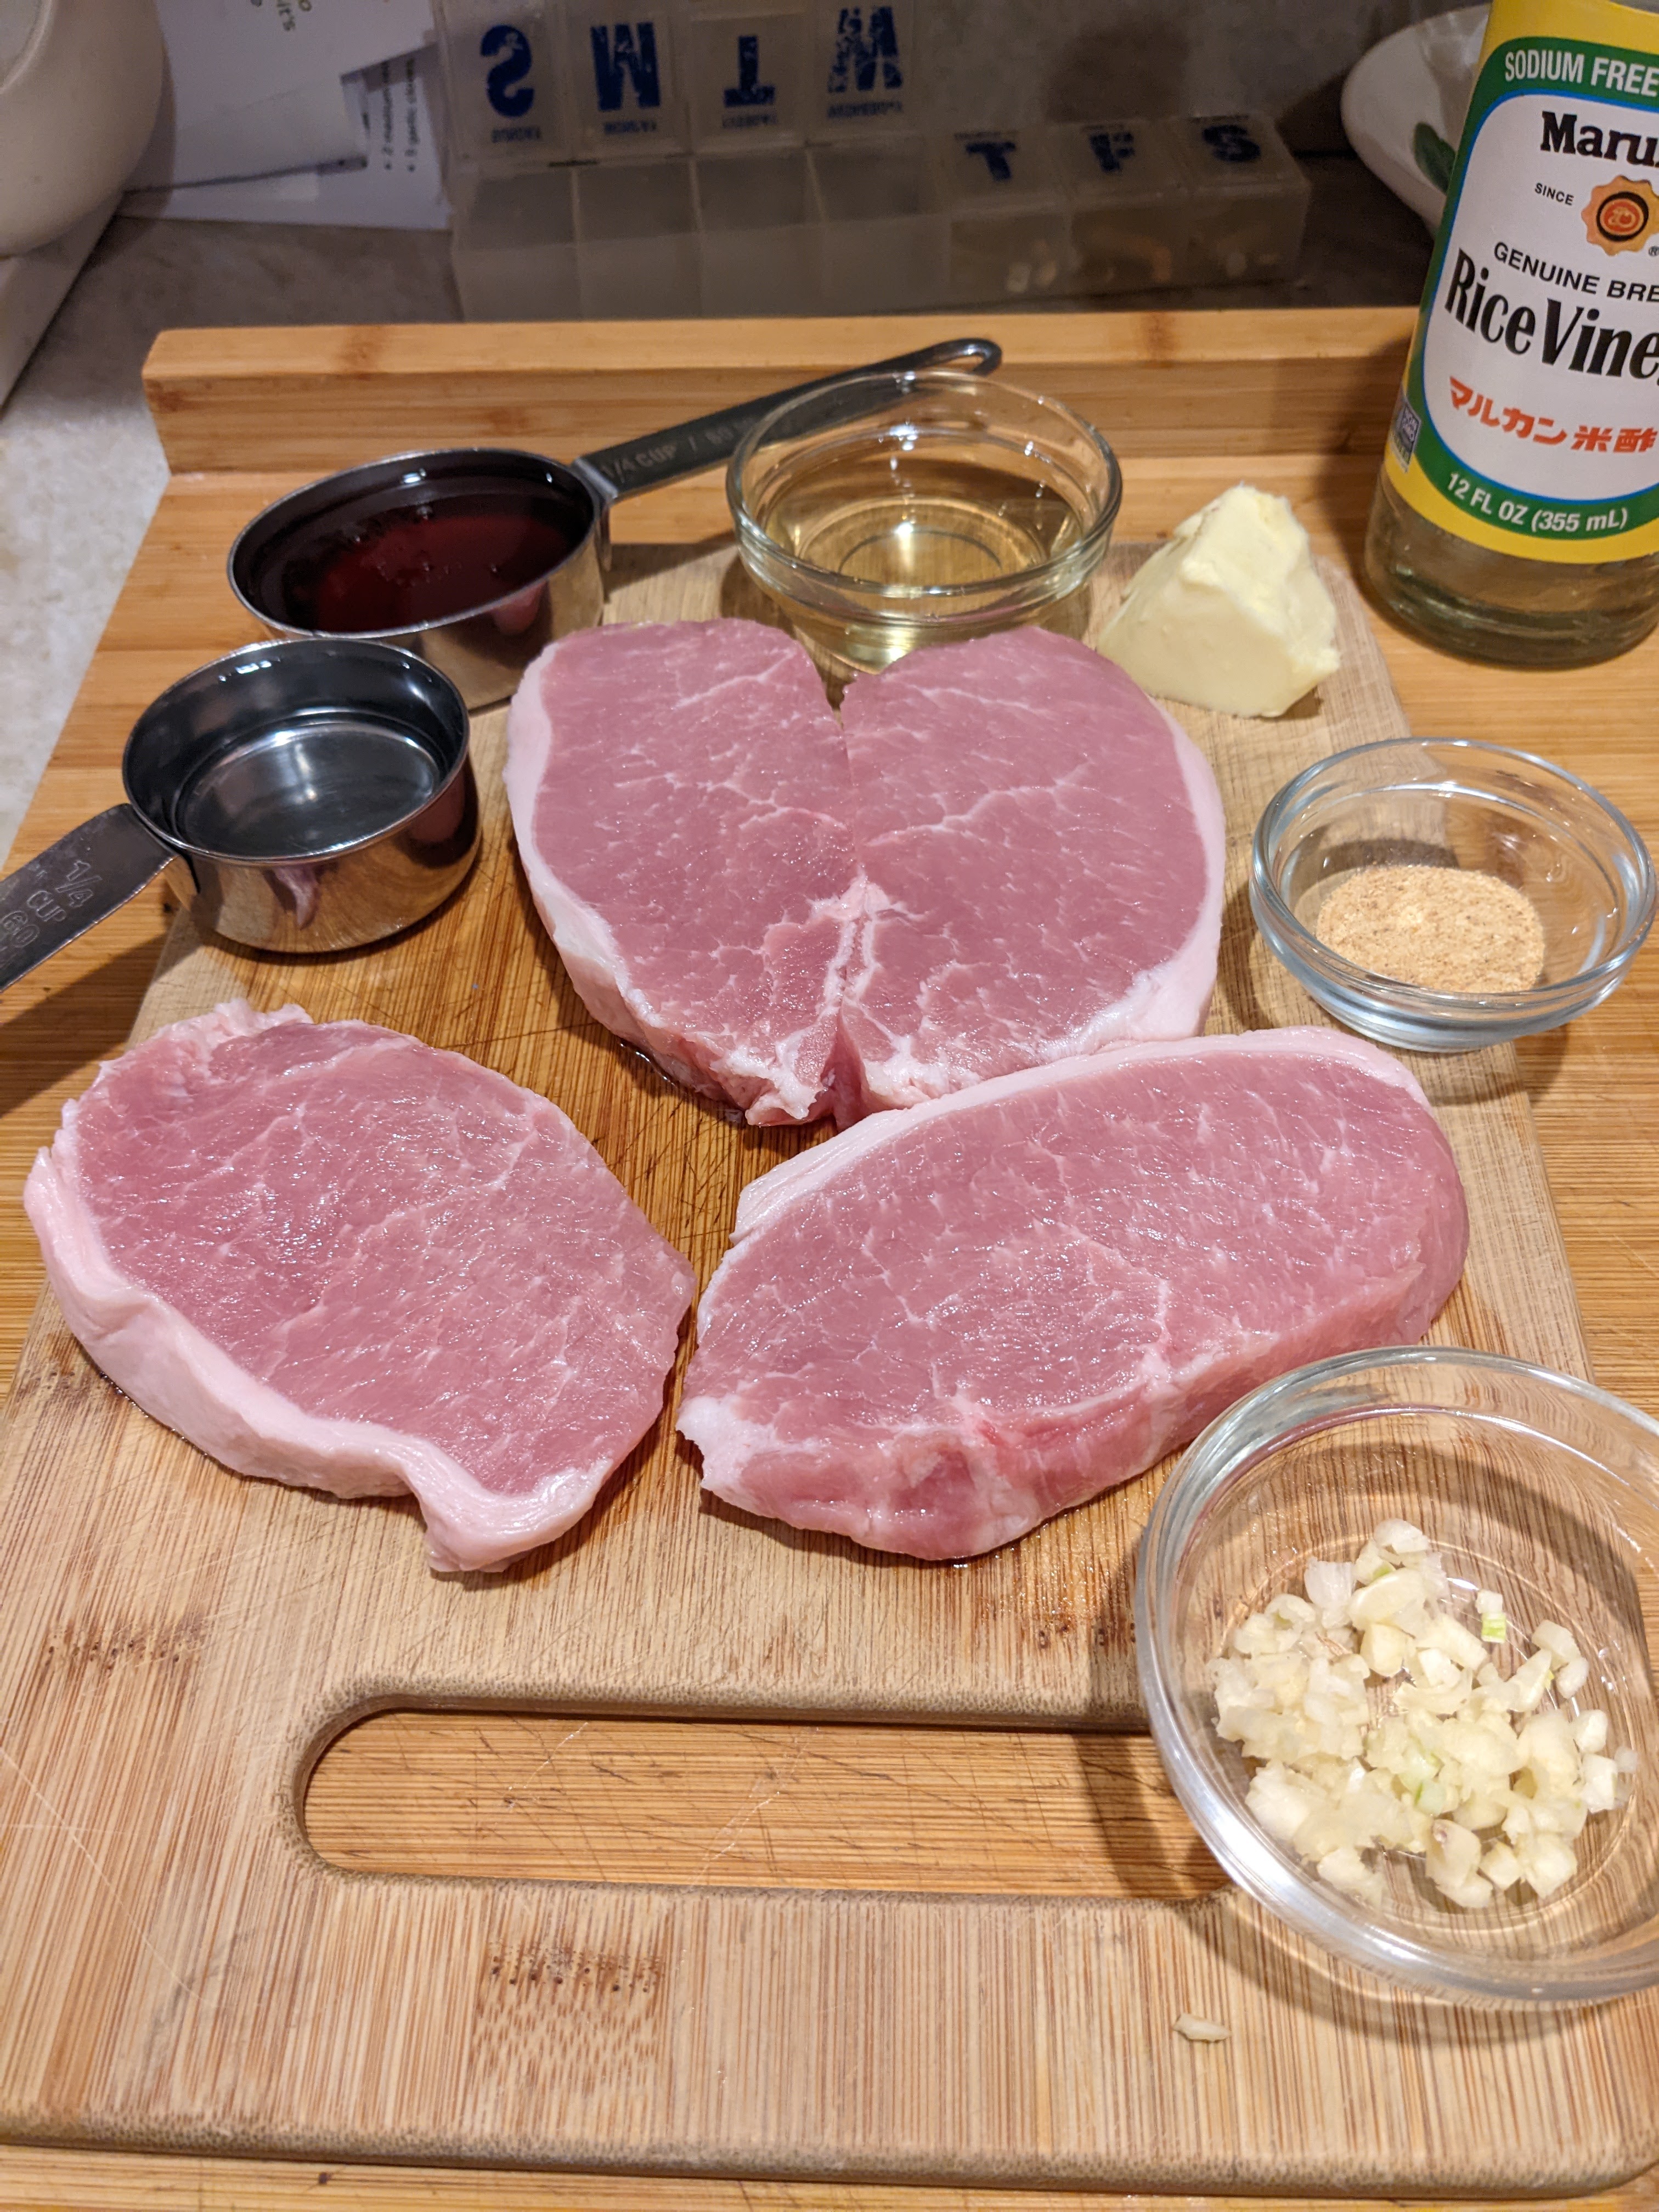
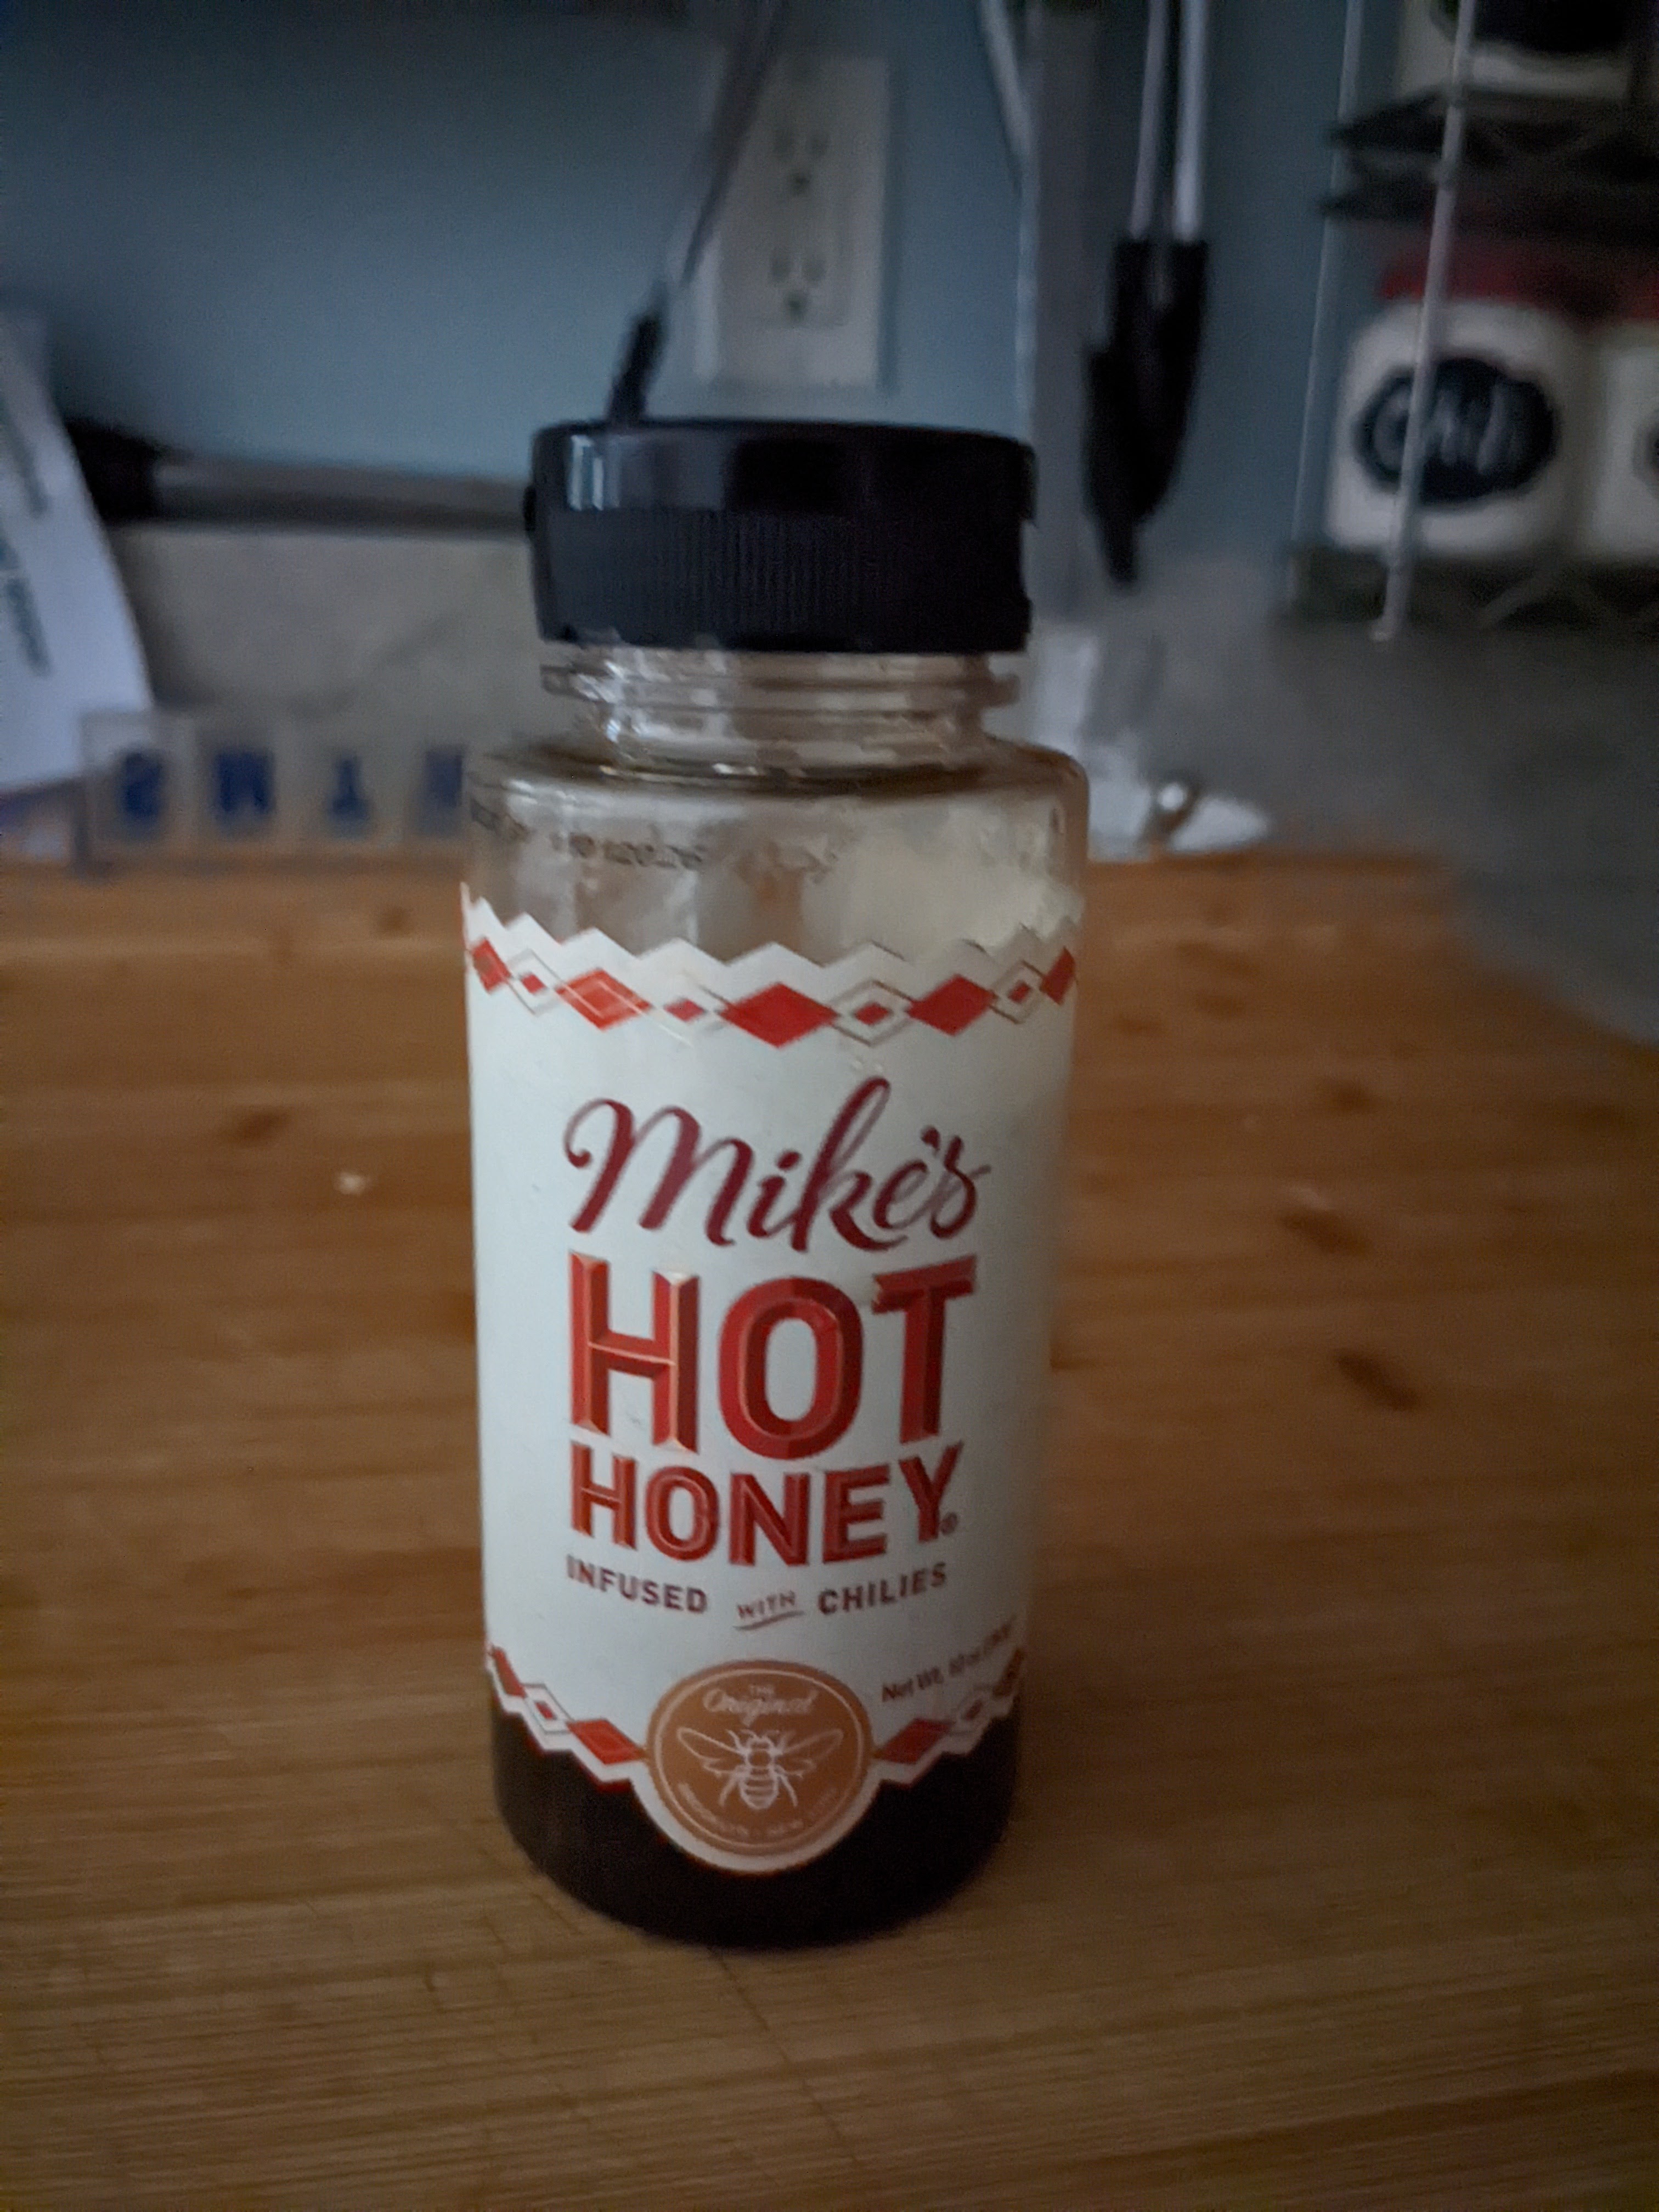
I had some center cut pork chops from ButcherBox and I was wondering what to do with it. Maria had given us some Mike Hot Honey so I though honey mustard but after checking out a few recipes on line I decide to modify this one from Café Delites. I only had two chops so I split them in half. I think next time I won’t cut in half. Anyway this was pretty darn good.
This Honey Garlic Pork Chops Recipe is so easy you won’t believe it when it’s done! No marinating needed, this recipe is an incredibly quick and delicious way to serve bone in or boneless pork chops — seared until golden then simmered and broiled (or grilled) in the most amazing honey garlic sauce!
INGREDIENTS
4 pork chops bone in or out
Salt and pepper, to season
1 teaspoon garlic powder
2 tablespoons olive oil
1 tablespoon unsalted butter
6 cloves garlic, minced
1/4 cup honey Steve Note: I used Mike’s Hot Honey
1/4 cup water (or chicken broth)
2 tablespoons rice wine vinegar (or apple cider vinegar, or any white vinegar)
How
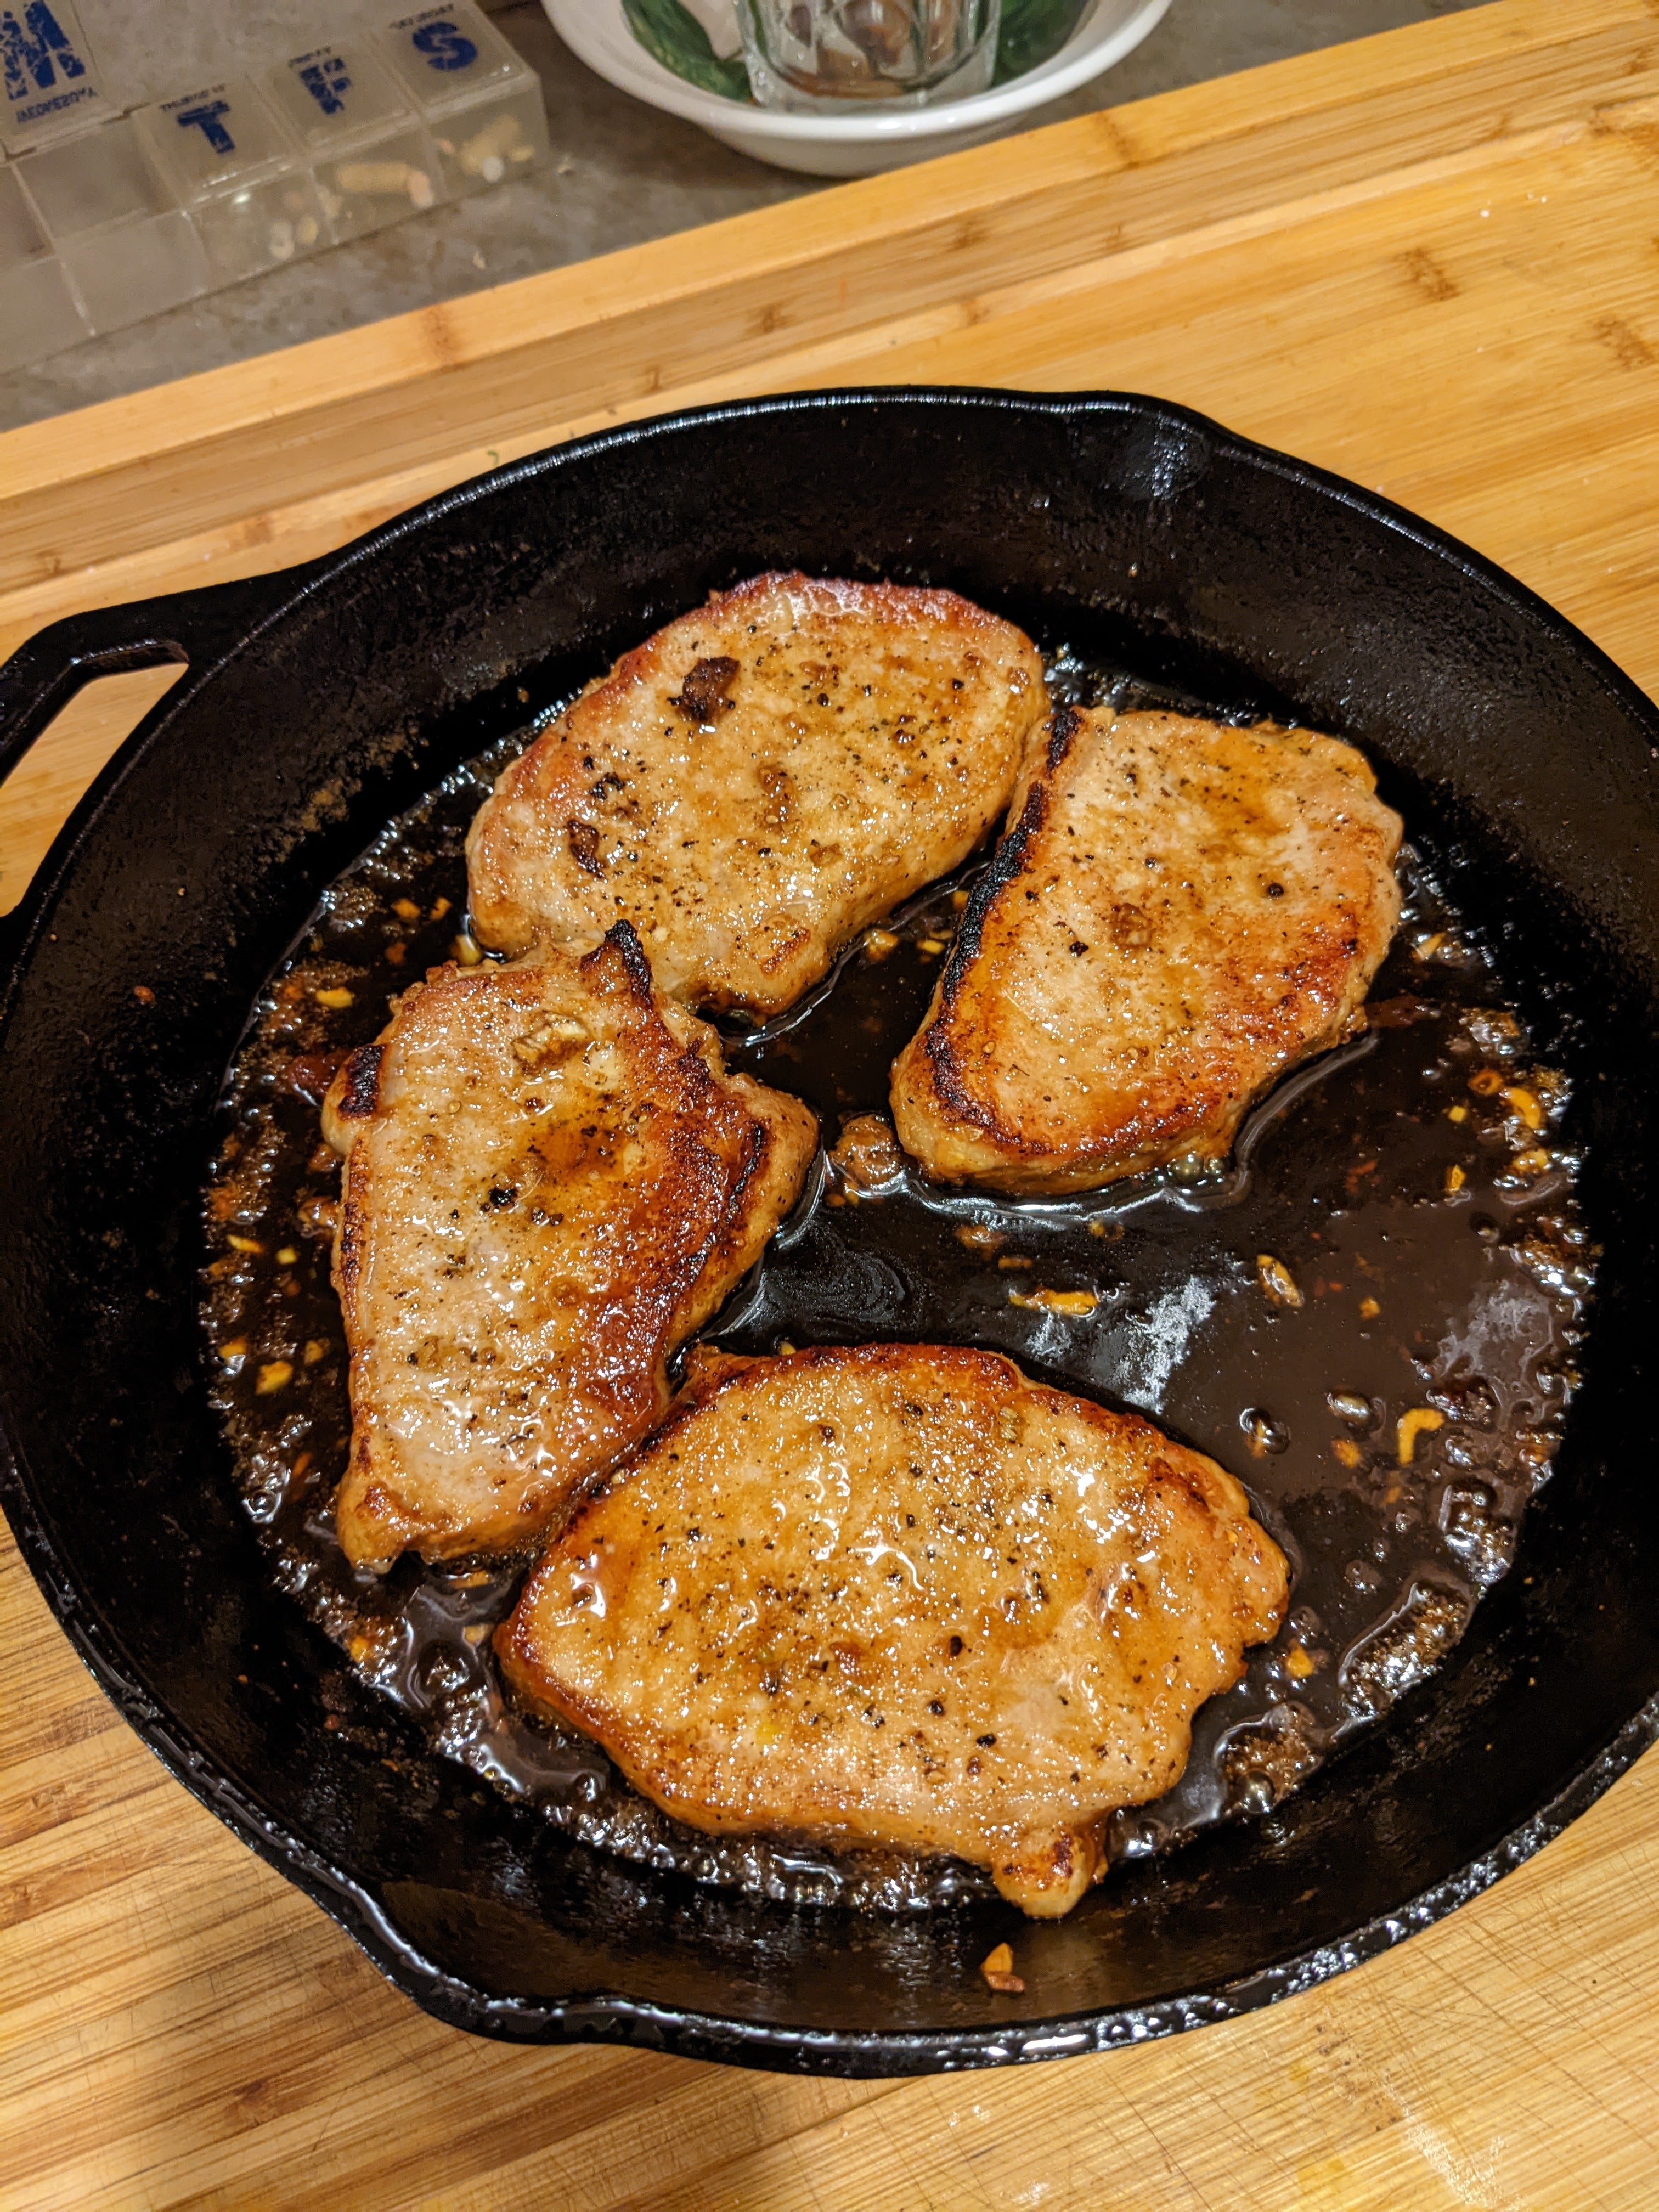
Preheat oven broiler (or grill) on medium-high heat. Season chops with salt, pepper and garlic powder just before cooking.
Heat oil in a pan or skillet over medium high heat until hot. Sear chops on both sides until golden and cooked through (about 4-5 minutes each side). Transfer to a plate; set aside.
Reduce heat to medium. Melt butter in the same pan, scraping up any browned bits from the bottom of the pan. Sauté garlic until fragrant (about 30 seconds). Add the honey, water and vinegar. Increase heat to medium-high and continue to cook until the sauce reduces down and thickens slightly (about 3-4 minutes), while stirring occasionally.
Add pork back into the pan, baste generously with the sauce and broil/grill for 1-2 minutes, or until edges are slightly charred.
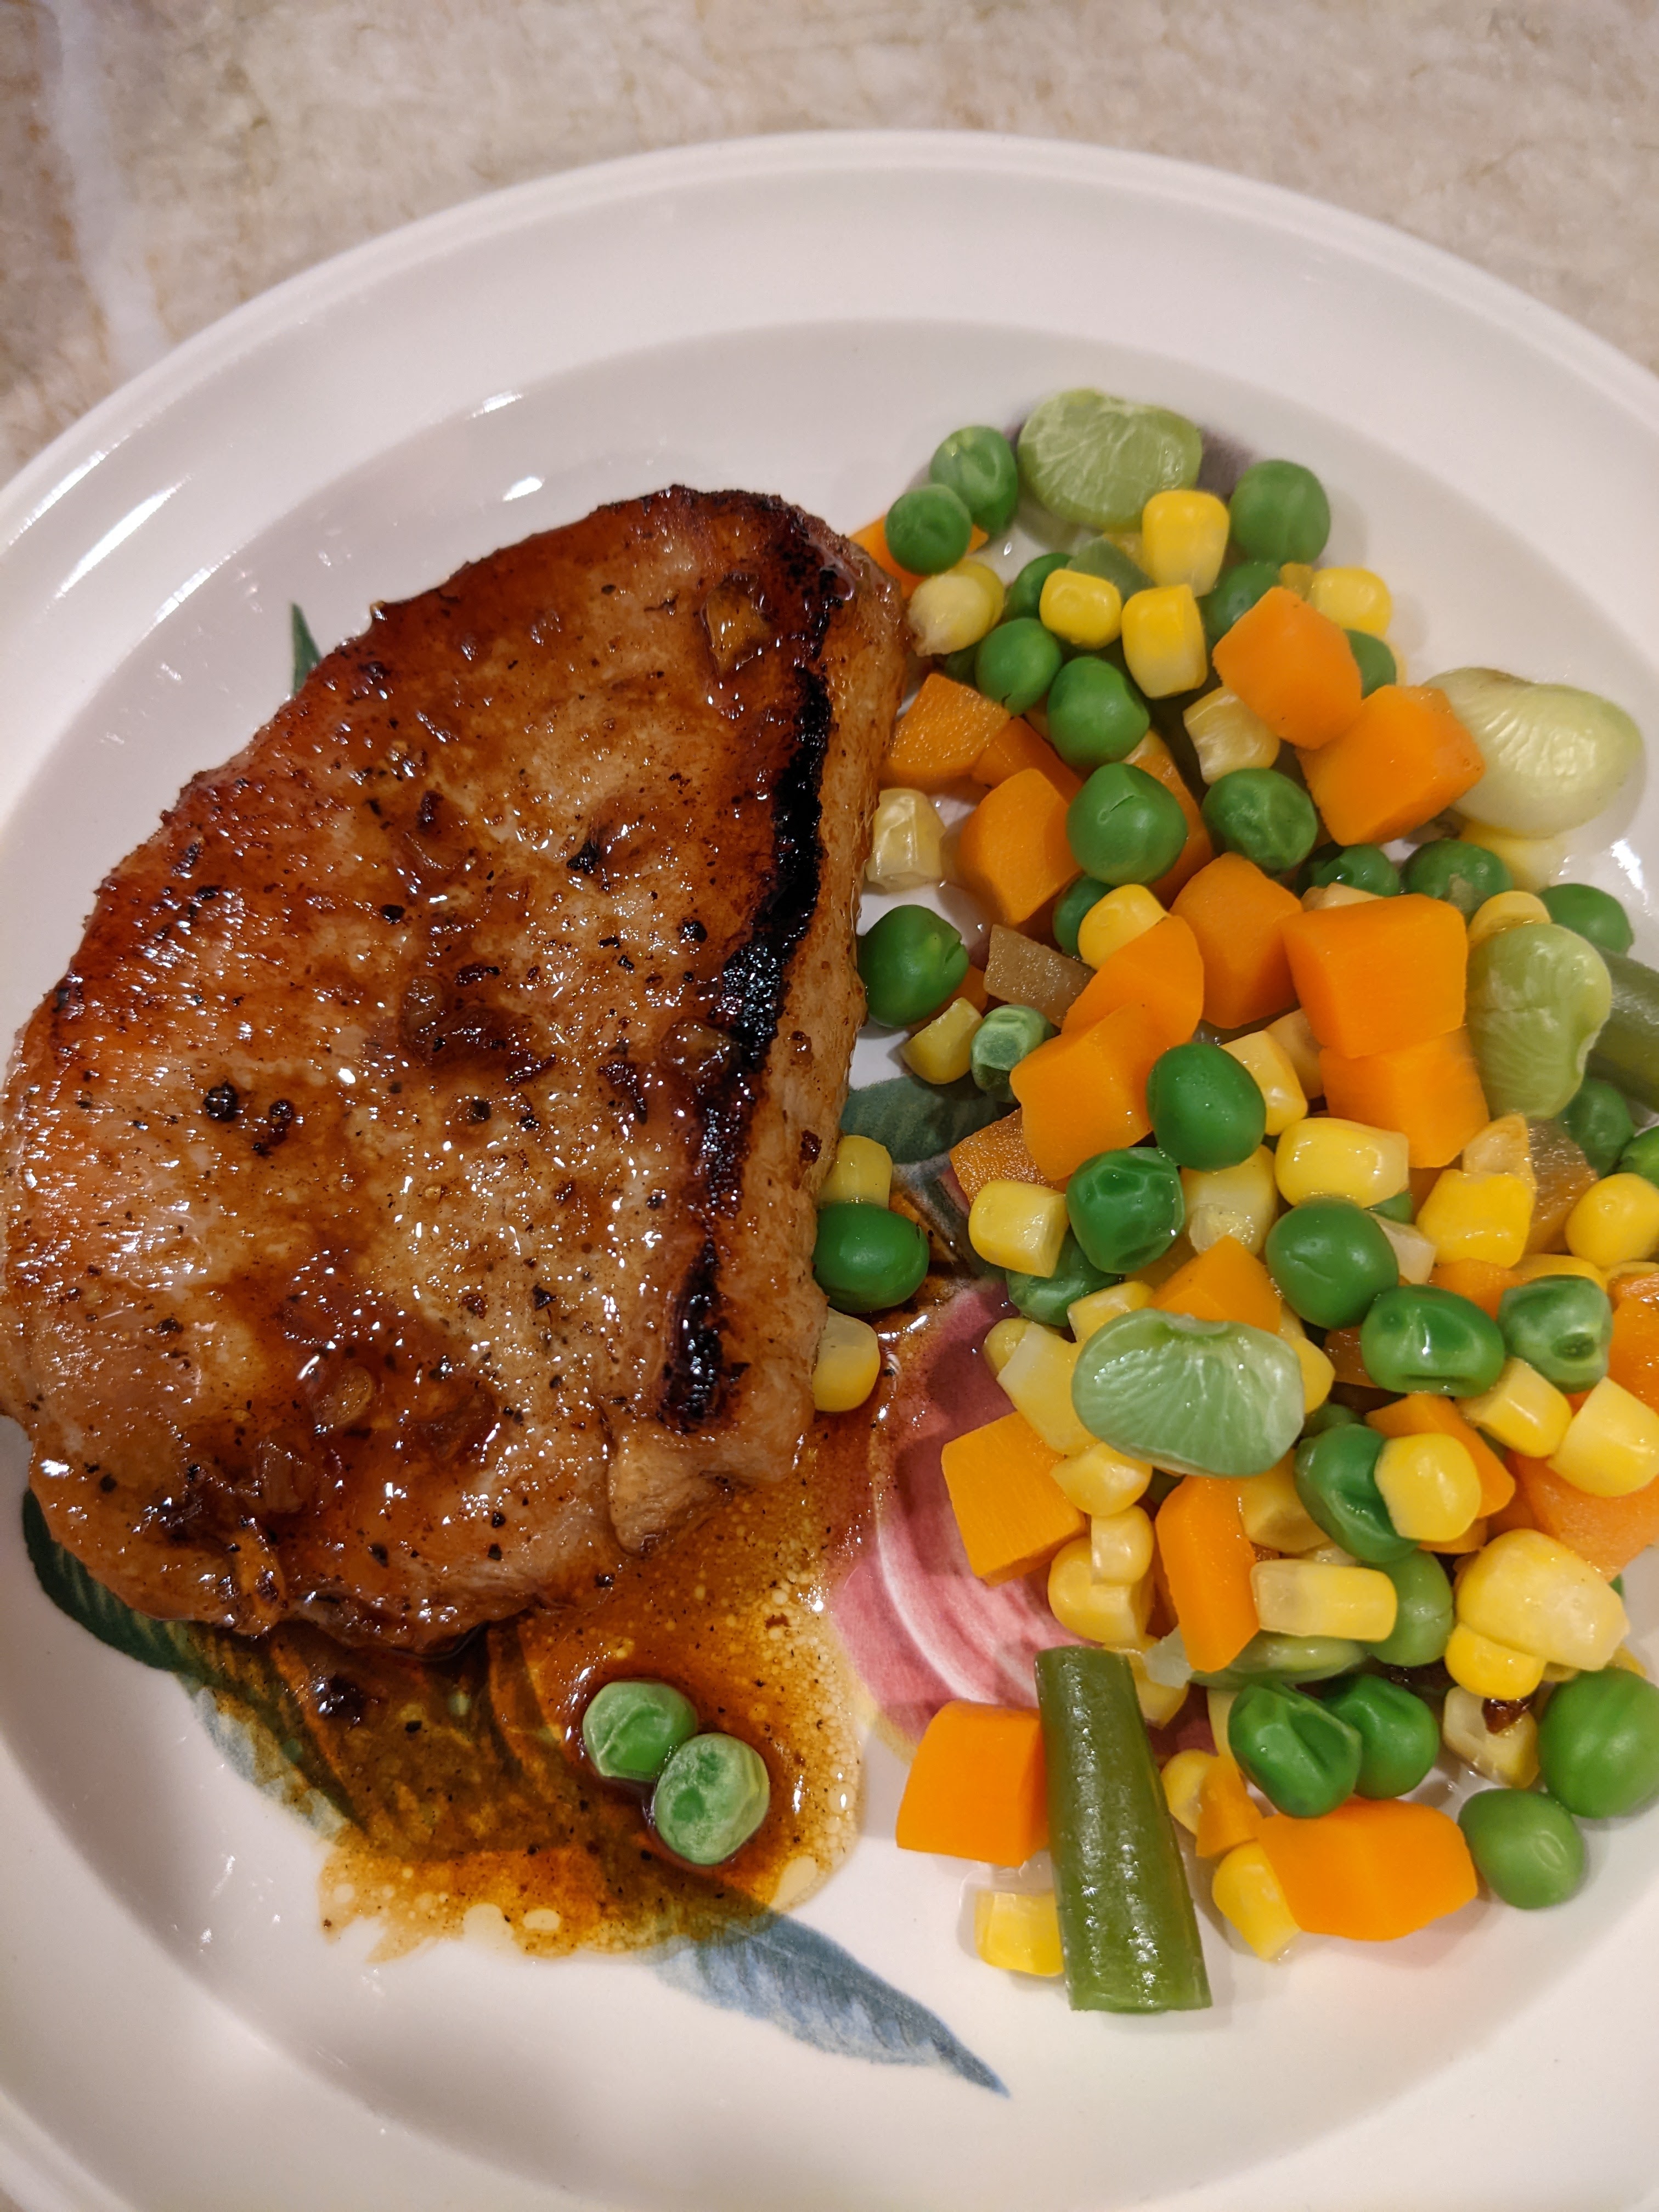
Garnish with parsley and serve over vegetables, rice, pasta or with a salad.
Optional
Baked Pork Chops:
Preheat oven to 390°F | 200°C.
Sear seasoned chops in a hot oven-proof pan or skillet over medium-high for 2 minutes per side — get them crisp.
Remove chops and make your sauce following the recipe above (Step 3).
Baste with sauce and bake in the oven for about 10-15 minutes, or until reaching your desired doneness.
Broil/grill for 2 minutes to get those caramelized edges!
Butcher Box
If your interested in great grass fed beef plus chicken, pork seafood and more check it out.